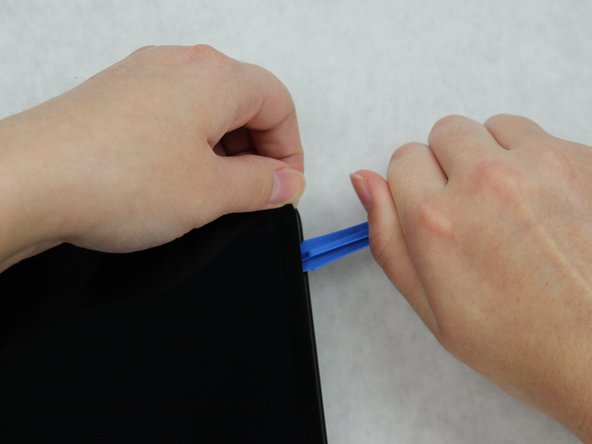
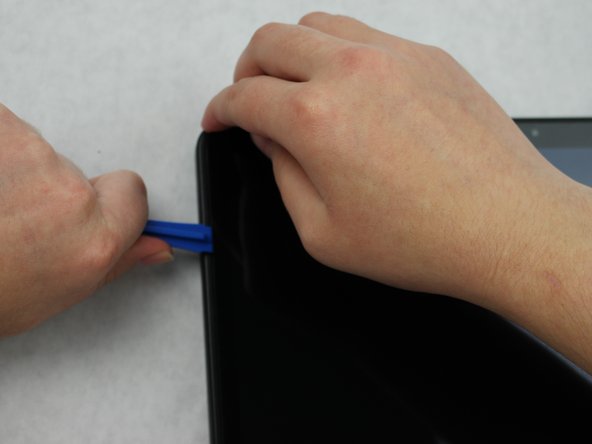
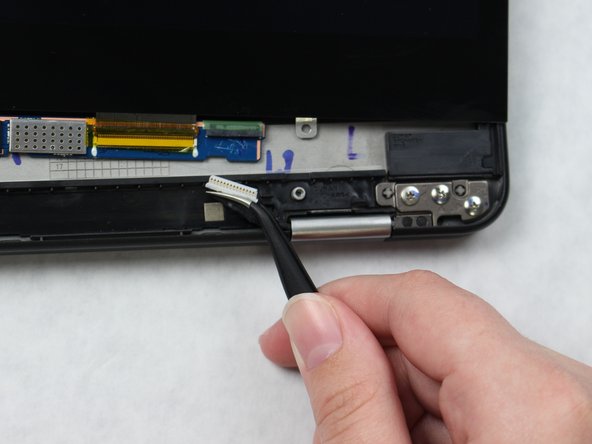
Ana içeriğe geç

Samsung Chromebook Pro Screen Replacement

Neye ihtiyacın var

  1. Samsung Chromebook Pro Screen Replacement, Screen: adım 1, 1 resimden 1.
    • Lay the Samsung Chromebook Pro flat on your work surface.

  2. Samsung Chromebook Pro Screen Replacement: adım 2, 3 resimden 1. Samsung Chromebook Pro Screen Replacement: adım 2, 3 resimden 2. Samsung Chromebook Pro Screen Replacement: adım 2, 3 resimden 3.
    • Insert the plastic opening tool between the hinge and plastic lining and pry upwards.

    • Continue to use the plastic opening tool along to the plastic lining to completely remove.

  3. Samsung Chromebook Pro Screen Replacement: adım 3, 1 resimden 1.
    • Remove the three silver 30 mm screws connected to the screen by using the JIS J000 screw bit.

  4. Samsung Chromebook Pro Screen Replacement: adım 4, 3 resimden 1. Samsung Chromebook Pro Screen Replacement: adım 4, 3 resimden 2. Samsung Chromebook Pro Screen Replacement: adım 4, 3 resimden 3.
    • Begin lifting the screen by prying upward using the plastic opening tool.

    • Work around the screen by lifting upward with the plastic opening tool until the screen is completely off.

  5. Samsung Chromebook Pro Screen Replacement: adım 5, 2 resimden 1. Samsung Chromebook Pro Screen Replacement: adım 5, 2 resimden 2.
    Bu adımda kullanılan alet:
    Tweezers
    $4.99
    Satın Al
    • Locate the black and gold wire on the left side of the screen, and pry the bar upward using the precision tweezers.

    • Disconnect the wire using the precision tweezers.

  6. Samsung Chromebook Pro Screen Replacement: adım 6, 3 resimden 1. Samsung Chromebook Pro Screen Replacement: adım 6, 3 resimden 2. Samsung Chromebook Pro Screen Replacement: adım 6, 3 resimden 3.
    • Disconnect the wire connected to the right side of the screen using the precision tweezers.

  7. Samsung Chromebook Pro Screen Replacement: adım 7, 1 resimden 1.
    • Gently lift to remove screen.

Sonuç

To reassemble your device, follow these instructions in reverse order.

Bir başkası bu kılavuzu tamamladı.

Amber Castro-Beltran

Üyelik tarihi: 10/09/18

918 İtibar

5 adet Kılavuz yazıldı

Ekip

5 Yorum

Is the screen glued down?

Daniel Roberts - Yanıt

Hmm, followed this in an effort to repair a broken hinge. Fortunately, the screen didn’t break when the hinge came through the front of the monitor. Less fortunately, the prying described in step 4 totally blacked out the lower right corner of my screen. Damaged area is about the size of my thumbnail. Touchscreen still works and the machine is still usable, but so much for knowing what time it is…

Ben Caldwell - Yanıt

Does anyone know if a XE510C24 screen can be used in a XE510C25?

The touchscreen in mine stopped working and all I can find online are XE510C24 screens.

Hoby Van Hoose - Yanıt

does it work? i have the same issue

Jaron Larson -

Hi, my screen works, stylus work but no touch, do you know what could be wrong? There are two cables on each side. Which one is responsible for touch? Maybe that's the problem?

mpenkie - Yanıt

Yorum Ekle

İstatistikleri Görüntüle:

Son 24 Saat: 3

Son 7 gün: 5

Son 30 gün: 27

Her zaman: 3,435