Giriş
Use this guide to replace the display in your Samsung Galaxy A5 (2017).
Opening the Samsung Galaxy A5 (2017) will damage the waterproof sealing on the device. If you do not replace the adhesive seals, your phone will function normally, but will loose its water-protection.
This guide instructs you to replace only the display while leaving the original frame, logic board, and battery in place. However, some replacement screens for this phone come pre-installed in a new frame (a.k.a. chassis), which requires a very different procedure—transplanting your phone's internals and installing a new battery. Make sure you have the correct part before starting this guide.
The process of separating the display from the frame usually destroys the display, so don't follow this guide unless you intend to replace the display.
You’ll need replacement adhesive to reattach a new display and the back cover when reassembling the device.
Neye ihtiyacın var
-
-
Power off your phone before beginning disassembly.
-
Use an iOpener to loosen the adhesive beneath the back cover. Apply the iOpener for at least two minutes. You might want to repeat this step several times during the back cover removal.
-
-
-
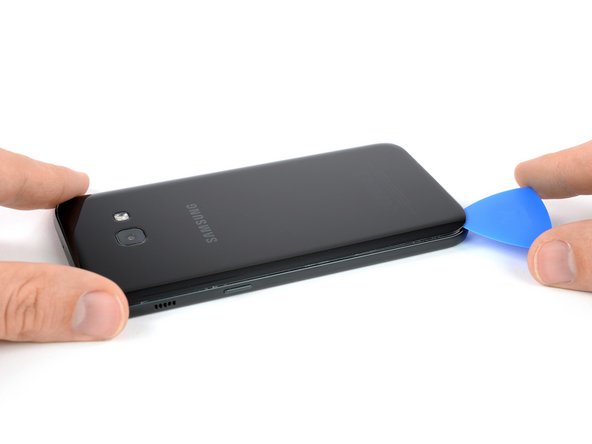
Insert an opening pick at the bottom end of your phone.
-
Start to slide the tip of the opening pick to the bottom left corner and cut the adhesive with it.
-
Leave the opening pick in the bottom left corner to prevent the adhesive from resealing. Insert a new opening pick and start to cut the adhesive on the left side of the phone.
-
-
-
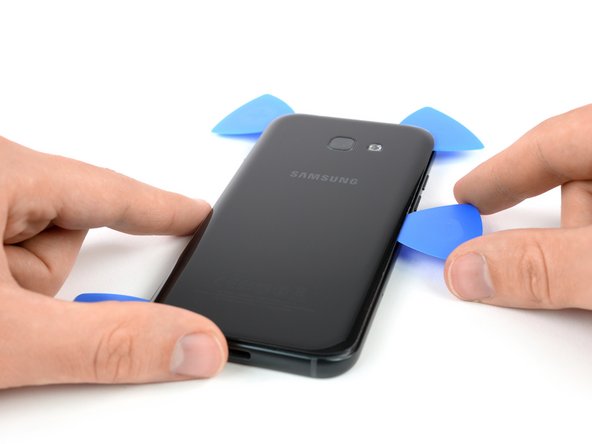
Use an opening pick to cut the adhesive on all sides of the phone. Leave one opening pick in every corner to prevent the adhesive from resealing.
-
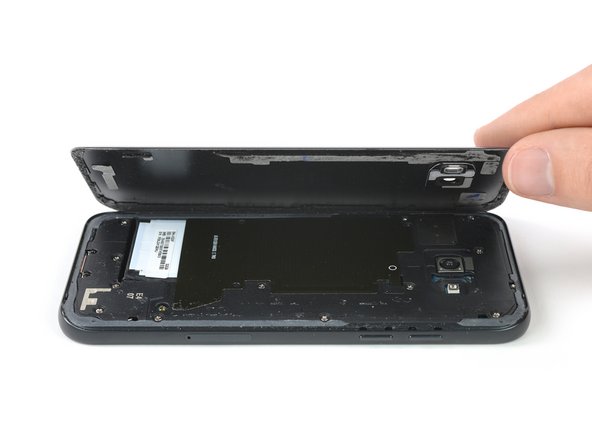
Insert an opening pick on the right side of the phone after you cut the adhesive on all sides. Flip it sideways until you can get a good grip on the back cover.
-
-
-
Remove the eight Phillips #00 screws that hold the motherboard cover in its place.
-
-
-
-
Use the flat end of a spudger to disconnect the battery flex cable.
-
-
-
Use the flat end of a spudger and disconnect the display flex cable.
-
-
-
Prepare an iOpener and apply it to the display for at least two minutes to loosen the adhesive beneath.
-
Lay overlapping strips of clear packing tape over the display until the whole face is covered.
-
This will keep glass shards contained and provide structural integrity when prying and lifting the display.
-
-
-
Once the display is warm to the touch, apply a suction cup to the upper edge of the phone.
-
Lift on the suction cup, and insert an opening pick under the display assembly.
-
Start to slide the opening pick along the upper edge of the phone to cut the adhesive. Leave an opening pick at the corner to prevent the adhesive from resealing.
-
Continue to slide the tip of the opening pick along the side towards the bottom of the phone to cut the adhesive.
-
-
-
Leave an opening pick on the bottom left edge of the phone to prevent the adhesive from resealing.
-
Carefully slide the tip along the bottom edge of the phone to cut the adhesive.
-
Continue to cut the adhesive on the remaining sides of the phone and leave an opening pick in each corner.
-
-
-
Start to carefully lift the upper edge of the display assembly and thread the display flex cable through the mid frame.
-
In case one of the cables sticks to the display, carefully peel them of with a pair of tweezers or an opening pick.
-


If possible, turn on your phone and test your repair before installing new adhesive and resealing the phone.
After reapplying adhesive, follow these instructions in reverse order to reassemble your device.
The best way to secure the new screen is with a sheet of custom-cut double-sided tape. Apply the tape to the back of the screen, then carefully feed the display cable through the mid frame. Align the screen and press it into place.
İptal et: Bu kılavuzu tamamlamadım.
44 farklı kişi bu kılavuzu tamamladı.


3 Yorum
If the screen is not found is there any alternative screen that can work A5 screen
You should get some adhesive tape to remeount the whole thing. Not mentioned in the furnitures needed. Don't forget it !
Plus, on the tutorial dedicated to the display replacement of the galaxy A5 (2015), the year is not mentioned --> I followed this first on the first place.
And, thanks for all these awesome guides <3