Ana içeriğe geç

Samsung Galaxy Mega (SGH-M819N) Front Display Assembly Replacement

Neye ihtiyacın var

Videoya Genel Bakış

  1. Samsung Galaxy Mega  (SGH-M819N) Front Display Assembly Replacement, Remove battery and rear door.: adım 1, 2 resimden 1. Samsung Galaxy Mega  (SGH-M819N) Front Display Assembly Replacement, Remove battery and rear door.: adım 1, 2 resimden 2.
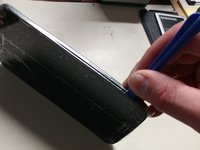
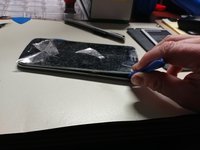
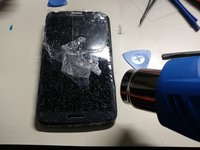
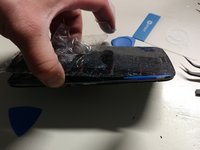
    • bold textWith a heavily shattered screen lay some tape over it to protect yourself and to keep it all in one place.

    • Flip the phone over to remove the batter door and battery.

  2. Samsung Galaxy Mega  (SGH-M819N) Front Display Assembly Replacement, Remove Phillips Screws and Speaker componant.: adım 2, 2 resimden 1. Samsung Galaxy Mega  (SGH-M819N) Front Display Assembly Replacement, Remove Phillips Screws and Speaker componant.: adım 2, 2 resimden 2.
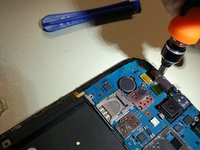
    • With a phillips remove all 14 visibile screws.

    • Using your pry tool slowly pop the speaker companant off.being careful not to damage it

  3. Samsung Galaxy Mega  (SGH-M819N) Front Display Assembly Replacement, Remove rear assembly frame: adım 3, 3 resimden 1. Samsung Galaxy Mega  (SGH-M819N) Front Display Assembly Replacement, Remove rear assembly frame: adım 3, 3 resimden 2. Samsung Galaxy Mega  (SGH-M819N) Front Display Assembly Replacement, Remove rear assembly frame: adım 3, 3 resimden 3.
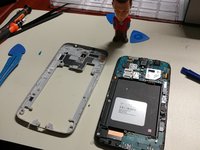
    • Using the pry tool work your way arounf the phone, separating the rear assembly frame from the device.

    • the frame can be deceiving and seem as if it attached closer to the top but in the picture you will see down to the middle is where you should look to separate.

    • Fully remove the rear assembly frame from the main device.

  4. Samsung Galaxy Mega  (SGH-M819N) Front Display Assembly Replacement, Remove the LCD Cable and the Front Camera: adım 4, 3 resimden 1. Samsung Galaxy Mega  (SGH-M819N) Front Display Assembly Replacement, Remove the LCD Cable and the Front Camera: adım 4, 3 resimden 2. Samsung Galaxy Mega  (SGH-M819N) Front Display Assembly Replacement, Remove the LCD Cable and the Front Camera: adım 4, 3 resimden 3.
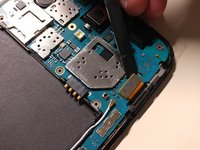
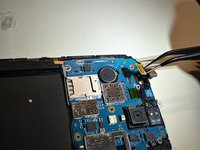
    • Using a spudger or pry tool lift remove the LCD flex cable from the logic board.

    • Next with a phillips screwdriver remove the one screw holding the protection plate over the cameras,

    • Proceed to remove the front camera

  5. Samsung Galaxy Mega  (SGH-M819N) Front Display Assembly Replacement, Using heat to soften the adhesive: adım 5, 3 resimden 1. Samsung Galaxy Mega  (SGH-M819N) Front Display Assembly Replacement, Using heat to soften the adhesive: adım 5, 3 resimden 2. Samsung Galaxy Mega  (SGH-M819N) Front Display Assembly Replacement, Using heat to soften the adhesive: adım 5, 3 resimden 3.
    • With your heat hun slowly heat the screen while using pry tool to work your wau around the device.

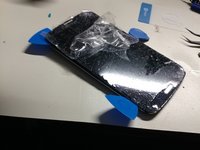
    • With atleast 3 guitar pick keeping separation as you progress the screen should slowly start lifting off.

    • leave the bottom area for last and be careful with your tools to not damage the back cable.

  6. Samsung Galaxy Mega  (SGH-M819N) Front Display Assembly Replacement, Remove bad LCD: adım 6, 1 resimden 1.
    • Clean device then follow the steps in reverse.

Sonuç

To reassemble your device, follow these instructions in reverse order.

4 farklı kişi bu kılavuzu tamamladı.

Austin Pollard

Üyelik tarihi: 02/05/17

1.474 İtibar

3 adet Kılavuz yazıldı

Ekip

Reno Phone Repair Reno Phone Repair üyesi

Business

1 Üye

7 adet Kılavuz yazıldı

0 Yorum

Yorum Ekle

İstatistikleri Görüntüle:

Son 24 Saat: 0

Son 7 gün: 0

Son 30 gün: 3

Her zaman: 1,668