Ana içeriğe geç
Samsung Galaxy Mega Midframe Replacement

Samsung Galaxy Mega Midframe Replacement

Aaron Fulton

Aaron Fulton ve 3 diğer katkıda bulunanlar

En son April 15, 2016 tarihinde güncellendi

2 - 5 dakika
Orta

This guide instructs on how to replace a damaged back panel assembly. The back panel assembly provides the protection for all the internal components of the device. Most components of this device require the removal of the back panel to gain access to them.

Neye ihtiyacın var

Aletler

Daha fazlasını göster…

  1. Samsung Galaxy Mega Midframe Replacement, Battery: adım 1, 3 resimden 1. Samsung Galaxy Mega Midframe Replacement, Battery: adım 1, 3 resimden 2. Samsung Galaxy Mega Midframe Replacement, Battery: adım 1, 3 resimden 3.
    • Before starting, ensure device is completely turned off.

    • On the back of phone, locate the slot on the top left corner.

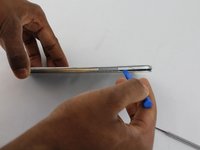
    • Insert plastic opening tool or fingernail and pull up on the back plate.

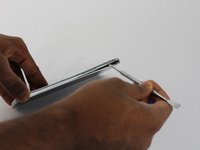
    • With the corner released, slide your finger around the device between the back plate and the phone to release connectors.

  2. Samsung Galaxy Mega Midframe Replacement: adım 2, 3 resimden 1. Samsung Galaxy Mega Midframe Replacement: adım 2, 3 resimden 2. Samsung Galaxy Mega Midframe Replacement: adım 2, 3 resimden 3.
    • Insert fingernail into the slot on bottom of battery and gently pull up.

    • Remove the battery.

  3. Samsung Galaxy Mega Midframe Replacement, Midframe: adım 3, 3 resimden 1. Samsung Galaxy Mega Midframe Replacement, Midframe: adım 3, 3 resimden 2. Samsung Galaxy Mega Midframe Replacement, Midframe: adım 3, 3 resimden 3.
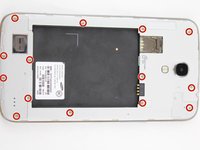
    • Remove the 14 3.45 mm Phillips #000 screws from the assembly.

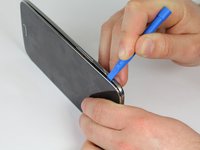
    • Gently, insert plastic opening tool into seam above the volume buttons of your phone.

    • You may substitute metal spudger for plastic opening tool to first start the opening of the seam. This may cause exterior cosmetic damage.

  4. Samsung Galaxy Mega Midframe Replacement: adım 4, 2 resimden 1. Samsung Galaxy Mega Midframe Replacement: adım 4, 2 resimden 2.
    • Slowly slide plastic opening tool around the device to release all the connectors internal to the device.

    • The device should easily come apart after the plastic opening tool is slid around the entire device.

    • During reassembly, ensure volume and power buttons align properly.

Sonuç

To reassemble your device, follow these instructions in reverse order.

5 farklı kişi bu kılavuzu tamamladı.

Aaron Fulton

Üyelik tarihi: 02/04/16

1.246 İtibar

3 adet Kılavuz yazıldı

Ekip

USF Tampa, Team 17-2, Blackwell Winter 2016 USF Tampa, Team 17-2, Blackwell Winter 2016 üyesi

USFT-BLACKWELL-W16S17G2

4 Üyeler

8 adet Kılavuz yazıldı

0 Yorum

Yorum Ekle

İstatistikleri Görüntüle:

Son 24 Saat: 0

Son 7 gün: 1

Son 30 gün: 3

Her zaman: 1,117