Giriş
This guide will teach you how to replace the charging port in your Samsung Galaxy 10.1 2014 edition.
Neye ihtiyacın var
-
-
Using the nylon spudger or plastic opening tool along the edges of the screen, separate the back case off of the device.
-
-
-
Place your finger on the thin black bar at the end of the ribbon tape and flip each one up.
-
Gently pull the ribbon tape on the battery away from the bar. Repeat this process for the second ribbon tape.
-
-
-
-
Remove the six 3mm screws around the battery with the Phillips PH000 screwdriver.
-
-
-
Lift up the battery from the bottom and situate the black nylon spudger underneath the battery.
-
Use the black nylon spudger to disconnect the multi-colored wires from the rest of the device.
-
-
-
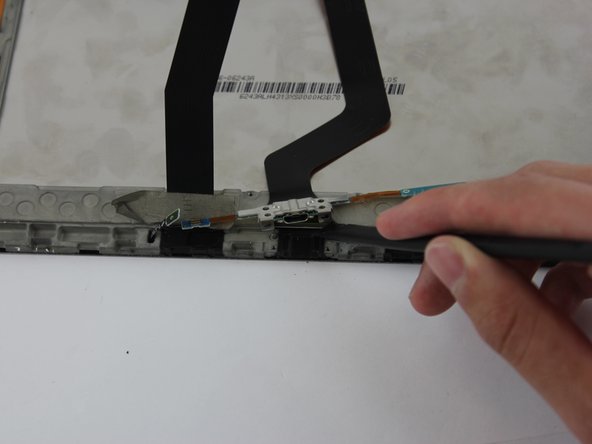
Using the PH000 screwdriver, remove the two black 3mm screws at the bottom of the device.
-


To reassemble your device, follow these instructions in reverse order.
To reassemble your device, follow these instructions in reverse order.
İptal et: Bu kılavuzu tamamlamadım.
14 farklı kişi bu kılavuzu tamamladı.
Ekip

USF Tampa, Team S1-G6, Leahy Spring 2017 USF Tampa, Team S1-G6, Leahy Spring 2017 üyesi
USFT-LEAHY-S17S1G6
3 Üyeler
6 adet Kılavuz yazıldı
4 Yorum
Great guide. It helped me find the right component to order and gave me confidence to fix it myself. Actually the steps can be shortened. The battery does not need to be removed. So you need to do step 1 (remove the cover), first part of step 2 (remove the flat cable of the charge plug), step 5 and 6. Step 7 should be to replace the old part with the new part. And then of course the reversal of reconnecting via steps 6, 5, 2 and 1.
Great guide. thanks.
at the SIM card slot corner, there is a little cylinder connected to the SIM card slot, what is it. i accidentally cut the ribbon between the SIM card slot and this piece.
This guide enabled me to replace a bad charging port.
Note - the replacement microUSB port didn’t have the little chrome frame around the port - so I had to carefully scavenge the frame from the old one just to give the new port a little more support when plugging in a cable.
I’m going to use a magnetic charging adapter to reduce the wear and tear on the port, but this one saved the day.
Although I have changed this flat cable and also the relative micro USB connector and have installed the driver on the PC, the Tablet is not recognized, even if it charges the battery. I also tried to change micro USB cable and USB port on PC : - ((((