Bu sürüm, hatalı düzenlemeler içerebilir. En son doğrulanmış bellek kopyası dönün.
Neye ihtiyacın var
-
-
Arka kameranın solundaki bölmede, güç düğmesinin yanındaki boşluğu, plastik bir açma aracıyla veya tırnağınızla kaldırın.
-
-
-
-
Arka kapağı, kanırttığınız bölüme en yakın köşeden kaldırın ve telefondan çıkarın.
I purchased a blue plastic opening tool(AKA: Spudge) like the one used in the above Step 1 rear cover pic and found the divot and was able to take off the rear cover as per the “Step 2 “ instructions.
-
-
Bu adım çevrilmemiş. Çevrilmesine yardım edin
-
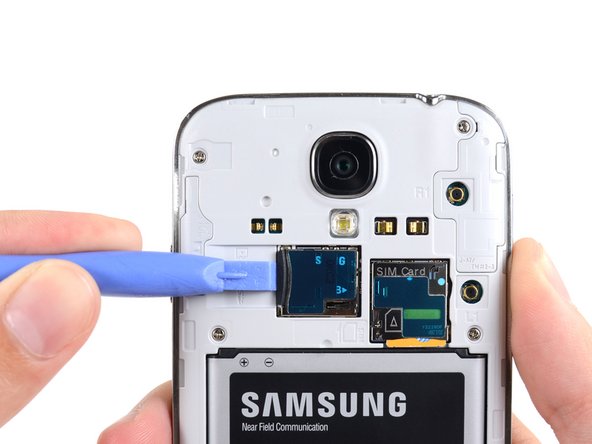
Use the flat end of a spudger, or your fingernail, to press the microSD card slightly deeper into its slot until you hear a click.
-
After the click, release the card and it will pop out of its slot.
-
Remove the microSD card.
I was able to remove the MicroSD Card as per the Step 3 MicroSD instructions with no problems.
-
İptal et: Bu kılavuzu tamamlamadım.
28 farklı kişi bu kılavuzu tamamladı.
Bir Yorum
If you use Micro SD card the you must know to How to Recover Memory Card
we are not going to use any app/softwares we only use CMD and 5 exclusive methods


