Ana içeriğe geç

Bu kılavuzda güncel değişiklikler var. En son onaylanmamış sürüme geçin.

Samsung Galaxy S7 Active Front Camera Replacement

Neye ihtiyacın var

  1. Samsung Galaxy S7 Active  Front Camera Replacement, Samsung Galaxy S7 Active Disassembly: adım 1, 1 resimden 1.
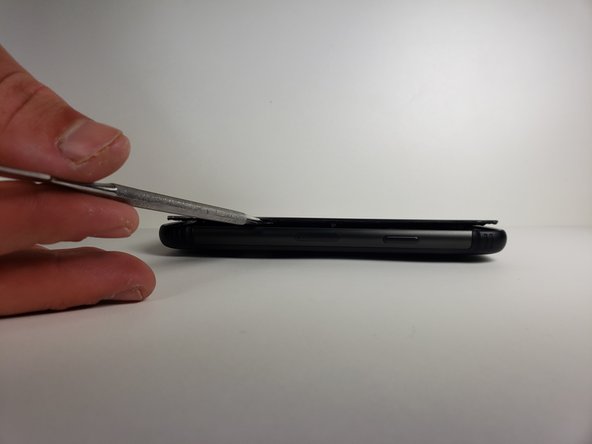
    • Melt the adhesive on the screen by applying a blow dryer directly on the screen.

    • Your phone is hot, please do not touch it with your bare hand.

  2. Samsung Galaxy S7 Active  Front Camera Replacement: adım 2, 1 resimden 1.
    • Wedge the metal spudger in between the screen and the frame to begin separating them.

    • It would be easier to separate the screen from the sealing adhesive on the frame if you with more than one metal spudger.

    • Your phone might no longer be watertight after you reassemble it.

  3. Samsung Galaxy S7 Active  Front Camera Replacement: adım 3, 2 resimden 1. Samsung Galaxy S7 Active  Front Camera Replacement: adım 3, 2 resimden 2.
    • Slide the metal spudger around the phone at least once.

    • It would be easier to slide your metal spudger if you apply the blow dryer to where you are currently sliding.

  4. Samsung Galaxy S7 Active  Front Camera Replacement: adım 4, 1 resimden 1.
    • Lift the screen up with your hands.

    • Please wash your hands thoroughly with hot water and soap after you finish.

  5. Samsung Galaxy S7 Active  Front Camera Replacement, Battery: adım 5, 1 resimden 1.
    • Use a Phillips #000 screwdriver to remove a single screw.

  6. Samsung Galaxy S7 Active  Front Camera Replacement: adım 6, 1 resimden 1.
    • Use tweezers to remove the small plastic cover you just unscrewed.

  7. Samsung Galaxy S7 Active  Front Camera Replacement: adım 7, 1 resimden 1.
    • Use tweezers to remove the other small plastic cover.

  8. Samsung Galaxy S7 Active  Front Camera Replacement: adım 8, 1 resimden 1.
    • Use a Phillips head #000 to take out the eleven screws marked in the photo.

  9. Samsung Galaxy S7 Active  Front Camera Replacement: adım 9, 1 resimden 1.
    • Use tweezers to disconnect the marked pieces from the motherboard.

  10. Samsung Galaxy S7 Active  Front Camera Replacement: adım 10, 1 resimden 1.
    • Use tweezers to take out the middle button and its connection to the motherboard.

  11. Samsung Galaxy S7 Active  Front Camera Replacement: adım 11, 3 resimden 1. Samsung Galaxy S7 Active  Front Camera Replacement: adım 11, 3 resimden 2. Samsung Galaxy S7 Active  Front Camera Replacement: adım 11, 3 resimden 3.
    • Use a metal spudger to pull the mid frame and battery off of the motherboard.

  12. Samsung Galaxy S7 Active  Front Camera Replacement: adım 12, 2 resimden 1. Samsung Galaxy S7 Active  Front Camera Replacement: adım 12, 2 resimden 2.
    • Use a spudger to remove the battery from the midframe.

    • To install a new battery and adhesive, follow this guide.

  13. Samsung Galaxy S7 Active  Front Camera Replacement, Rear Camera: adım 13, 1 resimden 1.
    • Use tweezers to disconnect the front camera from the battery.

    • The connector should unsnap similar to a lego piece.

  14. Samsung Galaxy S7 Active  Front Camera Replacement, Motherboard: adım 14, 1 resimden 1.
    • Use a Phillips 000 screwdriver to remove the screw covering the proximity sensor.

  15. Samsung Galaxy S7 Active  Front Camera Replacement: adım 15, 2 resimden 1. Samsung Galaxy S7 Active  Front Camera Replacement: adım 15, 2 resimden 2.
    • Use tweezers to remove the proximity sensor.

    • Set this aside for now.

  16. Samsung Galaxy S7 Active  Front Camera Replacement: adım 16, 1 resimden 1.
    • Use tweezers to disconnect the front mic and the two cables that have been marked in the photo.

  17. Samsung Galaxy S7 Active  Front Camera Replacement: adım 17, 1 resimden 1.
    • Use your hands and a metal spudger to lift the motherboard out of the phone.

    • Be gentle, as there is still a connection on the underside of the motherboard.

    • Use a metal spudger to remove this connection.

  18. Samsung Galaxy S7 Active  Front Camera Replacement, Front Camera: adım 18, 1 resimden 1.
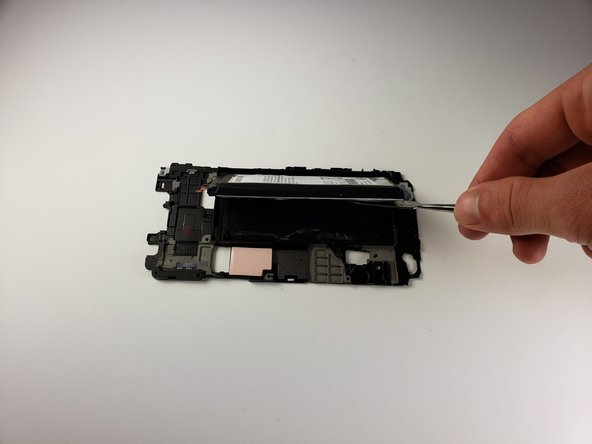
    • Use tweezers to remove the connection between the motherboard and the front camera.

    • In order to do this, the motherboard must be flipped over from its original position.

Sonuç

To reassemble your device, follow these instructions in reverse order.

Alexander Yazdani

Üyelik tarihi: 04/18/18

846 İtibar

3 adet Kılavuz yazıldı

Ekip

Cal Poly, Team S18-G1, Livingston Spring 2018 Cal Poly, Team S18-G1, Livingston Spring 2018 üyesi

CPSU-LIVINGSTON-S18S18G1

4 Üyeler

15 adet Kılavuz yazıldı

0 Yorum

Yorum Ekle

İstatistikleri Görüntüle:

Son 24 Saat: 0

Son 7 gün: 0

Son 30 gün: 2

Her zaman: 658