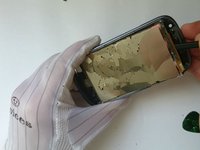
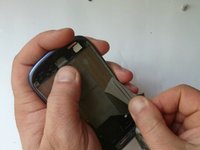
Ana içeriğe geç

Samsung Galaxy SIII Mini Display Assembly Replacement

Neye ihtiyacın var

Videoya Genel Bakış

  1. Samsung Galaxy SIII Mini Display Assembly Replacement, Display Assembly: adım 1, 2 resimden 1. Samsung Galaxy SIII Mini Display Assembly Replacement, Display Assembly: adım 1, 2 resimden 2.
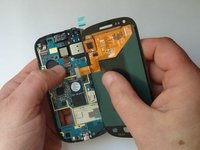
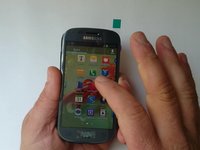
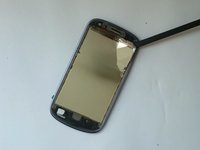
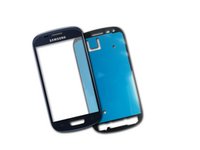
    • LCD Display + Touch screen (Display Assemblay) for Samsung Galaxy S III mini / i8190.

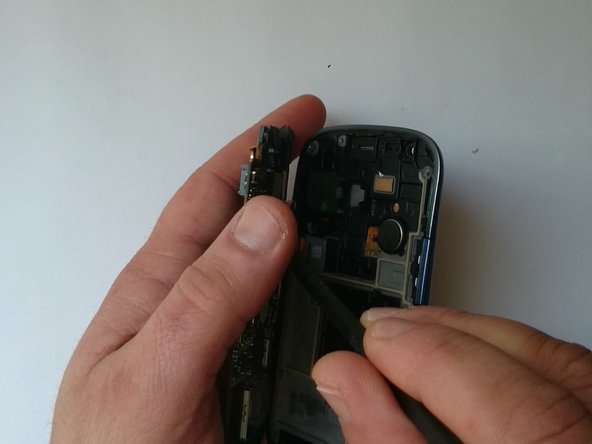
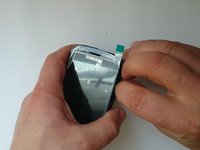
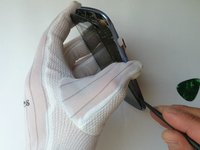
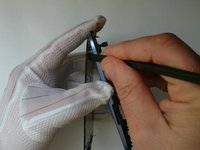
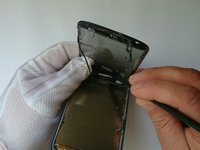
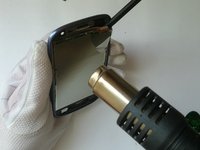
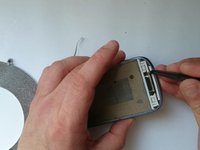
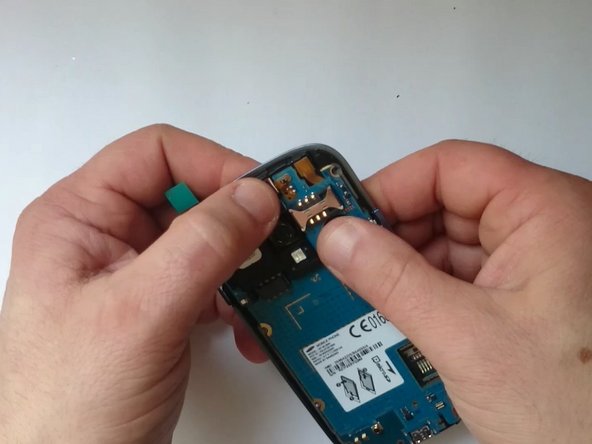
    • Switch off the phone, remove the battery and any SIM and memory card.

  2. Samsung Galaxy SIII Mini Display Assembly Replacement: adım 2, 3 resimden 1. Samsung Galaxy SIII Mini Display Assembly Replacement: adım 2, 3 resimden 2. Samsung Galaxy SIII Mini Display Assembly Replacement: adım 2, 3 resimden 3.
    • Remove 10x Phillips screws.

    • With a plastic tool remove the Middle frame.

  3. Samsung Galaxy SIII Mini Display Assembly Replacement: adım 3, 3 resimden 1. Samsung Galaxy SIII Mini Display Assembly Replacement: adım 3, 3 resimden 2. Samsung Galaxy SIII Mini Display Assembly Replacement: adım 3, 3 resimden 3.
    • Disconnect:

    • Menu buttons flex cable

    • Micro SD Card reader flex cable

    • Lift up slightly the mother board from the right edge.

    • Unstick the Earpiece and Main camera from the display frame. Be careful, don't break flex cables.

    • Now disconnect the LCD Display flex cable which is located on the underside of the board.

  4. Samsung Galaxy SIII Mini Display Assembly Replacement: adım 4, 1 resimden 1.
    • Front camera

    • Main / Rear camera

    • Earpiece

    • Loudspeaker

    • Vibro motor

    • Micro SD Card reader

  5. Samsung Galaxy SIII Mini Display Assembly Replacement: adım 5, 3 resimden 1. Samsung Galaxy SIII Mini Display Assembly Replacement: adım 5, 3 resimden 2. Samsung Galaxy SIII Mini Display Assembly Replacement: adım 5, 3 resimden 3.
    • Let's test the new spare part.

    • First connect the Display assembly, grab the phone comfortably and then put the battery.

  6. Samsung Galaxy SIII Mini Display Assembly Replacement: adım 6, 3 resimden 1. Samsung Galaxy SIII Mini Display Assembly Replacement: adım 6, 3 resimden 2. Samsung Galaxy SIII Mini Display Assembly Replacement: adım 6, 3 resimden 3.
    • Warm the touchscreen to make adhesive tape soft. You can use a hair dryer.

    • If the glass is cracked, put the tape in order not to scatter pieces.

    • Use the front camera hole to separate the glass at the corner.

    • Continue with separation with plastic tools, from up to down.

  7. Samsung Galaxy SIII Mini Display Assembly Replacement: adım 7, 3 resimden 1. Samsung Galaxy SIII Mini Display Assembly Replacement: adım 7, 3 resimden 2. Samsung Galaxy SIII Mini Display Assembly Replacement: adım 7, 3 resimden 3.
    • Gently separate the menu buttons flex cable from the touchscreen.

  8. Samsung Galaxy SIII Mini Display Assembly Replacement: adım 8, 3 resimden 1. Samsung Galaxy SIII Mini Display Assembly Replacement: adım 8, 3 resimden 2. Samsung Galaxy SIII Mini Display Assembly Replacement: adım 8, 3 resimden 3.
    • If the display is left on the frame, use the same techniques to remove it.

  9. Samsung Galaxy SIII Mini Display Assembly Replacement: adım 9, 3 resimden 1. Samsung Galaxy SIII Mini Display Assembly Replacement: adım 9, 3 resimden 2. Samsung Galaxy SIII Mini Display Assembly Replacement: adım 9, 3 resimden 3.
    • Clean the frame from the remnants of tape and install new.

    • Be careful with the menu buttons and the holes for the camera and the light sensor, don't cover them.

  10. Samsung Galaxy SIII Mini Display Assembly Replacement: adım 10, 3 resimden 1. Samsung Galaxy SIII Mini Display Assembly Replacement: adım 10, 3 resimden 2. Samsung Galaxy SIII Mini Display Assembly Replacement: adım 10, 3 resimden 3.
    • Will be easier if you use adhesive, ready for the model.

    • Install the new display assembly and start with reassembling.

  11. Samsung Galaxy SIII Mini Display Assembly Replacement: adım 11, 1 resimden 1.
    • That's all.

    • .

    • .

    • .

    • .

    • .

    • Did you do it successfully?

Sonuç

To reassemble your device, follow these instructions in reverse order.

18 farklı kişi bu kılavuzu tamamladı.

ZFix

Üyelik tarihi: 12/09/13

194.222 İtibar

330 adet Kılavuz yazıldı

Ekip

Master Techs Master Techs üyesi

Community

327 Üyeler

1.673 adet Kılavuz yazıldı

2Kılavuz Yorumları

Followed the VDO exactly and managed to fix the screen. Getting the right glue for the screen delivered took the longest time.

Erick Ogam - Yanıt

Worked perfectly, used regular glue I had at home and it worked just fine. Thanks!!

Elisa Díaz Ipes - Yanıt

Yorum Ekle

İstatistikleri Görüntüle:

Son 24 Saat: 3

Son 7 gün: 7

Son 30 gün: 18

Her zaman: 17,659