Ana içeriğe geç

Samsung Galaxy Tab 2 7.0 Camera Replacement

Neye ihtiyacın var

  1. Samsung Galaxy Tab 2 7.0 Camera Replacement, Camera: adım 1, 1 resimden 1.
    • Using a nylon spudger or a flat plastic opening tool, pry open the back of the device.

    • It is easiest to begin this process by starting at the micro SD card insert, as shown in the pictures.

  2. Samsung Galaxy Tab 2 7.0 Camera Replacement: adım 2, 1 resimden 1.
    • Using a phillips head screwdriver, remove the 6 4mm screws holding the battery on the device.

    • Remove the battery, and set it aside.

  3. Samsung Galaxy Tab 2 7.0 Camera Replacement: adım 3, 1 resimden 1.
    • Using a phillips head screwdriver, remove the 6 4mm screws holding the motherboard in the device.

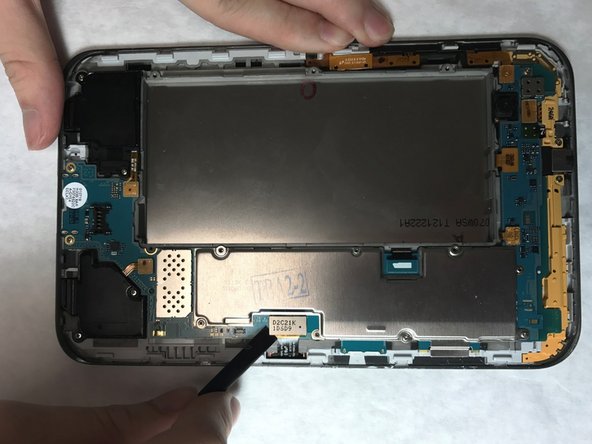
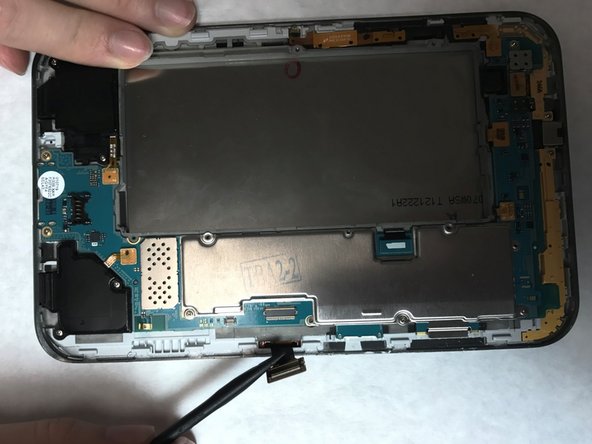
  4. Samsung Galaxy Tab 2 7.0 Camera Replacement: adım 4, 3 resimden 1. Samsung Galaxy Tab 2 7.0 Camera Replacement: adım 4, 3 resimden 2. Samsung Galaxy Tab 2 7.0 Camera Replacement: adım 4, 3 resimden 3.
    • Locate the 8 flex cables attached to the motherboard.

    • Using a nylon spudger, gently detach each flex cable from the motherboard.

    • Be careful when detaching flex cables. Excessive force and sharp objects have the potential to damage these components.

    • Lift the motherboard from the device and set it aside.

  5. Samsung Galaxy Tab 2 7.0 Camera Replacement: adım 5, 1 resimden 1.
    • Locate the camera towards the top of the device.

    • Use a nylon spudger to gently lift the camera and remove it from the device.

Sonuç

To reassemble your device, follow these instructions in reverse order.

2 farklı kişi bu kılavuzu tamamladı.

Katija Tarailo

Üyelik tarihi: 03/02/17

460 İtibar

3 adet Kılavuz yazıldı

Ekip

IUPUI, Team S3-G1, Harley Spring 2017 IUPUI, Team S3-G1, Harley Spring 2017 üyesi

IUPUI-HARLEY-S17S3G1

4 Üyeler

3 adet Kılavuz yazıldı

0 Yorum

Yorum Ekle

İstatistikleri Görüntüle:

Son 24 Saat: 1

Son 7 gün: 6

Son 30 gün: 13

Her zaman: 646