Bu sürüm, hatalı düzenlemeler içerebilir. En son doğrulanmış bellek kopyası dönün.
Neye ihtiyacın var
-
Bu adım çevrilmemiş. Çevrilmesine yardım edin
-
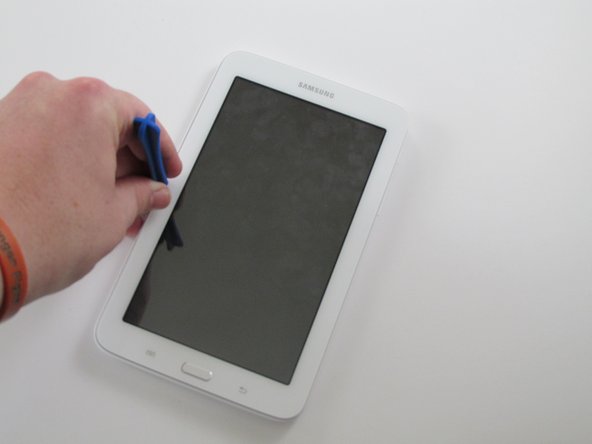
Using a plastic opening tool, wedge in the seam between the screen and the case.
-
Rock the tool by moving it towards and away from the middle of the screen, trying to separate the tape holding the screen and case together.
-
This is a long process, so don't try and rush it. Also, be careful about applying pressure.
-
-
Bu adım çevrilmemiş. Çevrilmesine yardım edin
-
After separating the tape holding the screen and case together, slowly start taking the screen off the case from the opposite side of the side with the buttons
-
-
Bu adım çevrilmemiş. Çevrilmesine yardım edin
-
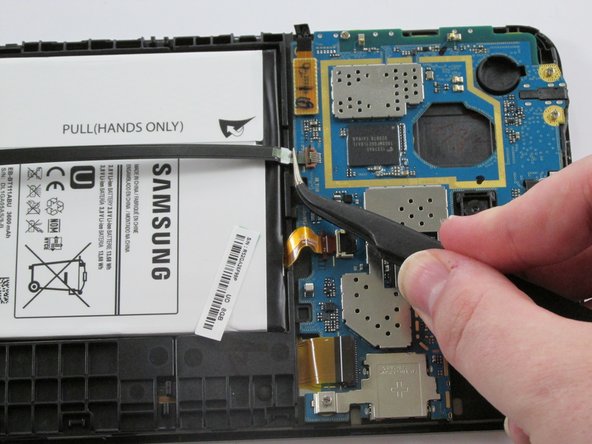
Use a plastic opening tool to lift up the zero insertion force (ZIF) connector holding down the ribbon cable.
-
Use the precision tweezers to gently pull the ribbon cable out of the ZIF connector.
-
-
-
Bu adım çevrilmemiş. Çevrilmesine yardım edin
-
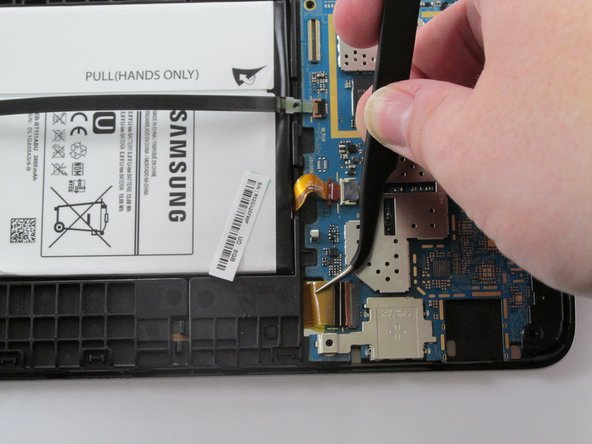
Use the plastic opening tool to lift up the zero insertion force (ZIF) connector holding down the battery ribbon cable.
-
Use the precision tweezers to remove the ribbon cable from the ZIF connector.
-
-
Bu adım çevrilmemiş. Çevrilmesine yardım edin
-
Use the plastic opening tool to lift up the zero insertion force (ZIF) connector holding down the battery ribbon cable.
-
Use the precision tweezers to remove the ribbon cable from the ZIF connector.
-
-
Bu adım çevrilmemiş. Çevrilmesine yardım edin
-
Remove the seven 4mm Phillips J000 screws holding the motherboard in place.
-
-
Bu adım çevrilmemiş. Çevrilmesine yardım edin
-
Use the plastic opening tool and gently pry up the tab holding the motherboard in place.
-
-
Bu adım çevrilmemiş. Çevrilmesine yardım edin
-
Use the precision tweezers to remove the black plastic corner on top of the motherboard.
-
Use the plastic opening tool to pull the motherboard off the case.
-


İptal et: Bu kılavuzu tamamlamadım.
21 farklı kişi bu kılavuzu tamamladı.
Ekip

USF Tampa, Team 11-1, Cheng Spring 2016 USF Tampa, Team 11-1, Cheng Spring 2016 üyesi
USFT-CHENG-S16S11G1
4 Üyeler
12 adet Kılavuz yazıldı
3 Yorum
Thank you friend!
Nice guide, Done very well.
Ótimo guia. Esses tutoriais facilitam demais nossa vida. Sou fã! Parabéns