Ana içeriğe geç

Samsung Galaxy Tab 4 10.1 Battery Replacement

Neye ihtiyacın var

  1. Samsung Galaxy Tab 4 10.1 Battery Replacement, Battery: adım 1, 2 resimden 1. Samsung Galaxy Tab 4 10.1 Battery Replacement, Battery: adım 1, 2 resimden 2.
    • Insert the wedge of the nylon spudger and slide it between the front and back panels until the back comes off.

  2. Samsung Galaxy Tab 4 10.1 Battery Replacement: adım 2, 1 resimden 1.
    • Peel off the green tape that covers the connectors for the three black strips.

    • Use the tip of a spudger or your fingernail to flip up the small retaining flaps.

  3. Samsung Galaxy Tab 4 10.1 Battery Replacement: adım 3, 1 resimden 1.
    • Use a Phillips #00 screwdriver to remove the four 3.2mm screws.

  4. Samsung Galaxy Tab 4 10.1 Battery Replacement: adım 4, 1 resimden 1.
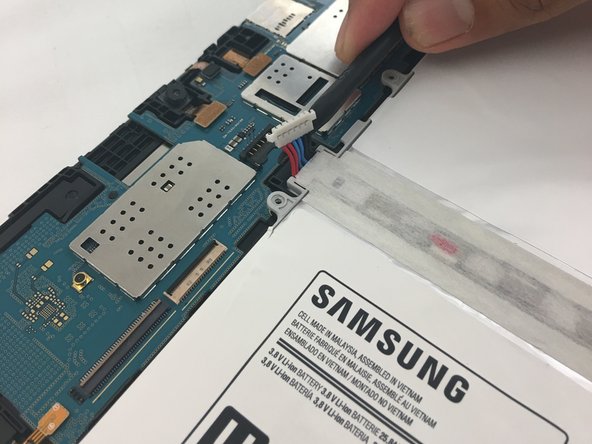
    • Detach the red, blue, and black cables by prying up on the white connector from the motherboard.

    • If using fingers instead, pull evenly on the full width of the cable so the wires are not overly strained.

    • If you pull too hard you can damage the connector on the circuit board. Use a spudger or tweezers to push down on the black connector on the board while gently prying the battery connector loose. The connector breaks VERY easily.

  5. Samsung Galaxy Tab 4 10.1 Battery Replacement: adım 5, 1 resimden 1.
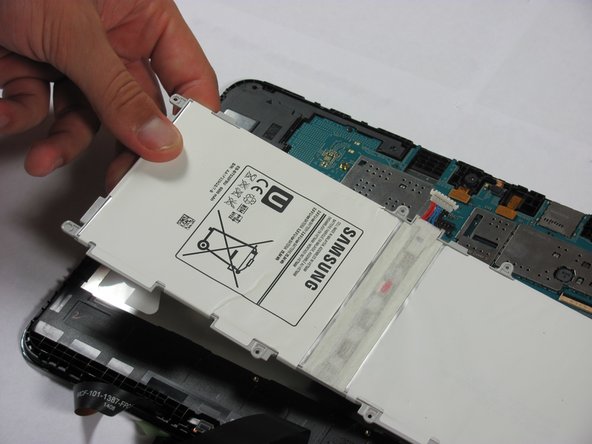
    • Use the nylon spudger to remove the battery by prying up on the edges.

  6. Samsung Galaxy Tab 4 10.1 Battery Replacement: adım 6, 1 resimden 1.
    • Once the battery is loose, lift it out of the device.

Sonuç

To reassemble your device, follow these instructions in reverse order.

52 farklı kişi bu kılavuzu tamamladı.

Samantha Gunzl

Üyelik tarihi: 09/30/16

629 İtibar

1 Kılavuz yazıldı

Ekip

Cal Poly, Team 18-1, Forte Fall 2016 Cal Poly, Team 18-1, Forte Fall 2016 üyesi

CPSU-FORTE-F16S18G1

5 Üyeler

4 adet Kılavuz yazıldı

5 Yorum

Well, I know what I did wrong. I thought I was super careful, but I damaged the black connector. (Please pay extra attention to the red warning area in Gunzl’s instructions.) It separates from the board extremely easy. My husband was worried about my taking on this task. I know what I did wrong, but that doesn’t help the fact that I will be purchasing another tablet for him. I’m not sure I will purchase another Samsung, but perhaps all the tablets has such fragile inner workings.

Racquel Naylor - Yanıt

Don’t worry, you’re not the only one! :(

Ashley Lahm -

Thank you! Will try this.

affriedl - Yanıt

the battery on this tablet is terrible, once i get the parts, your guide will come in handy.

kcole - Yanıt

Regarding Step 4, Take note of the red warning comment! Very easy to pull up the connector off the board!!!

Unfortunately I just that because I didn’t hold down the connectors with tweezers (or something) and then botched an attempted reflow of the solder, costing even more time and money! :(

Ashley Lahm - Yanıt

Yorum Ekle

İstatistikleri Görüntüle:

Son 24 Saat: 15

Son 7 gün: 45

Son 30 gün: 234

Her zaman: 51,996