Ana içeriğe geç

Samsung Galaxy Tab 7.0 Volume Buttons Replacement

Neye ihtiyacın var

  1. Samsung Galaxy Tab 7.0 Volume Buttons Replacement, Front Panel: adım 1, 1 resimden 1.
    • Use the flat end of a metal spudger to pry the two plastic tabs near the dock connector off the rear case.

  2. Samsung Galaxy Tab 7.0 Volume Buttons Replacement: adım 2, 1 resimden 1.
    • Remove the two 4.1 mm Tri-Wing screws near the adjacent edges of the dock connector.

  3. Samsung Galaxy Tab 7.0 Volume Buttons Replacement: adım 3, 1 resimden 1.
    • The following steps will require you to disengage several clips (highlighted in red) around the perimeter of the rear case. The clips are delicate and fragile; proceed with caution.

  4. Samsung Galaxy Tab 7.0 Volume Buttons Replacement: adım 4, 2 resimden 1. Samsung Galaxy Tab 7.0 Volume Buttons Replacement: adım 4, 2 resimden 2.
    • Disclaimer: The Galaxy Tab we acquired already had a shattered front glass panel. However, the procedure outlined in this guide is identical for both intact/shattered front panels.

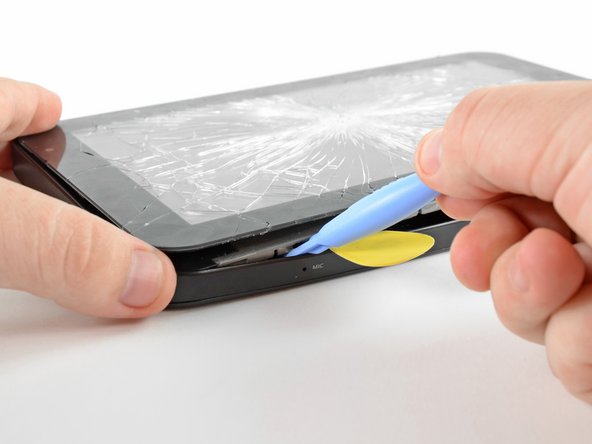
    • Insert a plastic opening tool near the bottom left edge of the rear case.

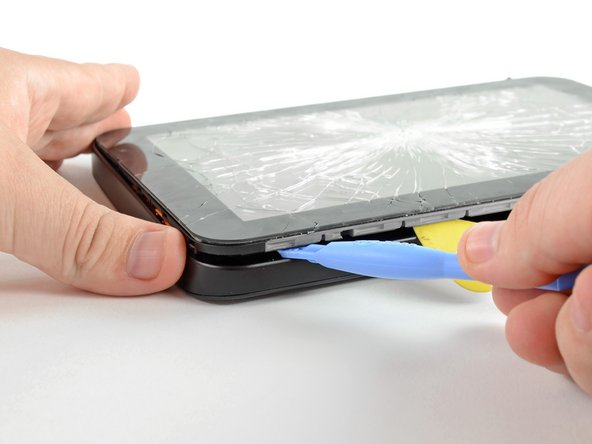
    • Use your plastic opening tool to gently create a small gap between the front panel and the rear panel near the bottom left edge.

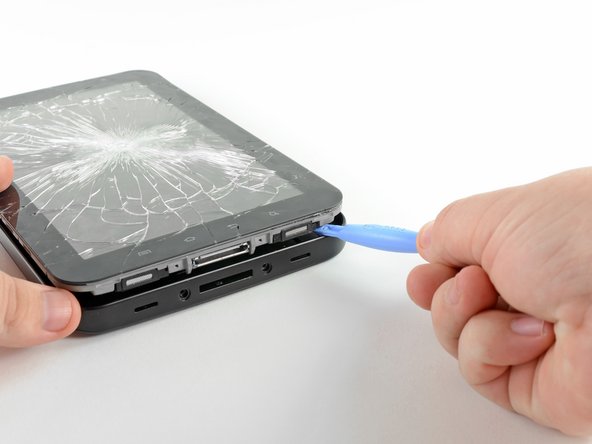
    • Run the plastic opening tool along the left side of the perimeter to create a bigger gap between the front panel and the rear panel.

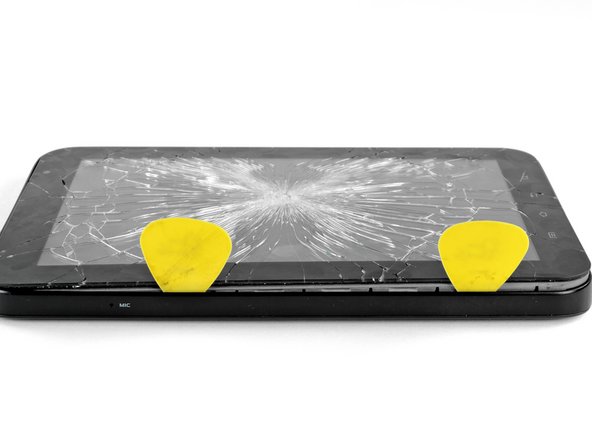
    • Insert two guitar picks into the small gap created by the plastic opening tool.

  5. Samsung Galaxy Tab 7.0 Volume Buttons Replacement: adım 5, 2 resimden 1. Samsung Galaxy Tab 7.0 Volume Buttons Replacement: adım 5, 2 resimden 2.
    • Insert the plastic opening tool into the dock connector and wedge it underneath the front panel/motherboard assembly.

    • Thrust the plastic opening tool downwards to create a gap near the lower left corner of the front panel assembly.

    • Insert a guitar pick into the newly created gap near the lower left edge of the Galaxy Tab.

  6. Samsung Galaxy Tab 7.0 Volume Buttons Replacement: adım 6, 3 resimden 1. Samsung Galaxy Tab 7.0 Volume Buttons Replacement: adım 6, 3 resimden 2. Samsung Galaxy Tab 7.0 Volume Buttons Replacement: adım 6, 3 resimden 3.
    • Be careful when approaching the top left corner of the Galaxy Tab. Be sure to follow the next step carefully.

    • When separating the front panel from the top left corner of the Galaxy Tab, be careful not to rip the microphone ribbon cable (highlighted in red in the first picture). It is extremely thin and easy to tear.

    • Insert a plastic opening tool into the gap next to the left side of the guitar pick.

    • Make sure to wedge it underneath the inner framework to gain the most leverage when releasing the clips.

    • Simultaneously lift upwards and run the plastic opening tool along the top left corner of the Galaxy Tab to free the Front Panel Assembly from the retaining clips.

  7. Samsung Galaxy Tab 7.0 Volume Buttons Replacement: adım 7, 1 resimden 1.
    • Slightly lift the left side of the front panel assembly to separate it from its housing within the rear panel.

    • Do not completely lift the front panel assembly, as it is still restrained to the rear panel by clips around the top, bottom, and right sides. Doing so may cause severe damage.

  8. Samsung Galaxy Tab 7.0 Volume Buttons Replacement: adım 8, 2 resimden 1. Samsung Galaxy Tab 7.0 Volume Buttons Replacement: adım 8, 2 resimden 2.
    • Wedge the flat edge of an opening tool between the front panel and rear panel near the dock connector.

    • Use a plastic opening tool to pry the bottom right corner out of its housing in the rear panel.

  9. Samsung Galaxy Tab 7.0 Volume Buttons Replacement: adım 9, 1 resimden 1.
    • Lift and remove the front panel assembly from the rear panel.

  10. Samsung Galaxy Tab 7.0 Volume Buttons Replacement, Battery: adım 10, 1 resimden 1.
    • Remove the single Phillips screw securing the battery to the motherboard.

  11. Samsung Galaxy Tab 7.0 Volume Buttons Replacement: adım 11, 1 resimden 1.
    • Use the edge of a plastic opening tool to pry the battery connector straight up off its socket on the motherboard.

  12. Samsung Galaxy Tab 7.0 Volume Buttons Replacement, Rear Camera: adım 12, 1 resimden 1.
    • Use the edge of a plastic opening tool to pry the rear camera connector up from its socket on the motherboard.

  13. Samsung Galaxy Tab 7.0 Volume Buttons Replacement: adım 13, 1 resimden 1.
    • Lift and remove the rear camera from the Galaxy Tab.

  14. Samsung Galaxy Tab 7.0 Volume Buttons Replacement, Volume Buttons: adım 14, 1 resimden 1.
    • Use the edge of a plastic opening tool to pry the volume buttons connector straight up from its socket on the motherboard.

  15. Samsung Galaxy Tab 7.0 Volume Buttons Replacement: adım 15, 2 resimden 1. Samsung Galaxy Tab 7.0 Volume Buttons Replacement: adım 15, 2 resimden 2.
    • Insert the edge of a plastic opening tool in between the inner framework and the volume button recess.

    • Carefully run the plastic opening tool to the left to dislodge the volume buttons assembly from the inner framework.

  16. Samsung Galaxy Tab 7.0 Volume Buttons Replacement: adım 16, 1 resimden 1.
    • Remove the volume buttons assembly away from the Galaxy Tab.

Sonuç

To reassemble your device, follow these instructions in reverse order.

3 farklı kişi bu kılavuzu tamamladı.

0 Yorum

Yorum Ekle

İstatistikleri Görüntüle:

Son 24 Saat: 1

Son 7 gün: 1

Son 30 gün: 8

Her zaman: 7,266