Bu sürüm, hatalı düzenlemeler içerebilir. En son doğrulanmış bellek kopyası dönün.
Neye ihtiyacın var
-
Bu adım çevrilmemiş. Çevrilmesine yardım edin
-
At the top portion of the memory card slot, use the small metal spudger to create separation between the back cover and the rest of the device.
-
-
Bu adım çevrilmemiş. Çevrilmesine yardım edin
-
Use the intermediate metal spudger in place of the small metal spudger to remove the back cover. This is done by sliding the intermediate metal spudger around the perimeter of the device, beginning at the top portion of the memory card slot.
-
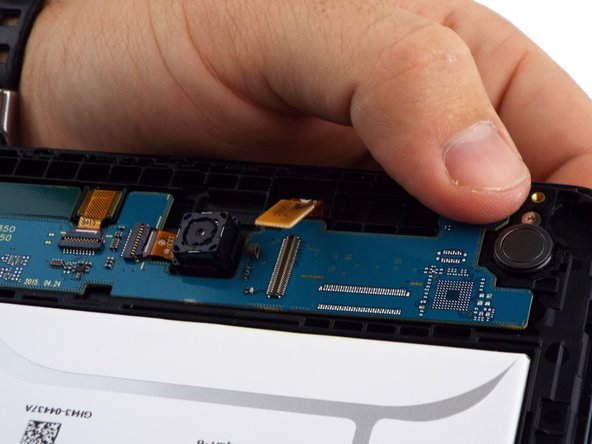
The second picture shows the internal portion of the device once the back cover is removed.
-
-
-
Bu adım çevrilmemiş. Çevrilmesine yardım edin
-
Use the spudger to disconnect the touchscreen from the motherboard. The two are connected at the top half of the motherboard where the yellow rubber portion of the touchscreen is located.
-
The first and second pictures illustrate the touchscreen when it connected and disconnected, respectively.
-
-
Bu adım çevrilmemiş. Çevrilmesine yardım edin
-
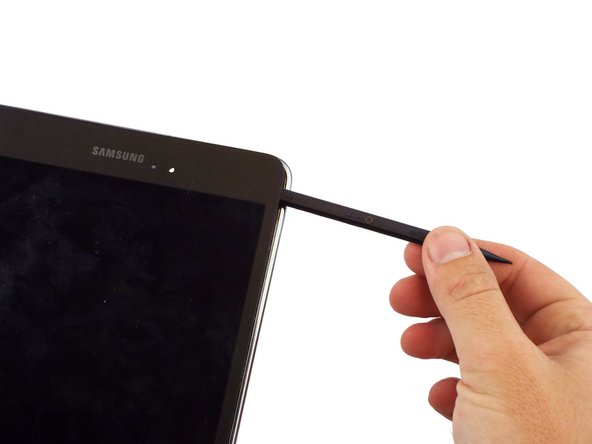
Use the spudger to separate the touch screen from the front cover of the device.
-
-
Bu adım çevrilmemiş. Çevrilmesine yardım edin
-
Once the touchscreen is loose enough, slowly pull it off the front cover to fully remove it from the rest of the device.
-
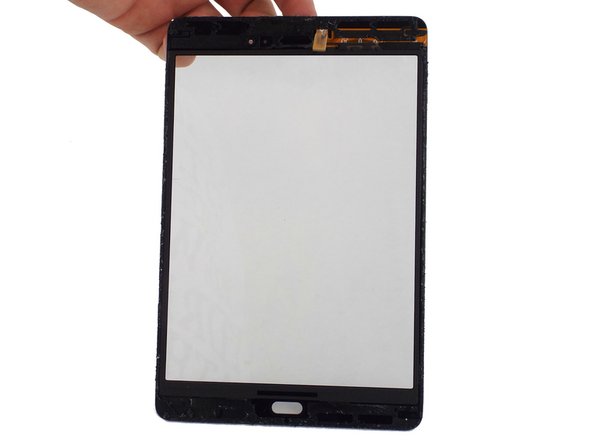
The picture shows what the device should look like once the touchscreen is fully removed.
-


İptal et: Bu kılavuzu tamamlamadım.
39 farklı kişi bu kılavuzu tamamladı.
Ekip

USF Tampa, Team 17-4, Blackwell Winter 2016 USF Tampa, Team 17-4, Blackwell Winter 2016 üyesi
USFT-BLACKWELL-W16S17G4
4 Üyeler
11 adet Kılavuz yazıldı
13 Yorum
These steps worked well but you must use a metal spudger to get this started. I didn't have one and it was a nightmare. I finished the project but it was very difficult to start. I would also use a heat gun to loosen the glue for the bottom and top. Just my opinion from my experience.
See comments on the last step re: avoiding the area of the flex connector, and using heat, as the previous commenter suggested, throughout the removal process to loosen the adhesive and avoid breaking the glass.
Also, the “metal" frame around the digitizer is very susceptible to being dented. Be very careful of it.
Finally, a piece of advice from other iFixit commenters about cleaning the LCD before adding new glass: careful circular motions with a very clean, dry microfiber cloth are sufficient in most cases. If not, a small amount of water can be added to the cloth. Avoid adding alcohol or water directly to the LCD, as it is easily smudged.
^This! An iOpener or heat is a MUST when separating the digitizer and LCD. There is no way the digitizer just pops off. This is especially important if the digitizer is cracked and spider-webbed.
Oops--one final suggestion, also from other iFixit commenters (I can't find the original, or I’d reference it. It's in the Q&A section, answering a question about jumpy digitizer responses after screen replacement.)
The first time I did this, all seemed well until I tried to use the digitizer, when its response to touch was suddenly very jumpy and erratic in all areas of the screen. The next time I followed Ifixit advice and covered all metallic-looking areas of the back of the new screen with thin Kapton tape, and had no problems. I essentially made a thin frame of Kapton all the way around the non-transparent areas of the screen.
There have been various suggestions about why this might work, most speculating on small electrical shorts occurring between these metallic areas and the metal parts of the frame surrounding the LCD. I just know that it's quick and easy and seems to work.
Hi Bonnie, would you happen to know what thickness of tape that should be? I’m getting little to no response then when I put the back on i’m getting nothing at all.