Ana içeriğe geç
Onarım Topluluğuna Katılın - Hesap Oluşturun

Samsung Impression LCD Flex Cable Replacement

Neye ihtiyacın var

    1. Samsung Impression LCD Flex Cable Replacement, Battery: adım 1, 1 resimden 1.
      • Orient the phone with the screen facing downward.

      • Slide the panel away from the camera using your thumb. This will expose the battery.

      FixBot'a Sor

      Yorum Ekle

    2. Samsung Impression LCD Flex Cable Replacement: adım 2, 2 resimden 1. Samsung Impression LCD Flex Cable Replacement: adım 2, 2 resimden 2.
      • Insert the tip of the spudger on the left side of the battery.

      • Pry the battery out. It will pivot in the direction of the white arrow.

      FixBot'a Sor

      Yorum Ekle

    1. Samsung Impression LCD Flex Cable Replacement, Back Cover: adım 3, 1 resimden 1.
      • Remove the six 3.5 mm screws using a Phillips #000 screwdriver. Unscrew in a counterclockwise direction.

      FixBot'a Sor

      Yorum Ekle

    2. Samsung Impression LCD Flex Cable Replacement: adım 4, 1 resimden 1.
      • Gently pry around the edges with the spudger to remove back panel.

      • It may help to slide the touchscreen upwards when removing the back panel.

      • The side buttons will become loose and will fall out, so put these in a safe place.

      FixBot'a Sor

      Yorum Ekle

    1. Samsung Impression LCD Flex Cable Replacement, Circuit Board: adım 5, 1 resimden 1.
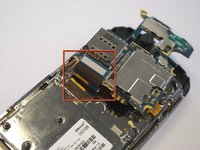
      • Gently remove the black wire to free the circuit board.

      • Remove the wire by gently prying up the gold terminator attached to the green circuit board.

      FixBot'a Sor

      Yorum Ekle

    2. Samsung Impression LCD Flex Cable Replacement: adım 6, 2 resimden 1. Samsung Impression LCD Flex Cable Replacement: adım 6, 2 resimden 2.
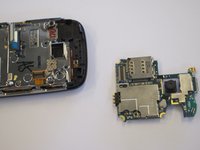
      • Gently tug the black and blue ribbon upwards to release the circuit board.

      FixBot'a Sor

      Yorum Ekle

    1. Samsung Impression LCD Flex Cable Replacement, Keyboard: adım 7, 1 resimden 1.
      • Remove the two base screws along the edge of the silver piece, where you just removed the black end piece.

      • The screws are 2.7mm in length.

      • The bottom black end cap will snap out.

      FixBot'a Sor

      Yorum Ekle

    2. Samsung Impression LCD Flex Cable Replacement: adım 8, 2 resimden 1. Samsung Impression LCD Flex Cable Replacement: adım 8, 2 resimden 2.
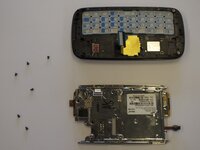
      • Remove the six 2.7 mm screws holding the silver plate on and set aside (fig. 1).

      • Separate the silver plate and phone frame (fig. 2).

      FixBot'a Sor

      Yorum Ekle

    3. Samsung Impression LCD Flex Cable Replacement: adım 9, 1 resimden 1.
      • The silver piece you are left with is the physical keyboard assembly.

      FixBot'a Sor

      Yorum Ekle

    1. Samsung Impression LCD Flex Cable Replacement, LCD Flex Cable: adım 10, 2 resimden 1. Samsung Impression LCD Flex Cable Replacement, LCD Flex Cable: adım 10, 2 resimden 2.
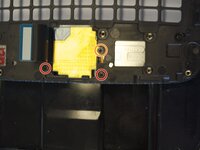
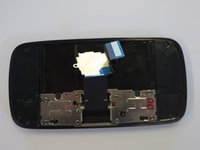
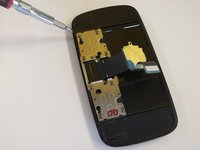
      • Remove the 3 screws holding down the flex cable.

      • The two screws on the black frame are 2.0 mm in length.

      • The top right screw that goes through the circle port on the flex cable is 2.3 mm.

      • Remove the keyboard slider frame. The flex cable should be exposed, but not free.

      FixBot'a Sor

      Yorum Ekle

    2. Samsung Impression LCD Flex Cable Replacement: adım 11, 1 resimden 1.
      • Remove the four 3.5 mm outer screws.

      FixBot'a Sor

      Yorum Ekle

    3. Samsung Impression LCD Flex Cable Replacement: adım 12, 3 resimden 1. Samsung Impression LCD Flex Cable Replacement: adım 12, 3 resimden 2. Samsung Impression LCD Flex Cable Replacement: adım 12, 3 resimden 3.
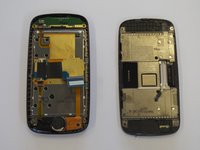
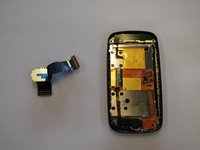
      • Slide the phone apart and remove the 3.5 mm screw on the top middle (fig. 1).

      • Remove the outer shell by prying the edges off with your fingers or a small screwdriver (fig. 2).

      • The device will now be in two pieces (fig. 3).

      FixBot'a Sor

      Yorum Ekle

    4. Samsung Impression LCD Flex Cable Replacement: adım 13, 2 resimden 1. Samsung Impression LCD Flex Cable Replacement: adım 13, 2 resimden 2.
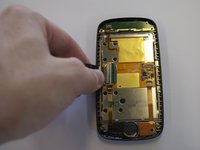
      • Lift the tab underneath the blue tape and gently pull the flex cable (fig. 1).

      • The flex cable will now be completely free (fig. 2).

      FixBot'a Sor

      Yorum Ekle

Sonuç

To reassemble your device, follow these instructions in reverse order.

İptal et: Bu kılavuzu tamamlamadım.

2 farklı kişi bu kılavuzu tamamladı.

Saul Villatoro

Üyelik tarihi: 04/25/11

260 İtibar

7 adet Kılavuz yazıldı

Ekip

Cal Poly, Team 8-10, Regan Spring 2011 Cal Poly, Team 8-10, Regan Spring 2011 üyesi

CPSU-REGAN-S11S8G10

4 Üyeler

45 adet Kılavuz yazıldı

0Kılavuz Yorumları

Yorum Ekle

İstatistikleri Görüntüle:

Son 24 Saat: 2

Son 7 gün: 11

Son 30 gün: 39

Her zaman: 7,884