Bu sürüm, hatalı düzenlemeler içerebilir. En son doğrulanmış bellek kopyası dönün.
Neye ihtiyacın var
-
Bu adım çevrilmemiş. Çevrilmesine yardım edin
-
With the camera facing LCD side up, slide the battery compartment lid to the right.
-
Remove the old batteries.
-
-
Bu adım çevrilmemiş. Çevrilmesine yardım edin
-
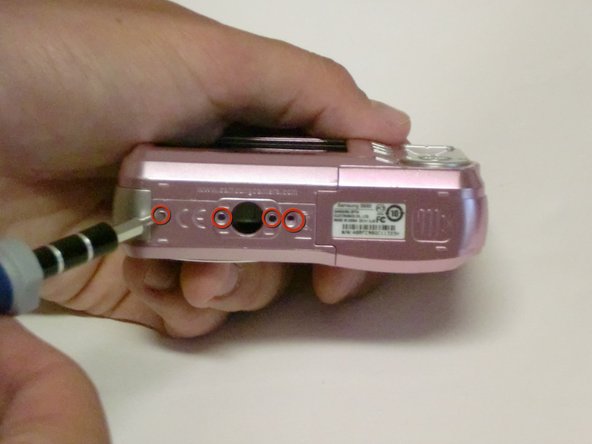
Remove all screws along the edges of the camera, using a #00 Phillips screwdriver.
-
-
Bu adım çevrilmemiş. Çevrilmesine yardım edin
-
Slide open the battery compartment cover before removing the exterior covers of the camera.
-
-
Bu adım çevrilmemiş. Çevrilmesine yardım edin
-
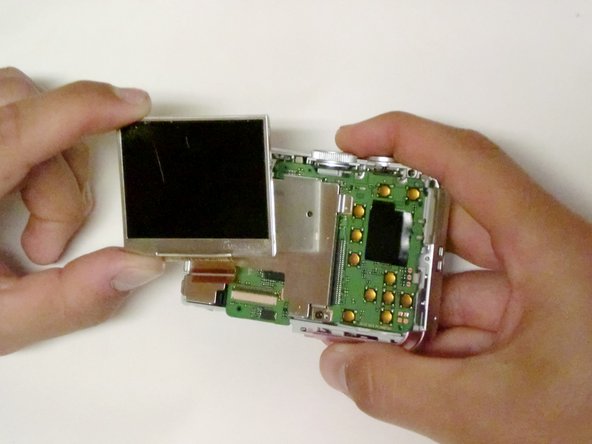
Carefully pull the back case (the side showing the LCD screen) away from the front half.
-
There are clips securing the top of the back case. Do not be afraid to use the proper amount of force to remove the back case.
-
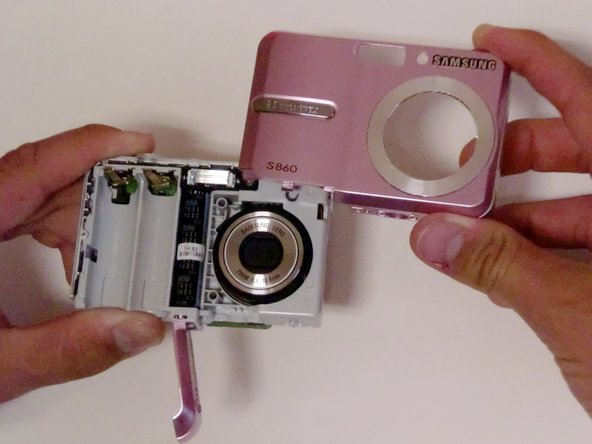
Turn the camera around to the front (the lens side). Carefully remove the front case.
-
There are also clips on the lens' side as well, so do not be afraid to use force.
-
-
Bu adım çevrilmemiş. Çevrilmesine yardım edin
-
Position the camera so the LCD screen is facing you.
-
Remove the LCD screen from the screen plate.
-
Replace the broken LCD screen with the functioning LCD screen.
-
-
-
Bu adım çevrilmemiş. Çevrilmesine yardım edin
-
Remove all screws along the edges of the camera, using a #00 Phillips screwdriver.
-
The screws should be 4.3 mm in length.
-
Save them for putting the camera back together.
-
-
Bu adım çevrilmemiş. Çevrilmesine yardım edin
-
Turn the bottom edge of the camera towards you.
-
Slide open the battery chamber.
-
This must be done to remove the exterior covers of the camera.
-
-
Bu adım çevrilmemiş. Çevrilmesine yardım edin
-
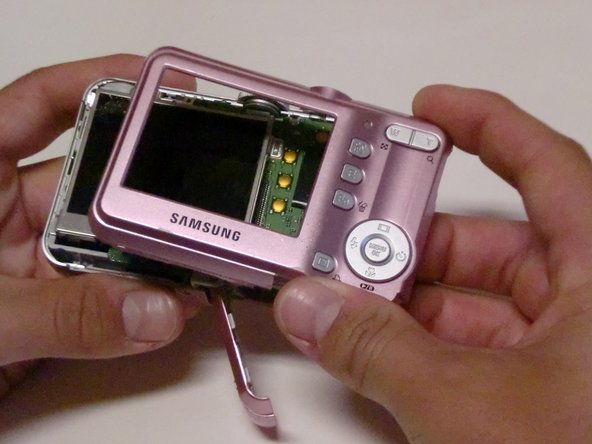
Carefully pull the back of the camera (the LCD screen side) away from the front.
-
There are clips securing the top of the back case. Do not be afraid to use the proper amount of force to remove the back case.
-
Turn the camera to the front (the flash side). Carefully remove.
-
There are clips on this side as well. Again, do not be afraid to use force.
-
-
Bu adım çevrilmemiş. Çevrilmesine yardım edin
-
Orient the camera so the LCD screen is facing you.
-
Remove any tape holding it down, and then lift the LCD screen from the screen plate.
-
Lift the hinged lip where the ribbon enters the connector. Remove the ribbon from the logic board by pulling it gently away from the logic board.
-
-
Bu adım çevrilmemiş. Çevrilmesine yardım edin
-
Remove all screws from the screen plate, using a #00 Philips screwdriver.
-
The screws should be 4.5 mm in length.
-
Separate the screen plate and logic board.
-
-
Bu adım çevrilmemiş. Çevrilmesine yardım edin
-
There is another ribbon attached to the logic board. It is located on the upper left edge of the logic board.
-
Similar to the other ribbon, remove by gently pulling in the opposite direction of the logic board. The "ears" on the cable can be used to help pull it free.
-
-
Bu adım çevrilmemiş. Çevrilmesine yardım edin
-
Using a #00 Philips screwdriver, unscrew the screws connecting the logic board to the camera.
-
You should be removing three 3.32 mm long screws.
-
Separate the logic board and the core of the camera.
-
-
Bu adım çevrilmemiş. Çevrilmesine yardım edin
-
To separate the logic board from the camera, carefully pull the logic board away from the camera.
-
Be careful not to damage the battery compartment. The battery sensors are attached to the logic board, so be gentle.
-
The USB connector is going to want to hang up on the housing, but once you have that free, the battery leads will slide out relatively easily.
-


İptal et: Bu kılavuzu tamamlamadım.
2 farklı kişi bu kılavuzu tamamladı.
Ekip

Cal Poly, Team 33-72, Johann Spring 2010 Cal Poly, Team 33-72, Johann Spring 2010 üyesi
CPSU-JOHANN-S10S33G72
4 Üyeler
6 adet Kılavuz yazıldı