
Seville Classics MSC10166 Disassembly

Queena Phung ve 9 diğer katkıda bulunanlar
En son 15 Oca 2026 tarihinde güncellendi
Görüntüleme: 13 B
İstatistikleri görüntüle:
- Son 24 Saat:
- 4
- Son 7 Gün:
- 24
- Son 30 Gün:
- 159
- Her zaman:
- 13.080
Yorumlar: 1
1 comment on steps.
Tamamlandı: 2 3
2 kişi bu kılavuzu "tamamlandı" olarak işaretledi. Sıradaki sen olacak mısın?
3 kişi bu kılavuzu "tamamlandı" olarak işaretledi. Siz de dahil - harika iş!
Sık Kullanılanlar: 2 3
2 kişi bu kılavuzu favorilerine ekledi (ve abone oldu). Sıradaki sen olacak mısın?
Siz de dahil olmak üzere 3 kişi bu kılavuzu favorilerine ekledi (ve abone oldu)!
İşlem Görüntüleri
Öykünün yıldızı olun! Belirli eylemlerin nasıl gerçekleştirileceğini daha iyi göstermek için bu kılavuza resimler gerekli.
Daha İyi Resimler Gerekli
Daha iyi fotoğraflar bu kılavuzu geliştirecektir. Yeni fotoğraflar çekerek, düzenleyerek ya da yükleyerek katkıda bulunun!
Daha Fazla Görsel Gerekli
Biraz daha fazla görsel sayesinde bu kılavuzdaki prosedürler apaçık olacaktır.
Eksik Ayrıntılar
Bu kılavuzun bazı ayrıntıları eksik. Kullanıcılara yardımcı olmak için şunlardan birini ekleyin: Aletler, zorluk ya da zaman.
Giriş
1. adıma git ↓This repair guide solves any rotation and vibration problems that the fan might have. The track at the bottom of the fan is the main source of rotation and vibration problems. Use the tear-down guide to remove all other components to get to the track.
Neye ihtiyacın var
Aletler


-
-
-
Use the Phillips #2 screwdriver to remove the four 6 mm screws by unscrewing counterclockwise.
 FixBot'a Sor
-
-
-
Remove the Phillips 6 mm screw that holds the circuit board to the outer shell of the fan.
-
-
-
Remove the top cover containing the circuit board and the wires by pulling it away from the outer shell of the fan.
-
-
-
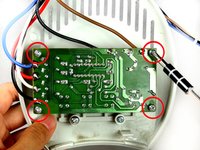
Remove the screws from the four corners of the circuit board.
-
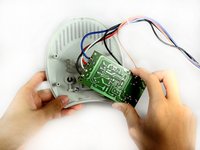
Remove the circuit board from the top cover.
-
-
-
-
-
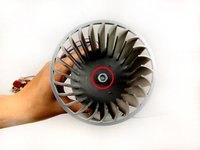
In order to remove the fan blade, use pliers to remove the holding nut.
-
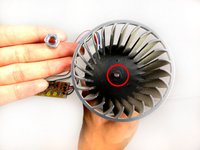
After the holding nut is loose, use the pliers to pull up to remove the nut.
-
-
-
-
Remove the two bronze Phillips 29-mm bolts that hold the fan blade to the transformer.
-
Use a pair of pliers to hold the nut at the bottom of the transformer, as you unscrew from left-to-right at the top of the transformer. After, pull up and remove both the screw and nut.
-
-
-
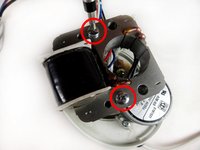
Next, remove the two silver Phillips (8-mm head) 40-mm screws from the transformer.
-
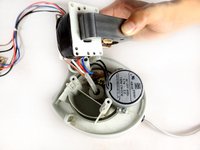
The transformer should be free after this step.
-
-
-
-
-
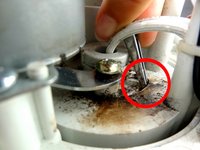
Clean the track, removing any obstructions.
-
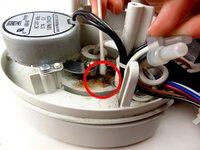
Lubricate the track with grease.
-
-








To reassemble your device, follow these instructions in reverse order.
İptal et: Bu kılavuzu tamamlamadım.
2 farklı kişi bu kılavuzu tamamladı.

Ekip

Cal Poly, Team 15-46, Forte Fall 2012 Cal Poly, Team 15-46, Forte Fall 2012 üyesi
CPSU-FORTE-F12S15G46
5 Üyeler
72 adet Kılavuz yazıldı
