Ana içeriğe geç

Shark Steam Pocket Mop Water Tank / Bladder Replacement

Neye ihtiyacın var

  1. Shark Steam Pocket Mop Water Tank / Bladder Replacement, Back Panel: adım 1, 3 resimden 1. Shark Steam Pocket Mop Water Tank / Bladder Replacement, Back Panel: adım 1, 3 resimden 2. Shark Steam Pocket Mop Water Tank / Bladder Replacement, Back Panel: adım 1, 3 resimden 3.
    • Begin by removing the 8 quarter inch phillips head screws found along the back panel

    • Once all 8 screws have been removed, gently remove the back panel from the rest of the mop's body

  2. Shark Steam Pocket Mop Water Tank / Bladder Replacement, Water Tank / Bladder: adım 2, 2 resimden 1. Shark Steam Pocket Mop Water Tank / Bladder Replacement, Water Tank / Bladder: adım 2, 2 resimden 2.
    • Start by gently moving the midframe from the top portion of the panel to expose the bottom portion of the mop's water tank / bladder.

  3. Shark Steam Pocket Mop Water Tank / Bladder Replacement: adım 3, 3 resimden 1. Shark Steam Pocket Mop Water Tank / Bladder Replacement: adım 3, 3 resimden 2. Shark Steam Pocket Mop Water Tank / Bladder Replacement: adım 3, 3 resimden 3.
    Bu adımda kullanılan alet:
    Tweezers
    $4.99
    Satın Al
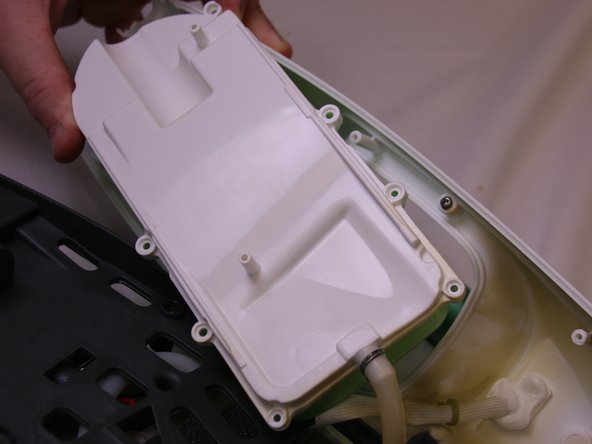
    • Remove the 10 quarter inch phillips head screws from the bottom portion of the water tank / bladder.

    • Then gently lift the water tank / bladder out of its plastic housing. and turn it over.

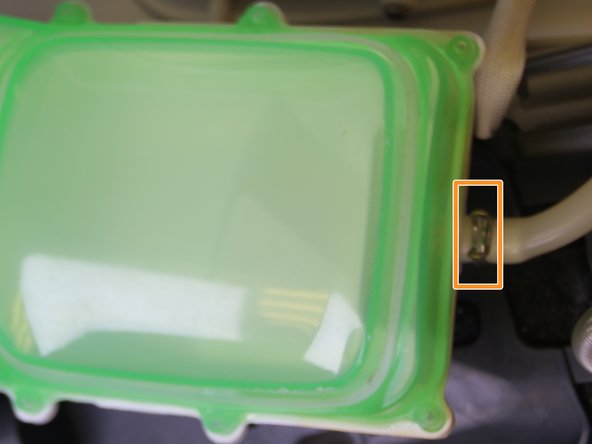
    • To fully remove the water tank / bladder, use your tweezers to remove the metal ring that keeps the hose fastened to the plastic tank.

Sonuç

To reassemble your device, follow these instructions in reverse order.

Jacob Howe

Üyelik tarihi: 10/10/17

549 İtibar

5 adet Kılavuz yazıldı

Ekip

USF Tampa, Team S13-G7, Cagle Fall 2017 USF Tampa, Team S13-G7, Cagle Fall 2017 üyesi

USFT-CAGLE-F17S13G7

4 Üyeler

10 adet Kılavuz yazıldı

0 Yorum

Yorum Ekle

İstatistikleri Görüntüle:

Son 24 Saat: 1

Son 7 gün: 6

Son 30 gün: 10

Her zaman: 636