Neye ihtiyacın var
-
-
Position the tablet on a flat surface in front of you and place it face down.
-
-
-
Remove silver side panels with prying tool by snapping them of the outer casing of the tablet.
-
-
-
-Remove 9 screws by unscrewing the ones behind the panels with a bit driver. There are four screws on one side and five on the other. All which need to be removed.
-
-
-
-
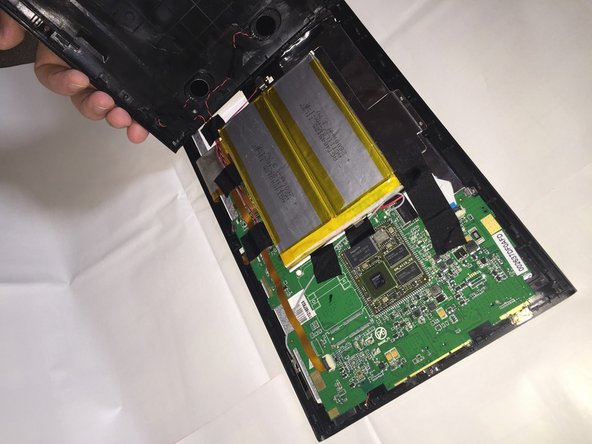
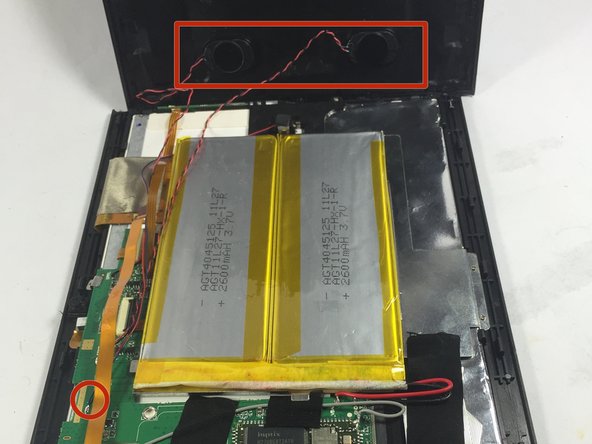
Snap the back cover of the tablet off of the front cover, hence removing the tablet’s outer casing. Be cautious when removing because the speaker wires connect the two casings of the tablet.
-
-
-
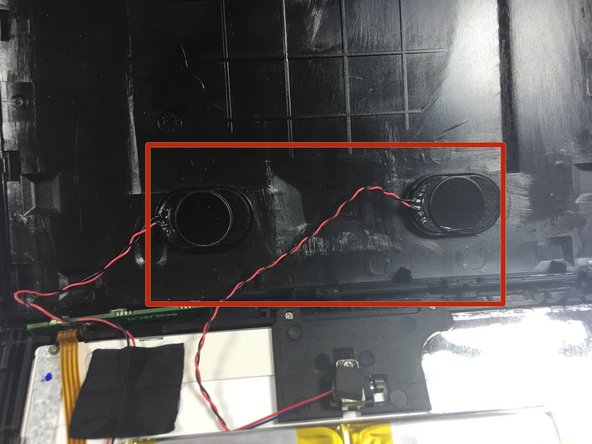
The speakers are located on the inside of the back casing. They are two small black ovals thats are connected with two sets of black and red wires and connect to the logic board.
-
-
-
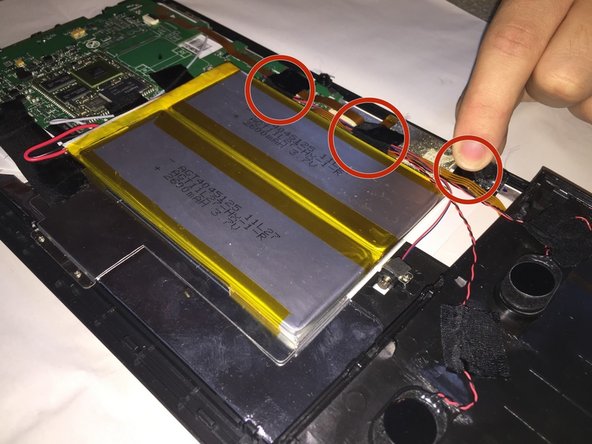
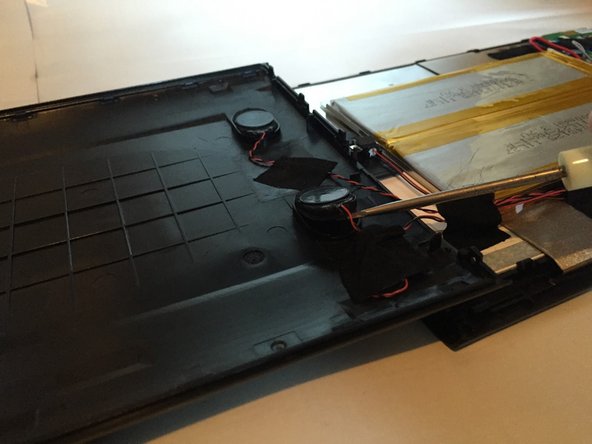
Using a prying tool lift the edge of the speakers where the wires are attached. Follow the wires connected to the speakers and remove the black tape. There is one piece of tape for each speaker and three pieces of tape that attach them to the logic board. Remove all carefully.
-
-
-
Using the wire snippers, cut the defective speaker wires as close to the circuit board as possible. Then gently remove the defective speakers from their housings with your hands.
-
-
-
First plug in the Soldering iron and wait for it to heat up. If your soldering iron has a dial, adjust the setting somewhere between 15 and 40 Watts..
-
Then connect the prepped speaker wire to the same spot where the previous wire was removed from.
-
Next take the new speakers and solder the ends of each set of wires to the logic board. The red wires go to the positive and the black wire goes to negative,which is labeled on the logic board. Do this by touching the soldering iron to the twisted copper wire for about a second to heat the wire.
-
Next, touch the solder to the soldering iron, so that a small amount of solder melts and forms a small bead between the surfaces being connected. (Avoid pooling of solder material by keeping this step between 3-4 seconds)
-
Lastly secure the new wires with the black tape and place the speaker back into its original slot.
-
To reassemble your device, follow these instructions in reverse order.
To reassemble your device, follow these instructions in reverse order.


