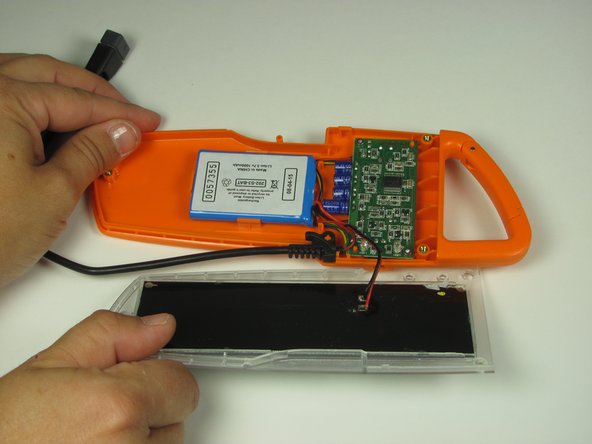
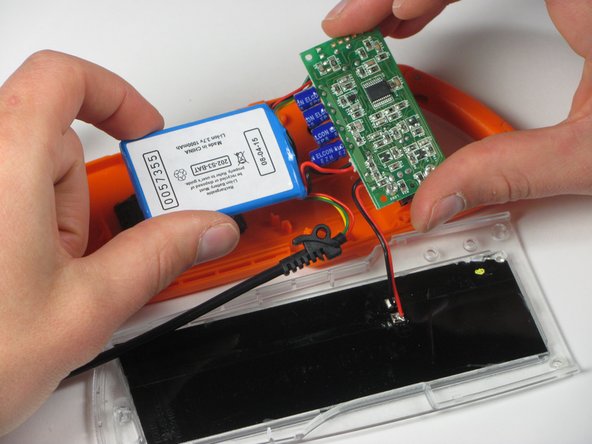
Ana içeriğe geç

Solio Rocsta Internal Components Replacement

Arşivlenmiş Kılavuz
Bu kılavuz sadece arşivsel amaçlarla muhafaza edilmiştir. Onarımınızı gerçekleştirmek için kılavuzun güncel halini kullanın.

Neye ihtiyacın var

  1. Solio Rocsta Internal Components Replacement, Internal Components: adım 1, 1 resimden 1.
    • Remove the three 7mm Torx T7 screws.

  2. Solio Rocsta Internal Components Replacement: adım 2, 3 resimden 1. Solio Rocsta Internal Components Replacement: adım 2, 3 resimden 2. Solio Rocsta Internal Components Replacement: adım 2, 3 resimden 3.
    • Insert the flat end of the spudger between the top panel and the body.

    • Use the spudger as a lever to carefully pry apart the two panels.

    • As you pry, take care not to break the small orange clip holding the top to the body.

    • Lift the panel above and away to disconnect the panel from the body.

    • Be careful when lifting because you could break the wiring connecting the motherboard to the panel.

  3. Solio Rocsta Internal Components Replacement: adım 3, 2 resimden 1. Solio Rocsta Internal Components Replacement: adım 3, 2 resimden 2.
    • Lift the panel off the body and set it next to the device.

    • Remember to use caution when lifting because you could break the wiring connecting the motherboard to the panel.

  4. Solio Rocsta Internal Components Replacement: adım 4, 1 resimden 1.
    • Remove the two 6mm Torx T6 screws from the motherboard.

  5. Solio Rocsta Internal Components Replacement: adım 5, 2 resimden 1. Solio Rocsta Internal Components Replacement: adım 5, 2 resimden 2.
    • Lift the end of the USB cord out of the body.

    • The cord fits over an orange peg.

  6. Solio Rocsta Internal Components Replacement: adım 6, 3 resimden 1. Solio Rocsta Internal Components Replacement: adım 6, 3 resimden 2. Solio Rocsta Internal Components Replacement: adım 6, 3 resimden 3.
    • Lift up the battery with your fingers or with the flat end of the spudger.

    • Be prepared to use force because the battery is adhered to the body.

    • Do not try to remove the battery completely because the wiring connects to the motherboard.

  7. Solio Rocsta Internal Components Replacement: adım 7, 2 resimden 1. Solio Rocsta Internal Components Replacement: adım 7, 2 resimden 2.
    • Remove the battery and the motherboard from the body.

Sonuç

To reassemble your device, follow these instructions in reverse order.

Bir başkası bu kılavuzu tamamladı.

Aimee Whiteside

Üyelik tarihi: 05/21/15

1 İtibar

1 Kılavuz yazıldı

Ekip

iFixit, Team 1-1, Goldberg SU 2015 iFixit, Team 1-1, Goldberg SU 2015 üyesi

FIX-GOLDBERG-SU15S1G1

3 Üyeler

1 Kılavuz yazıldı

0 Yorum

Yorum Ekle

İstatistikleri Görüntüle:

Son 24 Saat: 0

Son 7 gün: 0

Son 30 gün: 0

Her zaman: 58