Giriş
If the screen of your Sony Alpha 6000 is damaged and needs to be replaced then this guide is for you. This removal process is susceptible to breakage due to the amount of force that may be required in removing certain components.
Neye ihtiyacın var
-
-
Make sure the camera is turned off by turning the switch to OFF.
 FixBot'a Sor
-
-
-
Flip the camera around to access the battery compartment.
-
Slide the battery compartment lock to the left to unlock it.
-
-
-
-
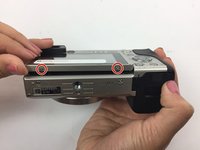
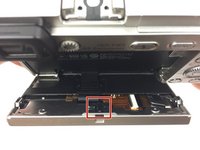
Locate and unscrew the two 3 mm screws on the bottom of the screen.
-
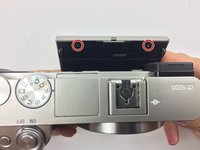
Pull the screen out from the top to reveal the two screws behind the screen; unscrew the two 3 mm screws.
-
-
-
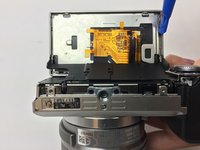
Flip the screen so it is facing up and then have the bottom of the camera facing yourself.
-
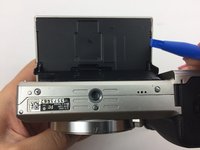
Using a spudger, remove the larger back panel.
-
Flip the camera right side up and pull back the screen.
-
Remove the smaller black panel on the back of the screen.
-
-
Bu adımda kullanılan alet:Tweezers$4.99
-
Locate the small "H" shaped clip on the back of the screen.
-
Remove the clip with tweezers
-
-
-
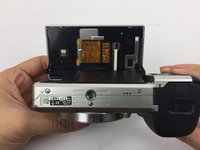
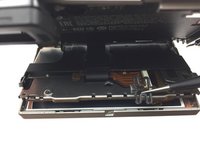
Flip the screen back so it is facing up and then have the bottom of the camera facing you. The yellow circuit board should now be exposed.
-
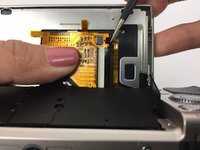
Hold down the yellow circuit board that the ribbon cables are attached to.
-
-
-
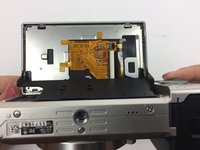
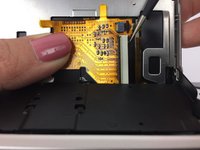
Using a plastic opening tool, separate the silver panel from the actual screen.
-
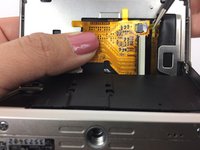
Carefully slide the ribbon cables through the narrow opening to fully remove the screen.
-


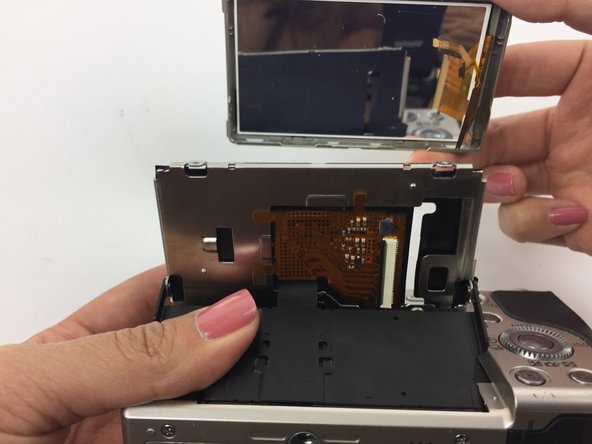

Now your screen is ready to be replaced! To reassemble your device, follow these instructions in reverse order.
İptal et: Bu kılavuzu tamamlamadım.
Bir başkası bu kılavuzu tamamladı.

Ekip

USF Tampa, Team 4-5, Passmore Fall 2016 USF Tampa, Team 4-5, Passmore Fall 2016 üyesi
USFT-PASSMORE-F16S4G5
3 Üyeler
14 adet Kılavuz yazıldı