Bu sürüm, hatalı düzenlemeler içerebilir. En son doğrulanmış bellek kopyası dönün.
Neye ihtiyacın var
-
Bu adım çevrilmemiş. Çevrilmesine yardım edin
-
Use your hand to remove the small back cover by gently pulling upward.
-
-
Bu adım çevrilmemiş. Çevrilmesine yardım edin
-
Using a screwdriver, remove the two 12 mm pan head screws.
-
-
Bu adım çevrilmemiş. Çevrilmesine yardım edin
-
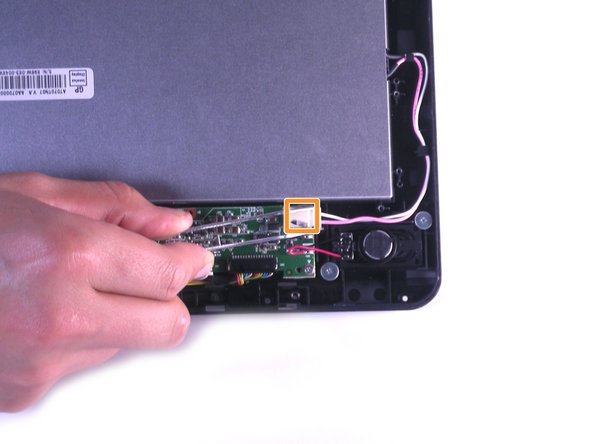
Remove the wires attached to the white base using tweezers to pull them up.
-
-
Bu adım çevrilmemiş. Çevrilmesine yardım edin
-
Referring back to Step 8, do the same with the wires attached to the black base.
-
-
-
Bu adım çevrilmemiş. Çevrilmesine yardım edin
-
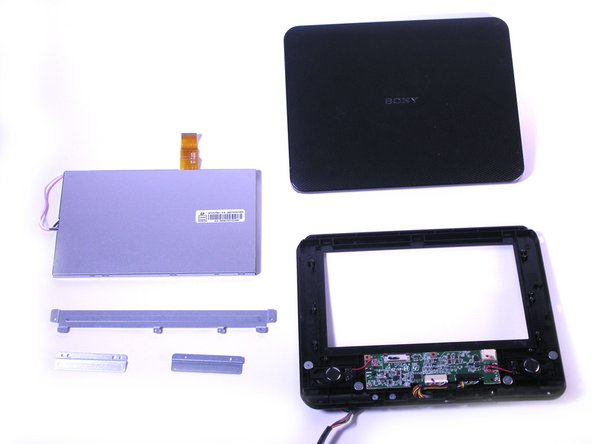
The screen should now be completely separated from the main device.
-
-
Bu adım çevrilmemiş. Çevrilmesine yardım edin
-
Remove the four rubber feet and the screws beneath.
-
Remove the two exposed screws on the left side.
-
Pull back the cables until the screw is visible.
-
-
Bu adım çevrilmemiş. Çevrilmesine yardım edin
-
Using the spudger, separate the top and bottom covers.
-
-
Bu adım çevrilmemiş. Çevrilmesine yardım edin
-
Using spudger, push the lock clips to unlock the ribbon cable.
-
Using tweezers, pull the connector loose.
-
-
Bu adım çevrilmemiş. Çevrilmesine yardım edin
-
Place your hand on the front of the screen and push upwards.
-


İptal et: Bu kılavuzu tamamlamadım.
2 farklı kişi bu kılavuzu tamamladı.
Ekip

Cal Poly, Team 11-21, Maness Winter 2012 Cal Poly, Team 11-21, Maness Winter 2012 üyesi
CPSU-MANESS-W12S11G21
4 Üyeler
5 adet Kılavuz yazıldı