Ana içeriğe geç

Sony Handycam DCR-DVD650 LCD Touchscreen Replacement

Arşivlenmiş Kılavuz
Bu kılavuz sadece arşivsel amaçlarla muhafaza edilmiştir. Onarımınızı gerçekleştirmek için kılavuzun güncel halini kullanın.

Neye ihtiyacın var

  1. Sony Handycam DCR-DVD650 LCD Touchscreen  Replacement, LCD Touchscreen: adım 1, 2 resimden 1. Sony Handycam DCR-DVD650 LCD Touchscreen  Replacement, LCD Touchscreen: adım 1, 2 resimden 2.
    • Remove the first screw located on the bottom of the LCD screen by using a cross tip screwdriver.

  2. Sony Handycam DCR-DVD650 LCD Touchscreen  Replacement: adım 2, 1 resimden 1.
    • Turn the LCD screen either clockwise or counterclockwise for a better view of the screw.

    • Remove the second screw.

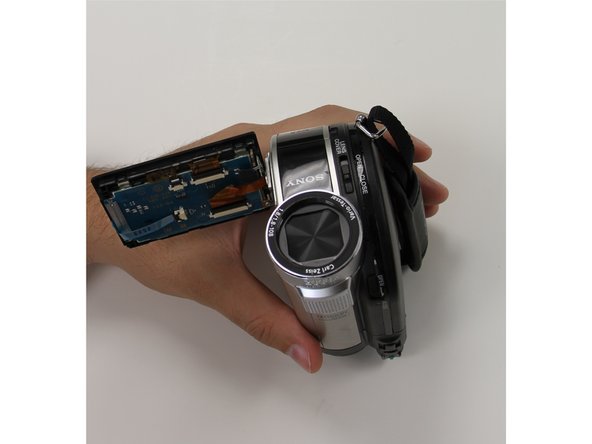
  3. Sony Handycam DCR-DVD650 LCD Touchscreen  Replacement: adım 3, 2 resimden 1. Sony Handycam DCR-DVD650 LCD Touchscreen  Replacement: adım 3, 2 resimden 2.
    • Place a plastic opening tool along the outside of the touchscreen.

    • Follow the path to remove the panel.

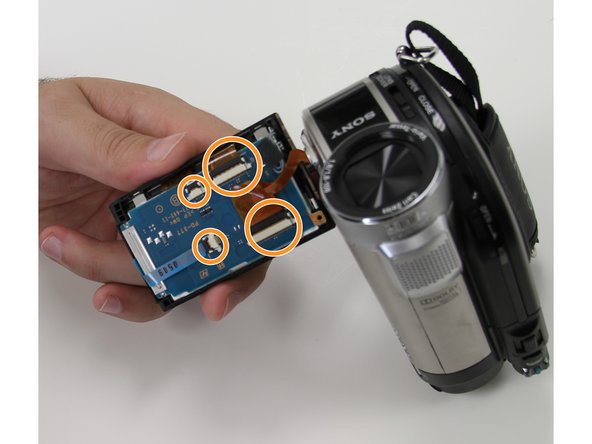
  4. Sony Handycam DCR-DVD650 LCD Touchscreen  Replacement: adım 4, 2 resimden 1. Sony Handycam DCR-DVD650 LCD Touchscreen  Replacement: adım 4, 2 resimden 2.
    • Remove each of the ribbon cables off by lifting up on the black tab.

    • Remove all ribbon cables before continuing unto the next step.

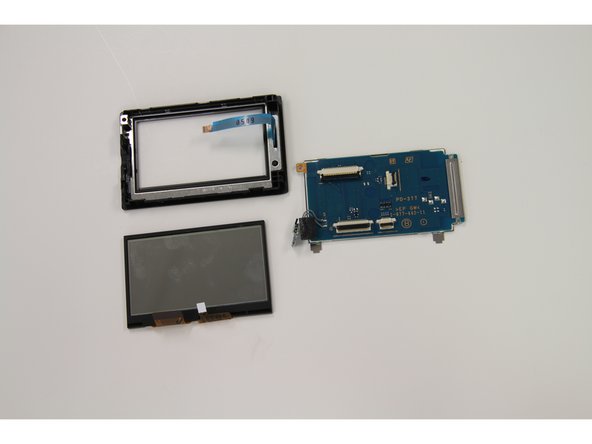
  5. Sony Handycam DCR-DVD650 LCD Touchscreen  Replacement: adım 5, 2 resimden 1. Sony Handycam DCR-DVD650 LCD Touchscreen  Replacement: adım 5, 2 resimden 2.
    • Unscrew the final screw located on the top left corner.

    • Remove the screen.

Sonuç

To reassemble your device, follow these instructions in reverse order.

Bir başkası bu kılavuzu tamamladı.

santos guitron

Üyelik tarihi: 09/24/15

144 İtibar

1 Kılavuz yazıldı

Ekip

Texas Tech, Team 22-1, Rauch Fall 2015 Texas Tech, Team 22-1, Rauch Fall 2015 üyesi

TTU-RAUCH-F15S22G1

3 Üyeler

1 Kılavuz yazıldı

0 Yorum

Yorum Ekle

İstatistikleri Görüntüle:

Son 24 Saat: 0

Son 7 gün: 0

Son 30 gün: 1

Her zaman: 152