Ana içeriğe geç

Sony Handycam FDR-AX33 Speaker Replacement

Neye ihtiyacın var

  1. Sony Handycam FDR-AX33 Speaker Replacement, Panel: adım 1, 2 resimden 1. Sony Handycam FDR-AX33 Speaker Replacement, Panel: adım 1, 2 resimden 2.
    • Remove the battery by pushing the latch towards the body of the camera. Push the battery down and pull it out.

    • Remove the six black 4 mm Phillips #00 screws from the bottom panel of the camera.

    • Pull off the bottom panel. It may be difficult, but tugging on it shouldn't cause harm to yourself or the device.

    • Be sure to un-velcro the handle strap.

  2. Sony Handycam FDR-AX33 Speaker Replacement: adım 2, 3 resimden 1. Sony Handycam FDR-AX33 Speaker Replacement: adım 2, 3 resimden 2. Sony Handycam FDR-AX33 Speaker Replacement: adım 2, 3 resimden 3.
    • Remove the 3 mm Phillips #00 screw from the bottom of the camera.

    • Remove the 4 mm Phillips #00 screw from the right panel.

    • Pull the right panel off. Again, it might be difficult, but pulling hard shouldn't harm you or the camera.

    • You may have to use the opening tool to remove this panel.

  3. Sony Handycam FDR-AX33 Speaker Replacement: adım 3, 2 resimden 1. Sony Handycam FDR-AX33 Speaker Replacement: adım 3, 2 resimden 2.
    • Remove the two 4 mm Phillips #00 screws from the top right corner of the camera.

    • Remove the 4 mm Phillips #00 screw from in front of the flash mount.

  4. Sony Handycam FDR-AX33 Speaker Replacement: adım 4, 2 resimden 1. Sony Handycam FDR-AX33 Speaker Replacement: adım 4, 2 resimden 2.
    • Remove the 3 mm Phillips #00 screw from below the right side of the battery slot.

    • Remove the black 5 mm Phillips #00 screw from the top of the battery slot.

  5. Sony Handycam FDR-AX33 Speaker Replacement: adım 5, 3 resimden 1. Sony Handycam FDR-AX33 Speaker Replacement: adım 5, 3 resimden 2. Sony Handycam FDR-AX33 Speaker Replacement: adım 5, 3 resimden 3.
    • Remove the three 4 mm Phillips #00 screws from the left panel underneath the display screen.

    • You’ll need to extend the eyepiece by pulling it out from the body of the camera.

    • Pull the top panel off of the device with the iFixit opening tool.

  6. Sony Handycam FDR-AX33 Speaker Replacement: adım 6, 3 resimden 1. Sony Handycam FDR-AX33 Speaker Replacement: adım 6, 3 resimden 2. Sony Handycam FDR-AX33 Speaker Replacement: adım 6, 3 resimden 3.
    • Remove the top and bottom 4 mm Phillips #00 screws from the display screen hinge.

    • Use the iFixit opening tool to remove the screen hinge.

  7. Sony Handycam FDR-AX33 Speaker Replacement: adım 7, 2 resimden 1. Sony Handycam FDR-AX33 Speaker Replacement: adım 7, 2 resimden 2.
    • Remove the 3 mm Phillips #00 screw from between the eyepiece and the panel directly to the right of the battery slot.

    • Angle the eyepiece up to reach the screw with the screwdriver.

    • Take the panel directly to the right of the battery slot off of the camera.

  8. Sony Handycam FDR-AX33 Speaker Replacement: adım 8, 3 resimden 1. Sony Handycam FDR-AX33 Speaker Replacement: adım 8, 3 resimden 2. Sony Handycam FDR-AX33 Speaker Replacement: adım 8, 3 resimden 3.
    • Remove the 4 mm Phillips #00 screw above and to the right of the battery slot.

    • Pry the left panel out at an angle by pushing the plastic slat between the battery slot and the eyepiece.

    • Wiggle the left panel and pull it out gently.

    • The left panel can be hard to remove so make sure to apply a good amount of force, but be cautious to not harm yourself or the device.

  9. Sony Handycam FDR-AX33 Speaker Replacement, Speaker: adım 9, 2 resimden 1. Sony Handycam FDR-AX33 Speaker Replacement, Speaker: adım 9, 2 resimden 2.
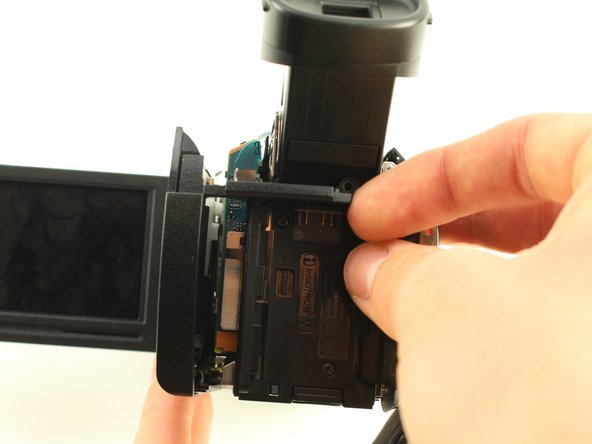
    • Remove the two 4 mm Phillips #00 screws from the inside of the screen hinge.

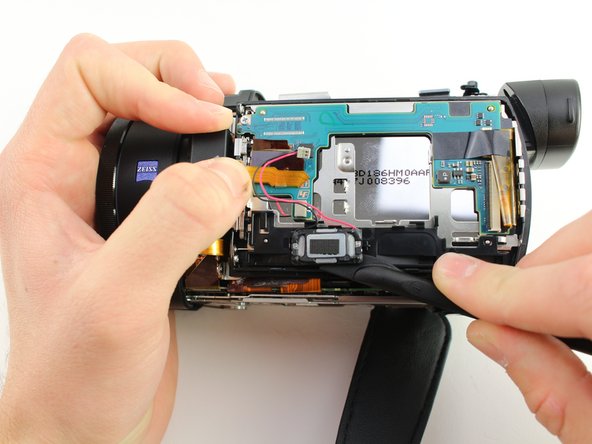
    • Remove the black plastic from the back of the screen.

  10. Sony Handycam FDR-AX33 Speaker Replacement: adım 10, 3 resimden 1. Sony Handycam FDR-AX33 Speaker Replacement: adım 10, 3 resimden 2. Sony Handycam FDR-AX33 Speaker Replacement: adım 10, 3 resimden 3.
    • Using the tweezers, unplug the speaker. The connector should be a white piece of plastic attached to a red wire and a black wire.

    • Remove the speaker with the black nylon spudger. The speaker is attached by adhesive.

Sonuç

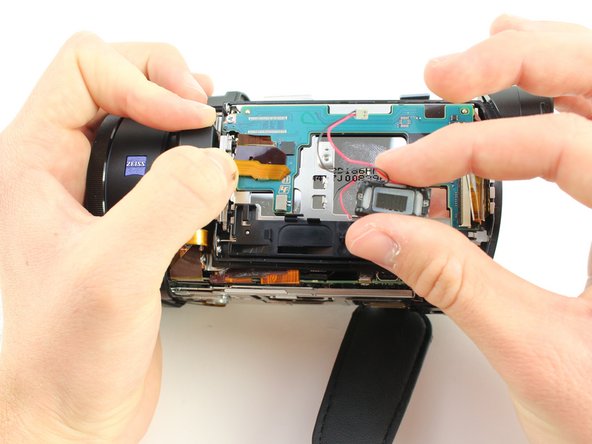
To reassemble your device, follow these instructions in reverse order.

Bir başkası bu kılavuzu tamamladı.

Lee Conway

Üyelik tarihi: 01/24/19

184 İtibar

2 adet Kılavuz yazıldı

Ekip

Cal Poly, Team S18-G2, White Winter 2019 Cal Poly, Team S18-G2, White Winter 2019 üyesi

CPSU-WHITE-W19S18G2

4 Üyeler

12 adet Kılavuz yazıldı

0 Yorum

Yorum Ekle

İstatistikleri Görüntüle:

Son 24 Saat: 0

Son 7 gün: 0

Son 30 gün: 5

Her zaman: 585