Giriş
This guide will teach you how to remove and replace the camera's screen. The guide has many steps and will take time to complete, but each step is relatively easy since the guide requires no advanced techniques. Stick to the steps, and you will get through it!
Neye ihtiyacın var
-
-
If the camera is on, rotate the power switch on top of the camera counterclockwise to turn the camera off.
 FixBot'a Sor
-
-
-
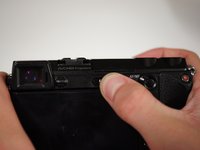
Flip the camera over such that the power switch points down.
-
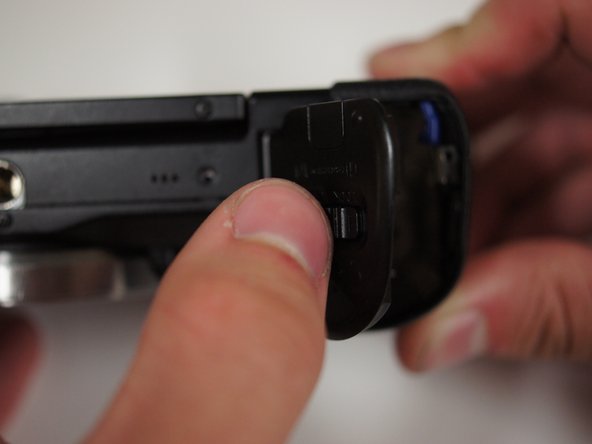
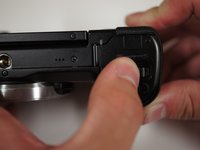
Slide the switch on the bottom of the camera grip towards the lens to open the battery door.
-
-
-
With the battery door open, push the blue lever in the battery compartment to release the battery.
-
-
-
To the left of the battery compartment, the SD card needs to be pushed down slightly with your fingers, which will cause the card to eject.
-
Pull the card out with your fingers.
-
-
-
First, turn the camera upside down.
-
Press the button located next to silver lens mount and rotate the lens counterclockwise.
-
Pull the lens away from the camera body.
-
-
-
Start by removing the two 5/32" #00 screws on the bottom of the camera using the Phillips #00 screwdriver.
-
-
-
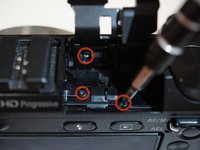
Remove the 5/32" #00 screw at the top of the compartment using the Phillips #00 screwdriver.
-
Remove the two 5/32" #00 screws from inside the compartment using the Phillips #00 screwdriver.
-
-
-
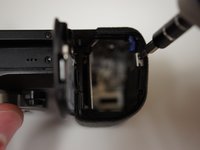
Looking at the left side of the camera, lift open the door that has 'HDMI' written on it.
-
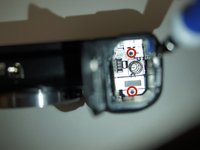
Remove the two visible 5/32" #00 screws using the Phillips #00 screwdriver.
-
-
-
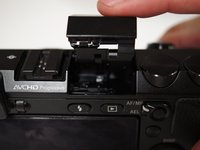
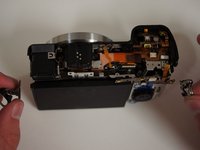
Looking at the back of the camera, press the button with a lightning bolt on it to pop the flash open.
-
Remove the three 5/32" screws from within the flash compartment using the Phillips #00 screwdriver.
-
Close the flash compartment.
-
-
-
Bu adımda kullanılan alet:Tweezers$4.99
-
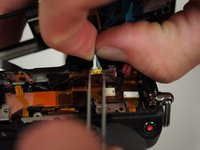
Using tweezers or your fingers, gently remove the blue ribbon cable from the port.
-
-
-
Place the tips of your tweezers on either side of the red jack.
-
Gently pull the red plug out of the jack.
-
Repeat those steps for the yellow jack and plug.
-
Now that the top is free, place it aside for later.
-
-
-
Lift the LCD screen with your fingers such that the screen is bent slightly away from the camera.
-
-
-
Starting at the bottom, gently pry the back panel away from the body of the camera using your fingers.
-
Once the back panel is free from the body, rotate the camera such that back is facing you and pull the back panel past the screen by rotating it to fit around the screen.
-
Set the back panel aside.
-
-
-
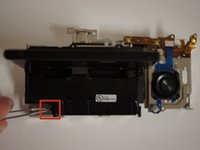
Remove the two 3/32" #00 screws located next to the viewfinder using the Phillips #00 screwdriver.
-
-
-
Use a Phillips #00 screwdriver to remove the two screws from the right side of the camera below the D ring:
-
The 5/32" upper screw
-
The 3/32" lower screw
-
-
-
Remove two more 3/32" #00 screws from the bottom of the camera using the Phillips #00 screwdriver.
-
-
-
Remove two more 3/32" #00 screws from the metal bracket on the left side of the camera using the Phillips #00 screwdriver.
-
-
Bu adımda kullanılan alet:Tweezers$4.99
-
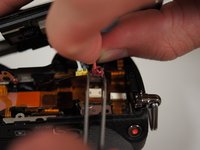
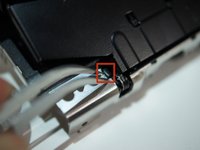
Unplug the orange ribbon cable on the top right of the camera next to the metal bracket by applying tweezers to the tabs on either side of the plug.
-
-
-
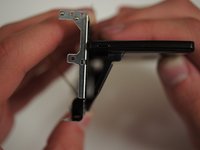
Before pulling off the assembly, fold the rightmost tab of the flexible circuit board away from the metal bracket.
-
-
-
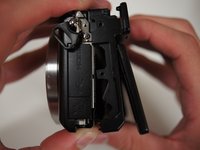
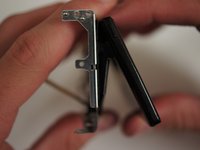
Pull on the D rings on either side of the camera to start removing the assembly.
-
Once the brackets are cleared from black shell, take them off and set them aside.
-
Continue to remove the screen assembly.
-
-
-
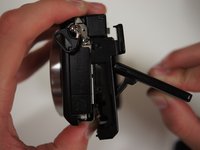
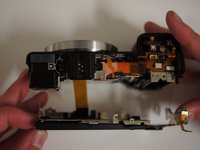
With the camera face down, move the assembly away from you to get a clear view of the wide ribbon cable.
-
Unplug the cable by applying tweezers to the tabs on either side of the plug.
-
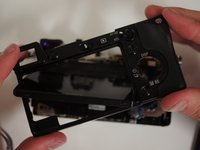
Set the LCD assembly aside.
-
-
-
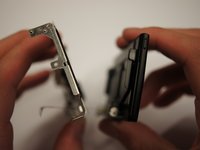
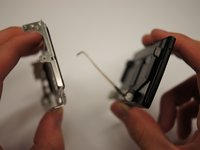
Set aside the camera body, top, and back plate and focus on the LCD assembly.
-
Rotate the screen away from the metal bracket.
-
-
Bu adımda kullanılan alet:Tweezers$4.99
-
Use the tweezers to push the tab near the bottom left corner of the panel to release a plastic cover from the back of the panel.
-
-
-
Turn the assembly around and slide the plastic cover off of the ribbon cable.
-
-
-
Remove the four 2/32" #00 screws from the metal bracket using the Phillips #00 screwdriver.
-


To reassemble your device, follow these instructions in reverse order.
İptal et: Bu kılavuzu tamamlamadım.
6 farklı kişi bu kılavuzu tamamladı.
Ekip

Cal Poly, Team 10-55, Amido Spring 2014 Cal Poly, Team 10-55, Amido Spring 2014 üyesi
CPSU-AMIDO-S14S10G55
4 Üyeler
46 adet Kılavuz yazıldı
4Kılavuz Yorumları
oh oh - took my nex 7 apart - got to step 28 "Conclusion" an realized I need more steps;
how do I disassemble ( and re-assemble )the "screen" that I have now "removes from the metal panel" ?!?
the part I was hopping to replace is part "LCD Screen Display for Sony nex7" a thin panel, dark gray on one side
and mirror-like on the other.....
Is there another how-to out there somewhere on how to do that ?
or did I order a pert that's to detailed/intricate for a how to series ....
Thanks for any advice
A much simpler process for this is to remove the two screws at the bottom of the screen, flip the screen to 90 degrees out from the body, and remove the two screws on the back. Then the top plastic piece can be worked loose and the LCD frame can be removed from the metal bracket.
Reinstallation is a little bit tricky because the plastic piece and the metal back plate much be held in place along with the LCD frame before any of the screws can be reinstalled.
Note that there is a plastic spring piece that clips in the top of the LCD frame, and also a clear/white plastic piece that sits on the light sensor element in the corner of the screen.
Long story short is that the metal LCD hinge does not need to be removed from the body in order to replace the LCD…. so, 4 screws instead of 28.
Much easier 4 screw method here:-