Bu sürüm, hatalı düzenlemeler içerebilir. En son doğrulanmış bellek kopyası dönün.
Neye ihtiyacın var
-
Bu adım çevrilmemiş. Çevrilmesine yardım edin
-
Use a Phillips #00 screwdriver to unscrew the two 5 mm screws located on the bottom of the back of the device.
-
-
Bu adım çevrilmemiş. Çevrilmesine yardım edin
-
Use a plastic opening tool to loosen the bottom portion of device.
-
-
Bu adım çevrilmemiş. Çevrilmesine yardım edin
-
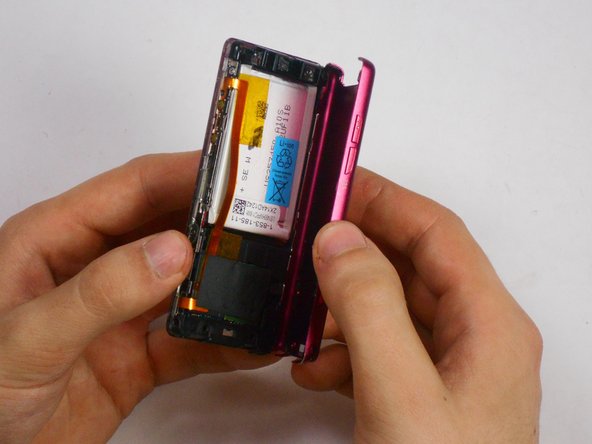
Use a plastic opening tool to loosen the top panel of the device.
-
-
Bu adım çevrilmemiş. Çevrilmesine yardım edin
-
Use a Phillips #00 screwdriver to remove the two 3 mm screws located on the portion under the top panel of the device.
-
-
-
Bu adım çevrilmemiş. Çevrilmesine yardım edin
-
Use a nylon spudger or tweezers to remove the plastic USB cover.
-
-
Bu adım çevrilmemiş. Çevrilmesine yardım edin
-
Use a Phillips #00 screwdriver to unscrew two 2 mm screws located on the top corners of the device.
-
-
Bu adım çevrilmemiş. Çevrilmesine yardım edin
-
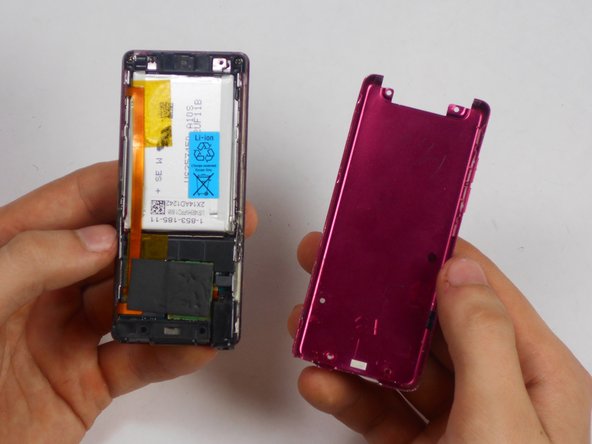
Use a nylon spudger or tweezers to remove the plastic protective plate at the top of device.
-
-
Bu adım çevrilmemiş. Çevrilmesine yardım edin
-
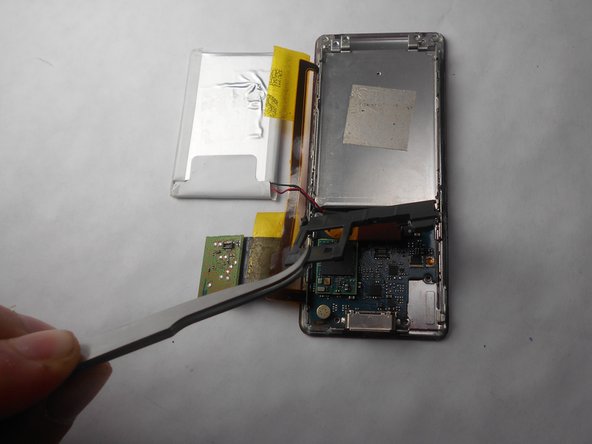
Remove the plastic protective frame located over the motherboard with tweezers and a spudger.
-
-
Bu adım çevrilmemiş. Çevrilmesine yardım edin
-
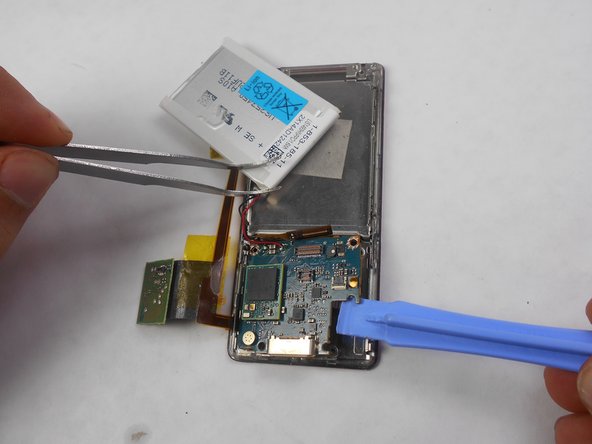
Remove screen connection from motherboard using tweezers and spudger.
-
-
Bu adım çevrilmemiş. Çevrilmesine yardım edin
-
Use a Phillips #00 screwdriver to remove two 3 mm screws at the bottom sides and two 1 mm screws at top sides of the device.
-
-
Bu adım çevrilmemiş. Çevrilmesine yardım edin
-
Use a Phillips #00 screwdriver to unscrew two 2 mm screws, and remove the motherboard from the device with tweezers and a plastic opening tool.
-
-
Bu adım çevrilmemiş. Çevrilmesine yardım edin
-
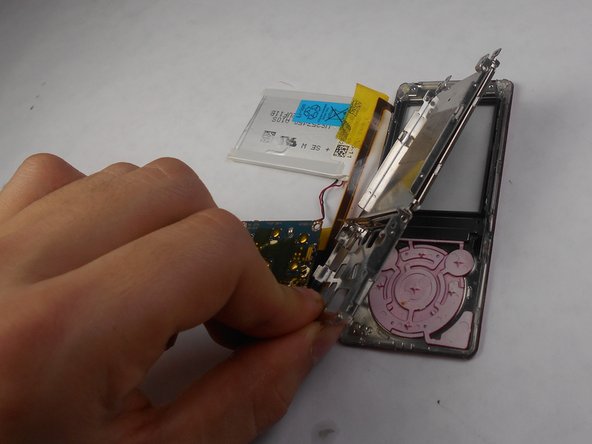
Disconnect the metal shielding plate from the front panel with tweezers or a plastic opening tool.
-
-
Bu adım çevrilmemiş. Çevrilmesine yardım edin
-
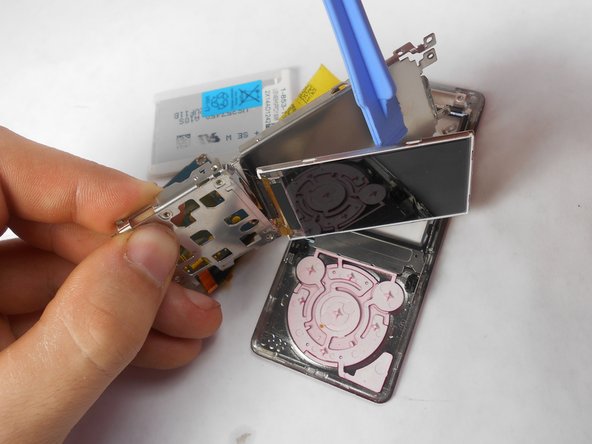
Use a plastic opening tool to remove the screen from metal back plate.
-


Ekip

USF Tampa, Team 17-6, Watkins Winter 2015 USF Tampa, Team 17-6, Watkins Winter 2015 üyesi
USFT-WATKINS-W15S17G6
4 Üyeler
7 adet Kılavuz yazıldı