Bu sürüm, hatalı düzenlemeler içerebilir. En son doğrulanmış bellek kopyası dönün.
Neye ihtiyacın var
-
Bu adım çevrilmemiş. Çevrilmesine yardım edin
-
Remove the speaker case from the outer casing by prying it from the base of the speaker using a metal spudger.
-
-
Bu adım çevrilmemiş. Çevrilmesine yardım edin
-
Remove the four T-8 screws (15 mm long) from the black speaker face.
-
-
Bu adım çevrilmemiş. Çevrilmesine yardım edin
-
Pry the two rubber end pieces loose enough to pry off two pieces of the long plastic casing from the speaker body using a metal spudger.
-
-
Bu adım çevrilmemiş. Çevrilmesine yardım edin
-
Pry the two remaining rubber pieces of the casing completely away from the body of the speaker with the same metal pry tool.
-
-
-
Bu adım çevrilmemiş. Çevrilmesine yardım edin
-
Once you have removed the outer blue casing, four T-8 screws (15 mm long) will be revealed on each corner. After removing these screws, simply pull the top part of the speaker way from the body to get the the inner part of the speaker.
-
-
Bu adım çevrilmemiş. Çevrilmesine yardım edin
-
Once you have gotten to the internal parts of the speaker, there are seven wires connecting the speaker plate to the body of the speaker. Pinch the release tabs at the top of each of the four main wires to remove them.
-
-
Bu adım çevrilmemiş. Çevrilmesine yardım edin
-
Simply pull the thin wires on each side to remove them from their attachment points.
-
Remove the final red and black wire by gently pulling it apart.
-
This will ultimately detach the speaker plate from the base.
-
-
Bu adım çevrilmemiş. Çevrilmesine yardım edin
-
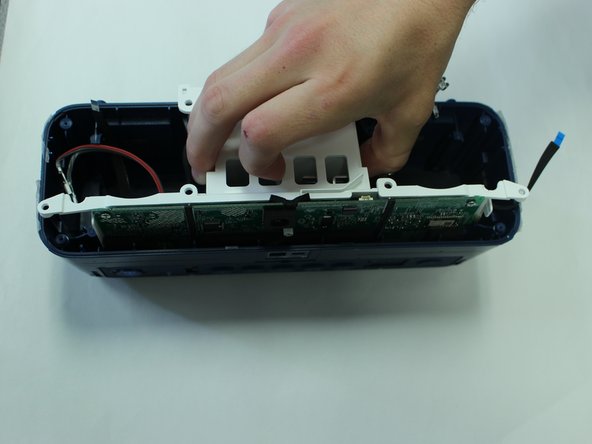
Remove the PH-1 (10mm) screw from the top of the speaker that is connected to the motherboard.
-
-
Bu adım çevrilmemiş. Çevrilmesine yardım edin
-
Disconnect the wire from the motherboard.
-
Then remove the motherboard and white case from the speaker.
-
-
Bu adım çevrilmemiş. Çevrilmesine yardım edin
-
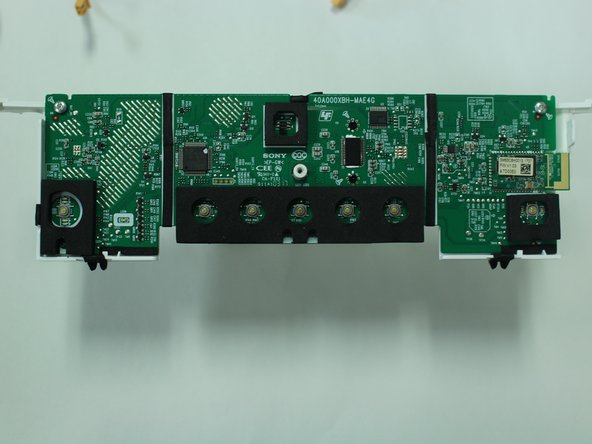
Remove the wires connected to the back of the motherboard before removing the white cover.
-
-
Bu adım çevrilmemiş. Çevrilmesine yardım edin
-
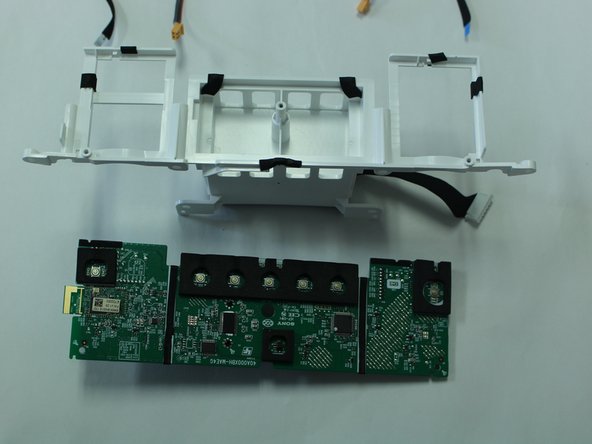
Remove the PH-1 screws (10 mm) from the motherboard to detach it from the outer white casing.
-


İptal et: Bu kılavuzu tamamlamadım.
3 farklı kişi bu kılavuzu tamamladı.
Ekip

University of Alabama, Team S1-G1, Bedsole Spring 2018 University of Alabama, Team S1-G1, Bedsole Spring 2018 üyesi
UA-BEDSOLE-S18S1G1
4 Üyeler
6 adet Kılavuz yazıldı
4 Yorum
This was a very informative breadown thanks. Im am looking to go further than this i am looking for the skhematic breadown of parts and resisters on the mother board. I have one that grounds out and wont come on so i just need to atlease be able to find the diodes on the board. Thanks again if ypu can help.
Indeed it is very informative, thanks for uploading these step details. I had to open up my same xb40 speaker coz it doesn’t start. When I pressed the power button the bluetooth light blinks for 2-3 sec and then it goes off along with the power light. So I showed the motherboard to the bluetooth speaker repair man, he told me the problem is with bluetooth chip without checking the circuit board. Can you further guide me on this please, where should i find the new motherboard, I live in India.
Where can I get a motherboard for the SRS-XB40?
Did you have any luck sourcing one?
maxhodg -