Ana içeriğe geç

Sony Vaio PCG-41216L Display Replacement

Neye ihtiyacın var

  1. Sony Vaio PCG-41216L Display Replacement, Display: adım 1, 2 resimden 1. Sony Vaio PCG-41216L Display Replacement, Display: adım 1, 2 resimden 2.
    • Remove the covers for the two 3mm Phillips head screws at the base of the screen.

    • Make sure the device is unplugged and turned off before proceeding to minimize the possibility of electrical damage to the device.

  2. Sony Vaio PCG-41216L Display Replacement: adım 2, 3 resimden 1. Sony Vaio PCG-41216L Display Replacement: adım 2, 3 resimden 2. Sony Vaio PCG-41216L Display Replacement: adım 2, 3 resimden 3.
    • Use a metal spudger to separate the top cover on the back of the screen. It will be a long, thin plastic section that has the SONY logo in the middle of it. This enables the disassembly of the rest of the screen frame.

  3. Sony Vaio PCG-41216L Display Replacement: adım 3, 2 resimden 1. Sony Vaio PCG-41216L Display Replacement: adım 3, 2 resimden 2.
    • Use the metal spudger on the sides of the frame to remove it from the screen.

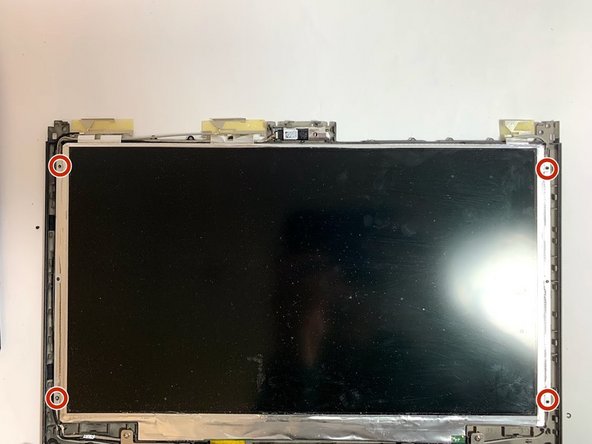
    • Remove the four 3mm Phillips head screws that secure the screen to the exterior of the laptop.

  4. Sony Vaio PCG-41216L Display Replacement: adım 4, 2 resimden 1. Sony Vaio PCG-41216L Display Replacement: adım 4, 2 resimden 2.
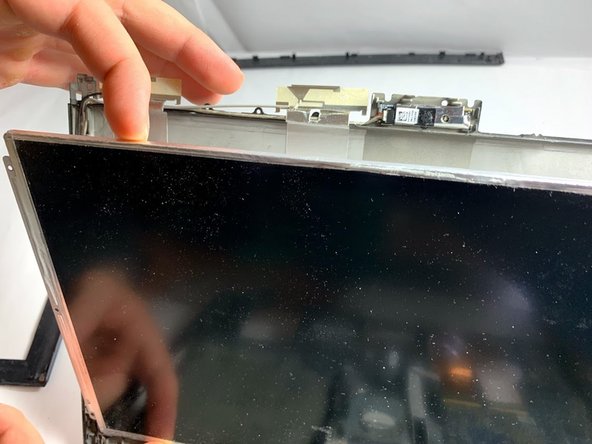
    • Carefully remove the screen from the supporting frame and lay it down on the keyboard of the laptop.

    • The wires connecting the screen to the body of the laptop will be exposed and fragile. It is important to proceed with caution.

  5. Sony Vaio PCG-41216L Display Replacement: adım 5, 2 resimden 1. Sony Vaio PCG-41216L Display Replacement: adım 5, 2 resimden 2.
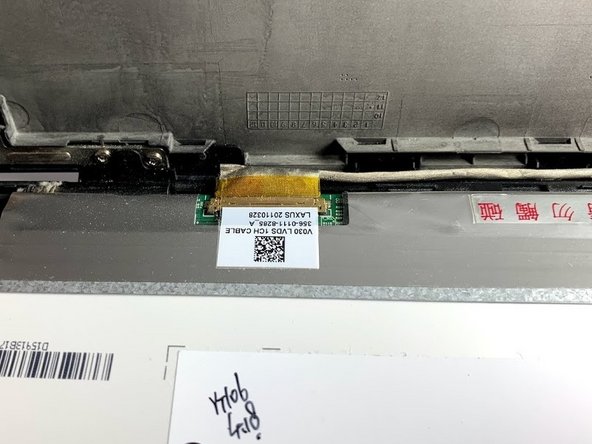
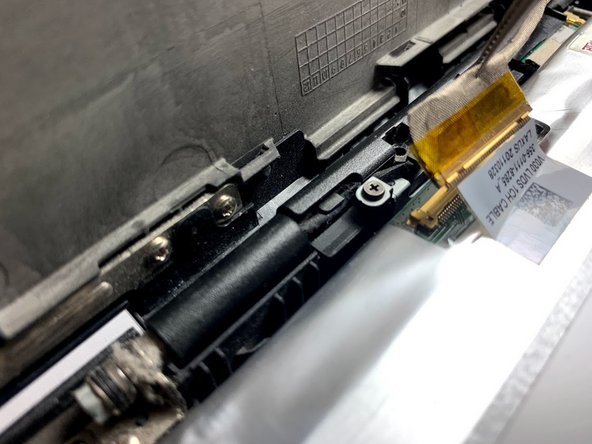
    • Locate the ribbon cable connecting the screen to the rest of the laptop.

    • It may be necessary to remove an adhesive seal in order to proceed.

  6. Sony Vaio PCG-41216L Display Replacement: adım 6, 3 resimden 1. Sony Vaio PCG-41216L Display Replacement: adım 6, 3 resimden 2. Sony Vaio PCG-41216L Display Replacement: adım 6, 3 resimden 3.
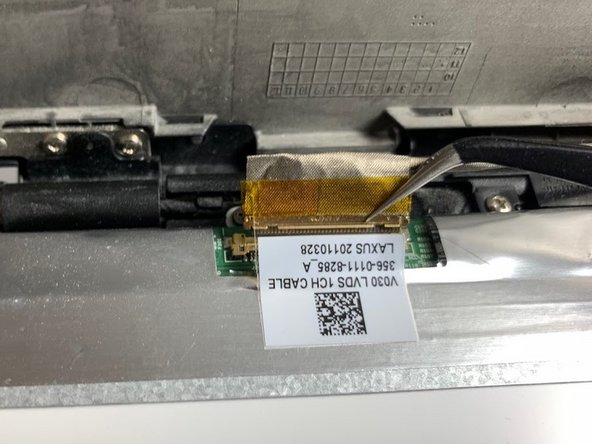
    • Use a pair of tweezers to remove the ribbon cable from the screen.

Sonuç

To reassemble your device, follow these instructions in reverse order.

Bir başkası bu kılavuzu tamamladı.

Bir Yorum

content de voir qu'il ne faut pas démonter l arrière du pc pour retirer la broche de l'écran merci pour ce topic

Serge Wilhelmy - Yanıt

Yorum Ekle

İstatistikleri Görüntüle:

Son 24 Saat: 1

Son 7 gün: 3

Son 30 gün: 12

Her zaman: 867