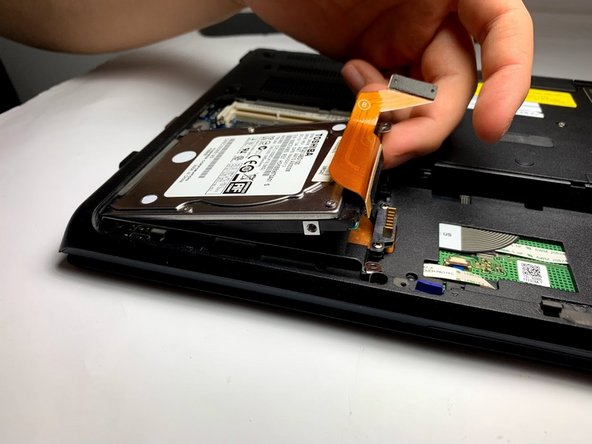
Ana içeriğe geç

Sony Vaio PCG-41216L Hard Drive Replacement

Neye ihtiyacın var

  1. Sony Vaio PCG-41216L Hard Drive Replacement, Hard Drive: adım 1, 2 resimden 1. Sony Vaio PCG-41216L Hard Drive Replacement, Hard Drive: adım 1, 2 resimden 2.
    • Flip the laptop over to begin the process.

    • Make sure the laptop is turned off and unplugged from the power cable.

  2. Sony Vaio PCG-41216L Hard Drive Replacement: adım 2, 3 resimden 1. Sony Vaio PCG-41216L Hard Drive Replacement: adım 2, 3 resimden 2. Sony Vaio PCG-41216L Hard Drive Replacement: adım 2, 3 resimden 3.
    • Remove the two 7mm Phillips #1 screws holding the battery cover.

  3. Sony Vaio PCG-41216L Hard Drive Replacement: adım 3, 3 resimden 1. Sony Vaio PCG-41216L Hard Drive Replacement: adım 3, 3 resimden 2. Sony Vaio PCG-41216L Hard Drive Replacement: adım 3, 3 resimden 3.
    • Peel off the ribbon cable, starting at the top by the wifi card.

  4. Sony Vaio PCG-41216L Hard Drive Replacement: adım 4, 3 resimden 1. Sony Vaio PCG-41216L Hard Drive Replacement: adım 4, 3 resimden 2. Sony Vaio PCG-41216L Hard Drive Replacement: adım 4, 3 resimden 3.
    • Remove all of the 7mm Phillips #1 casing screws around the hard drive.

  5. Sony Vaio PCG-41216L Hard Drive Replacement: adım 5, 1 resimden 1.
    • Pull the hard drive out, then remove the 3mm Phillips screws that connect the hard drive to the casing.

Sonuç

To reassemble your device, follow these instructions in reverse order.

0 Yorum

Yorum Ekle

İstatistikleri Görüntüle:

Son 24 Saat: 0

Son 7 gün: 9

Son 30 gün: 26

Her zaman: 2,220