Bu sürüm, hatalı düzenlemeler içerebilir. En son doğrulanmış bellek kopyası dönün.
Neye ihtiyacın var
-
Bu adım çevrilmemiş. Çevrilmesine yardım edin
-
Power off the laptop.
-
Unplug the charging cable and any other cables plugged into the laptop.
-
Turn the laptop over so that the back panel is facing upwards.
-
-
Bu adım çevrilmemiş. Çevrilmesine yardım edin
-
Locate two switches above the battery that lock it into place.
-
Push the left-hand switch, that says "lock" above it, so that it is unlocked.
-
-
Bu adım çevrilmemiş. Çevrilmesine yardım edin
-
Push and hold the right-hand switch, which says "release" above it, and lift the battery up out of its place.
-
-
Bu adım çevrilmemiş. Çevrilmesine yardım edin
-
Locate and unscrew the two highlighted 8 mm Phillips #1 screws.
-
-
-
Bu adım çevrilmemiş. Çevrilmesine yardım edin
-
Remove all the 8mm Phillips #1 screws on the backside of the laptop.
-
There are three 3mm and two 5.3mm screws under the battery that also need to be taken out.
-
There are three 3mm screws under the optical drives that also need to be taken out.
-
Remove the RAM panel in addition to the other screws. For further instructions, refer to the RAM replacement guide.
-
-
Bu adım çevrilmemiş. Çevrilmesine yardım edin
-
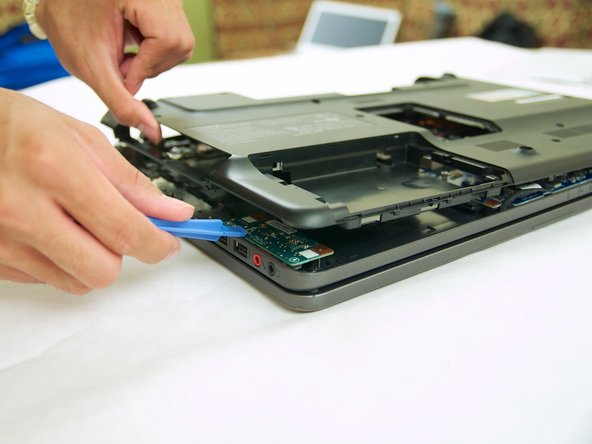
Pry along the edges of the back panel using the spudger.
-
-
Bu adım çevrilmemiş. Çevrilmesine yardım edin
-
Locate and remove three 5.3 mm Phillips #1 screws on the bottom of the fan.
-
Locate and remove the four 5.3 mm Phillips #1 screws on the top of the fan.
-
-
Bu adım çevrilmemiş. Çevrilmesine yardım edin
-
Locate and remove the four 3mm Phillips #1 screws above the processor and attached to the bronze heat-pipes.
-
Gently lift up the fan and heatsink from the the laptop.
-
-
Bu adım çevrilmemiş. Çevrilmesine yardım edin
-
The fan attached onto the heat sink with electrical tape. Removing the electrical tape allows you to replace the fan.
-


Ekip

Cal Poly, Team 9-17, Regan Spring 2014 Cal Poly, Team 9-17, Regan Spring 2014 üyesi
CPSU-REGAN-S14S9G17
4 Üyeler
18 adet Kılavuz yazıldı