Bu sürüm, hatalı düzenlemeler içerebilir. En son doğrulanmış bellek kopyası dönün.
Neye ihtiyacın var
-
Bu adım çevrilmemiş. Çevrilmesine yardım edin
-
Locate the battery on the bottom of the computer.
-
Flip the computer so that the battery faces you.
-
-
Bu adım çevrilmemiş. Çevrilmesine yardım edin
-
Locate the two latches with the words “lock” and “release” on them.
-
-
Bu adım çevrilmemiş. Çevrilmesine yardım edin
-
Push the latches towards each other and lift the battery to remove it.
-
-
Bu adım çevrilmemiş. Çevrilmesine yardım edin
-
Remove the memory door on the bottom of the computer to access the screw for the keyboard.
-
-
Bu adım çevrilmemiş. Çevrilmesine yardım edin
-
Remove the 6.7 mm screw that holds the keyboard assembly in place.
-
-
-
Bu adım çevrilmemiş. Çevrilmesine yardım edin
-
Slide the wires out, away from the solder connections.
-
Flip the computer over and open it.
-
-
Bu adım çevrilmemiş. Çevrilmesine yardım edin
-
Gently pry the keyboard assembly from the screen side, using an opening tool. You will need to lift the keyboard about two inches.
-
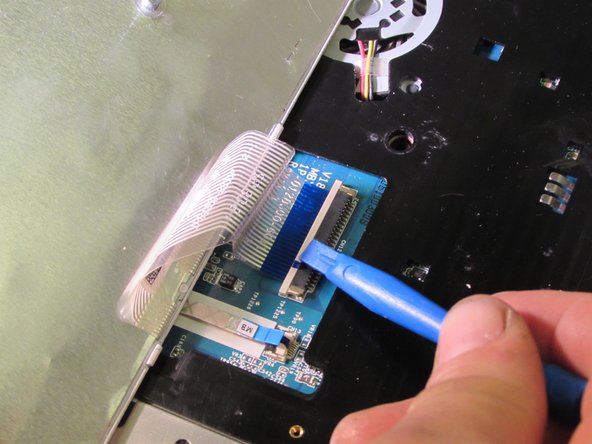
Using an opening tool, gently pull out and slightly up on the connector clip.
-
Gently lift the keyboard assembly up and out.
-
-
Bu adım çevrilmemiş. Çevrilmesine yardım edin
-
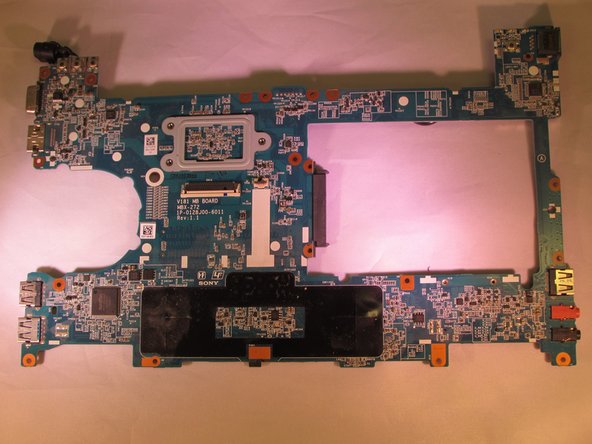
Locate and remove the screws holding the motherboard down.
-
Screws: L 4.6mm X D 1.85mm
-
-
Bu adım çevrilmemiş. Çevrilmesine yardım edin
-
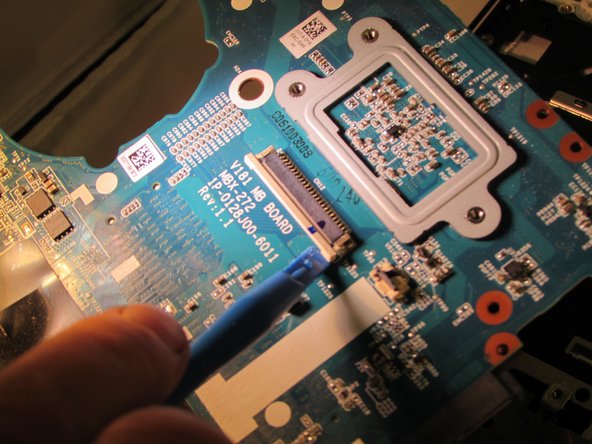
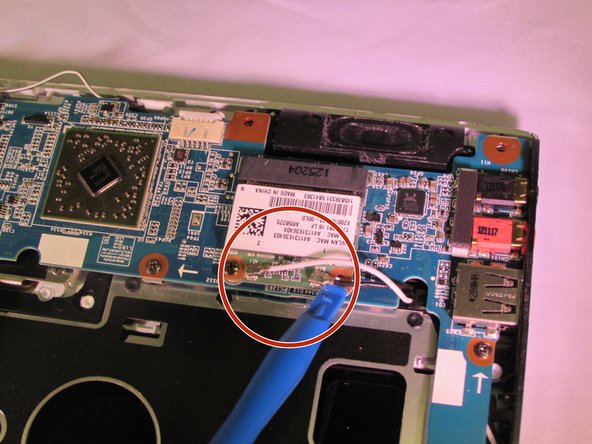
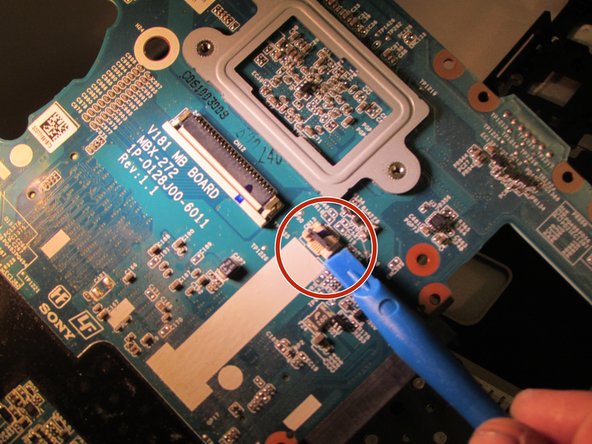
Locate the wires and connectors and remove them from the motherboard.
-
-
Bu adım çevrilmemiş. Çevrilmesine yardım edin
-
Lift the mother board out and safely put it to the side.
-
-
Bu adım çevrilmemiş. Çevrilmesine yardım edin
-
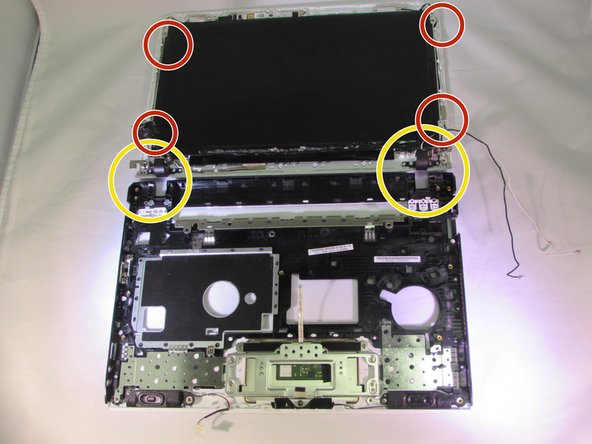
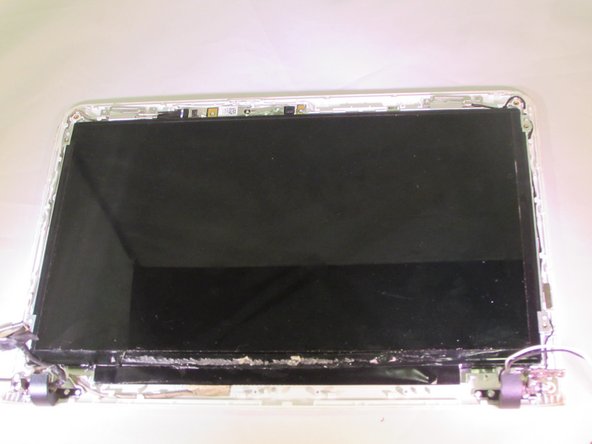
Locate screws. L 3.35mm X D 1.8mm
-
Remove Screws.
-
Lay the screen on a hard flat surface.
-
Remove hinges and wires for ease of removal.
-
-
Bu adım çevrilmemiş. Çevrilmesine yardım edin
-
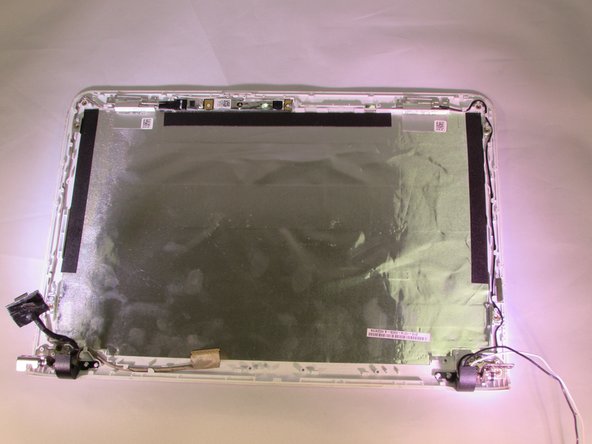
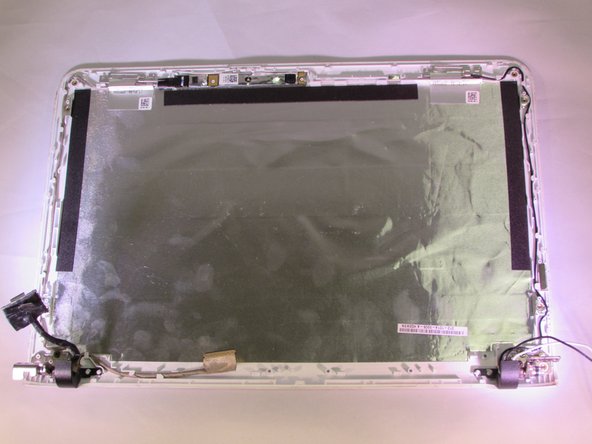
Gently remove the screen cover.
-
Be careful of the camera at the top of the screen.
-
Be careful of the seal tape between the cover and the screen.
-
-
Bu adım çevrilmemiş. Çevrilmesine yardım edin
-
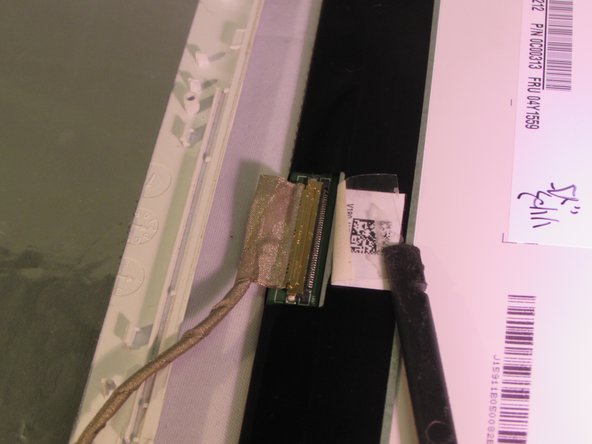
Locate the wires and connectors.
-
Unplug the wires from the connectors.
-
Be careful of the yellow tape around the connection.
-


İptal et: Bu kılavuzu tamamlamadım.
2 farklı kişi bu kılavuzu tamamladı.
Ekip

Eastern Washington University, Team 1-5, Crane Fall 2016 Eastern Washington University, Team 1-5, Crane Fall 2016 üyesi
EWU-CRANE-F16S1G5
4 Üyeler
10 adet Kılavuz yazıldı