Ana içeriğe geç

Sony Vaio VGN-FS640 Back Cover Replacement

Neye ihtiyacın var

  1. Sony Vaio VGN-FS640 Back Cover Replacement, Battery: adım 1, 1 resimden 1.
    • Lay the closed laptop on its screen so the bottom is facing towards you.

  2. Sony Vaio VGN-FS640 Back Cover Replacement: adım 2, 1 resimden 1.
    • Push both latches towards the center of the battery.

  3. Sony Vaio VGN-FS640 Back Cover Replacement: adım 3, 2 resimden 1. Sony Vaio VGN-FS640 Back Cover Replacement: adım 3, 2 resimden 2.
    • Revome the battery by pushing it away from the laptop.

    • Set the battery away from the laptop.

  4. Sony Vaio VGN-FS640 Back Cover Replacement, RAM Cover: adım 4, 2 resimden 1. Sony Vaio VGN-FS640 Back Cover Replacement, RAM Cover: adım 4, 2 resimden 2.
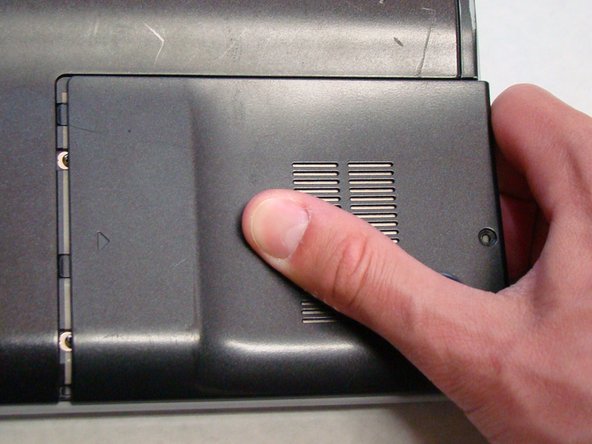
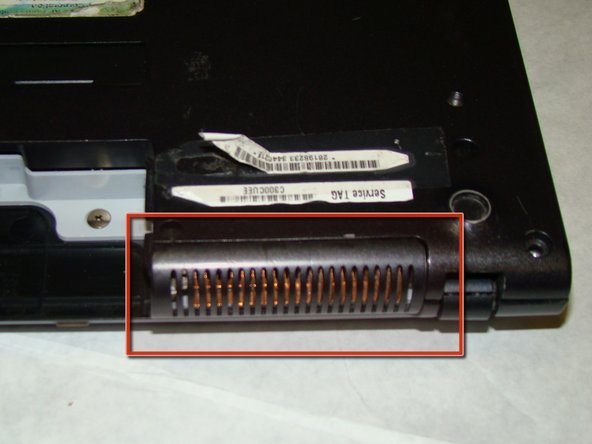
    • With the bottom of the laptop facing up, locate the RAM cover.

    • The RAM is covered by the panel with four columns of vents.

    • Locate the screw (Length: 4.8 mm) holding down the panel, which is near the edge of the laptop. Unscrew it with your phillips #0 screwdriver.

  5. Sony Vaio VGN-FS640 Back Cover Replacement: adım 5, 3 resimden 1. Sony Vaio VGN-FS640 Back Cover Replacement: adım 5, 3 resimden 2. Sony Vaio VGN-FS640 Back Cover Replacement: adım 5, 3 resimden 3.
    • Use your fingers to slide the cover away from the laptop. (It will only slide a few millimeters)

    • Once the panel is out of its locked position, it can be lifted out without any resistance.

  6. Sony Vaio VGN-FS640 Back Cover Replacement, Hard Drive: adım 6, 3 resimden 1. Sony Vaio VGN-FS640 Back Cover Replacement, Hard Drive: adım 6, 3 resimden 2. Sony Vaio VGN-FS640 Back Cover Replacement, Hard Drive: adım 6, 3 resimden 3.
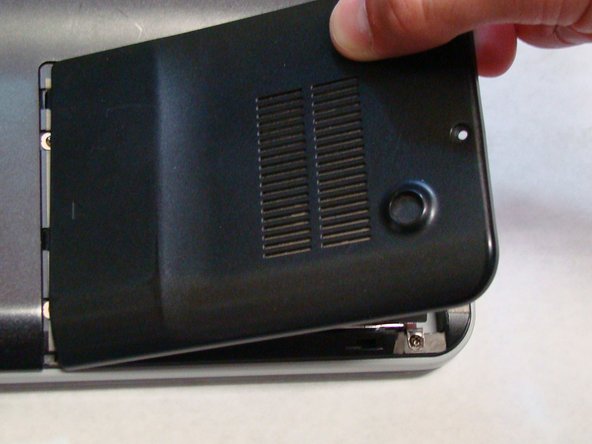
    • Locate and remove the screw (Length: 7.7mm) for the hard drive cover.

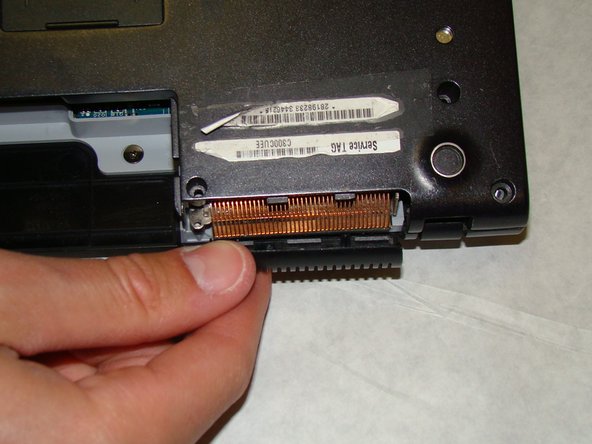
    • Slide the cover until it is free from the laptop case.

    • Lift the cover to remove.

  7. Sony Vaio VGN-FS640 Back Cover Replacement: adım 7, 3 resimden 1. Sony Vaio VGN-FS640 Back Cover Replacement: adım 7, 3 resimden 2. Sony Vaio VGN-FS640 Back Cover Replacement: adım 7, 3 resimden 3.
    • Locate and remove the four screws (Length: 7.7mm) holding the Hard Drive tray in place.

    • Using the tab on the tray, slide the Hard Drive away from the main body of the laptop.

    • The Hard Drive should now be disconnected.

    • Lift the drive out with the tab on the tray.

  8. Sony Vaio VGN-FS640 Back Cover Replacement, Back Cover: adım 8, 1 resimden 1.
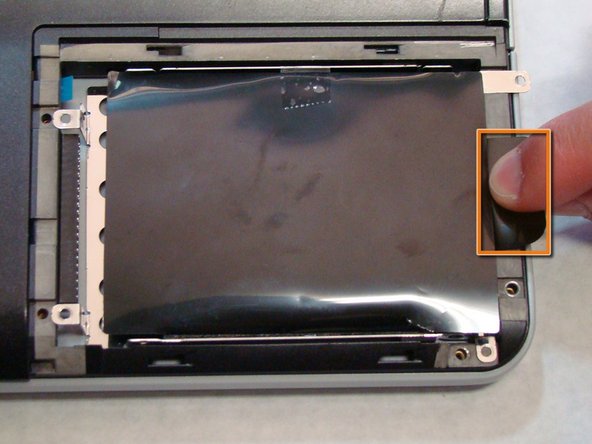
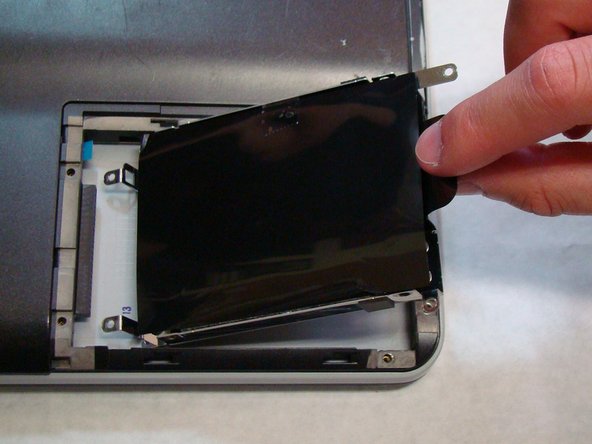
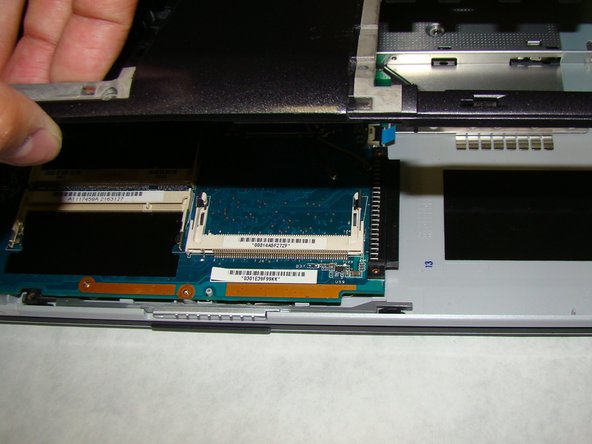
    • Locate the screws highlighted here. There are 16 total.

    • Using a Phillips #0 screwdriver, remove the screws (Length: 6.8mm) and place them on a tray for later use.

  9. Sony Vaio VGN-FS640 Back Cover Replacement: adım 9, 3 resimden 1. Sony Vaio VGN-FS640 Back Cover Replacement: adım 9, 3 resimden 2. Sony Vaio VGN-FS640 Back Cover Replacement: adım 9, 3 resimden 3.
    • Before you proceed, make sure you pay special attention to the way the small plastic part that covers the radiator fins is held in place. You will need to know how it attaches when you reassemble the laptop.

    • You do not need to actually remove the part at this time. It is held in place by the rest of the back cover and will fall off when back cover is removed in the next step.

  10. Sony Vaio VGN-FS640 Back Cover Replacement: adım 10, 2 resimden 1. Sony Vaio VGN-FS640 Back Cover Replacement: adım 10, 2 resimden 2.
    • After removing the screws, use your fingers to lift the back cover off the laptop.

  11. Sony Vaio VGN-FS640 Back Cover Replacement: adım 11, 1 resimden 1.
    • Remove the back cover and place it somewhere safe so you can locate it later.

Sonuç

To reassemble your device, follow these instructions in reverse order.

4 farklı kişi bu kılavuzu tamamladı.

Kevin Lau

Üyelik tarihi: 04/10/10

150 İtibar

2 adet Kılavuz yazıldı

Ekip

Cal Poly, Team 24-32, Regan Spring 2010 Cal Poly, Team 24-32, Regan Spring 2010 üyesi

CPSU-REGAN-S10S24G32

4 Üyeler

16 adet Kılavuz yazıldı

0 Yorum

Yorum Ekle

İstatistikleri Görüntüle:

Son 24 Saat: 0

Son 7 gün: 2

Son 30 gün: 11

Her zaman: 9,631