Bu sürüm, hatalı düzenlemeler içerebilir. En son doğrulanmış bellek kopyası dönün.
Neye ihtiyacın var
-
Bu adım çevrilmemiş. Çevrilmesine yardım edin
-
Tools you will need is the Phillips #00 precision screwdriver, Plastic Opening Tools, and tweezers.
-
Insert plastic opening tool in the corner of device and slide along edges to separate adhesive.
-
Remove cover
-
-
-
Bu adım çevrilmemiş. Çevrilmesine yardım edin
-
Remove tape connecting front camera to motherboard and then disconnect the camera from the port.
-
Lift the camera from the right and simply wiggle out of the slot.
-
-
Bu adım çevrilmemiş. Çevrilmesine yardım edin
-
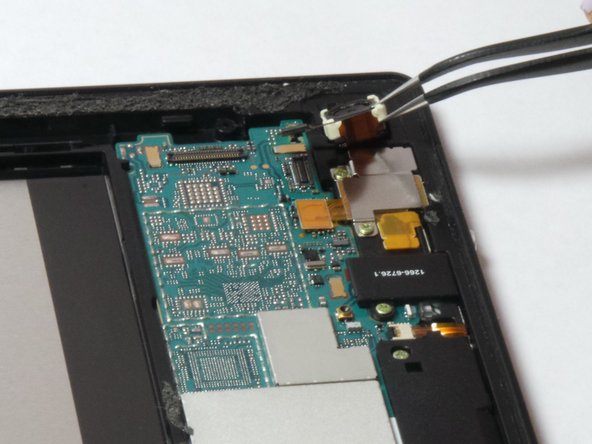
Disconnect the back camera from the port located in the upper right corner.
-
Lift up the camera cable using the tweezers.
-
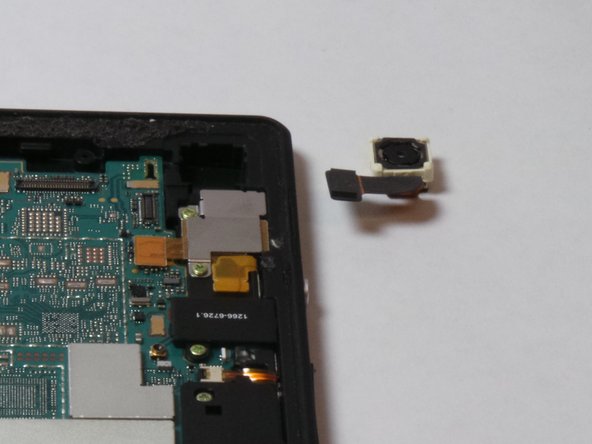
Wiggle out camera from the slot.
-


İptal et: Bu kılavuzu tamamlamadım.
2 farklı kişi bu kılavuzu tamamladı.
Ekip

USF Tampa, Team 15-6, Remmell Fall 2014 USF Tampa, Team 15-6, Remmell Fall 2014 üyesi
USFT-REMMELL-F14S15G6
3 Üyeler
7 adet Kılavuz yazıldı