Giriş
This is the step-by-step guide for replacing the Sony Xperia M4 Aqua front camera.
Neye ihtiyacın var
-
-
Place the phone face-down, and use a heat gun or hair dryer to evenly heat the back surface until to soften the adhesive.
-
-
-
-
Remove the four hex head 3mm screws at each corner of the motherboard with a screwdriver.
-
-
-
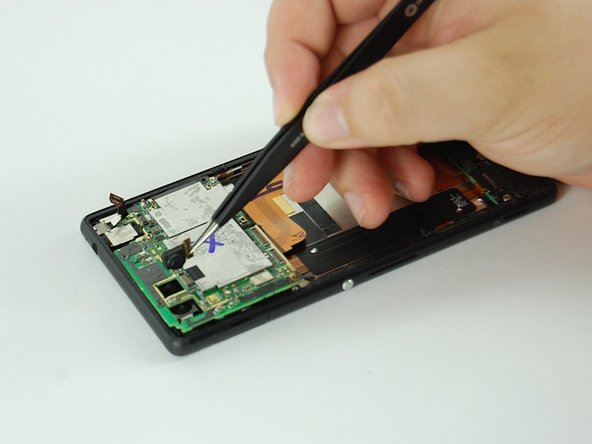
Remove three pieces of the securing bracket using tweezers
This step is wrong. It’s actually two security brackets, not three, as long as you don’t break the one on the left/upper side. If you do it like it’s shown here you will break this part. The correct way to do this is remove the bracket on the right side, then remove the board with the other bracket still attached. Watch this video to get an idea: https://youtu.be/9o1DGKT76eo (interesting part starting at 1:50).
-
-
-
Detach the rear camera connector from the front of the motherboard.
-
Remove the rear camera with your fingers or tweezers.
-
-
-
Release all connectors connecting to the motherboard.
-
Pry the motherboard up from the left side with the plastic pry tool and remove it.
-


To reassemble your device, follow these instructions in reverse order.
To reassemble your device, follow these instructions in reverse order.
İptal et: Bu kılavuzu tamamlamadım.
4 farklı kişi bu kılavuzu tamamladı.
Ekip

USF Tampa, Team 4-5, Lacy Spring 2016 USF Tampa, Team 4-5, Lacy Spring 2016 üyesi
USFT-LACY-S16S4G5
3 Üyeler
8 adet Kılavuz yazıldı