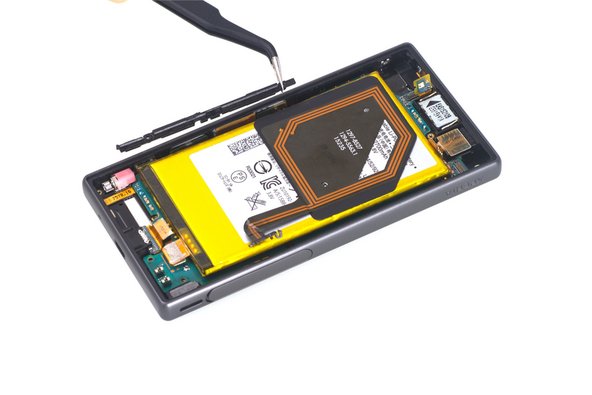
Ana içeriğe geç

Sony Xperia Z5C Charging port flex Replacement

Neye ihtiyacın var

  1. Sony Xperia Z5C Charging port flex Replacement, Charging port flex: adım 1, 2 resimden 1. Sony Xperia Z5C Charging port flex Replacement, Charging port flex: adım 1, 2 resimden 2.
    • Power off and remove SIM card tray.

  2. Sony Xperia Z5C Charging port flex Replacement: adım 2, 3 resimden 1. Sony Xperia Z5C Charging port flex Replacement: adım 2, 3 resimden 2. Sony Xperia Z5C Charging port flex Replacement: adım 2, 3 resimden 3.
    • Heat up the back cover to soften the adhesive.

    • Place the suction cup to open a gap from top side, then insert guitar picks and slide it to cut the adhesive underneath.

    • Remove back cover.

  3. Sony Xperia Z5C Charging port flex Replacement: adım 3, 2 resimden 1. Sony Xperia Z5C Charging port flex Replacement: adım 3, 2 resimden 2.
    • Remove all 10 Phillips screws.

    • Disconnect NFC clip and flashlight clip.

  4. Sony Xperia Z5C Charging port flex Replacement: adım 4, 3 resimden 1. Sony Xperia Z5C Charging port flex Replacement: adım 4, 3 resimden 2. Sony Xperia Z5C Charging port flex Replacement: adım 4, 3 resimden 3.
    • Remove the plastic bracket.

    • Pry up and remove back frame.

  5. Sony Xperia Z5C Charging port flex Replacement: adım 5, 3 resimden 1. Sony Xperia Z5C Charging port flex Replacement: adım 5, 3 resimden 2. Sony Xperia Z5C Charging port flex Replacement: adım 5, 3 resimden 3.
    • Remove front camera.

  6. Sony Xperia Z5C Charging port flex Replacement: adım 6, 3 resimden 1. Sony Xperia Z5C Charging port flex Replacement: adım 6, 3 resimden 2. Sony Xperia Z5C Charging port flex Replacement: adım 6, 3 resimden 3.
    • Remove rear camera.

  7. Sony Xperia Z5C Charging port flex Replacement: adım 7, 3 resimden 1. Sony Xperia Z5C Charging port flex Replacement: adım 7, 3 resimden 2. Sony Xperia Z5C Charging port flex Replacement: adım 7, 3 resimden 3.
    • Remove loudspeaker.

  8. Sony Xperia Z5C Charging port flex Replacement: adım 8, 3 resimden 1. Sony Xperia Z5C Charging port flex Replacement: adım 8, 3 resimden 2. Sony Xperia Z5C Charging port flex Replacement: adım 8, 3 resimden 3.
    • Release charging port connector.

    • Remove plastic protective bar.

    • Pry up motherboard assembly from this side. There are three flex connectors connecting the motherboard underneath. So pry up the motherboard assembly gently.

  9. Sony Xperia Z5C Charging port flex Replacement: adım 9, 1 resimden 1.
    • Remove charging port flex.

Sonuç

To reassemble your device, follow these instructions in reverse order.

9 farklı kişi bu kılavuzu tamamladı.

Witrigs

Üyelik tarihi: 11/24/15

69.385 İtibar

378 adet Kılavuz yazıldı

4 Yorum

How do you reseal the back cover on to the phone?

bmw0208 - Yanıt

You can take a new back cover sticker to reseal.

Witrigs -

Are there other parts in this procedure that need to be resealed, e.g. Loudspeaker?

Bernhard - Yanıt

Hi great guide thank you, made it less daunting than I expected to repair my own phone, and cheaper than getting it repaired by someone else! Phone is as good as new, though I could probably do with some new adhesive, as the guitar picks mess it up a fair bit. You did mention including adhesive though so fair play!

@bernhard you don’t need to reseal anything apart from the back, although the camera flash does have a small amount of adhesive behind it when you lift that part up, though doesn’t seem to be messed up too much

Edward Barker - Yanıt

Yorum Ekle

İstatistikleri Görüntüle:

Son 24 Saat: 0

Son 7 gün: 6

Son 30 gün: 21

Her zaman: 9,626