Giriş
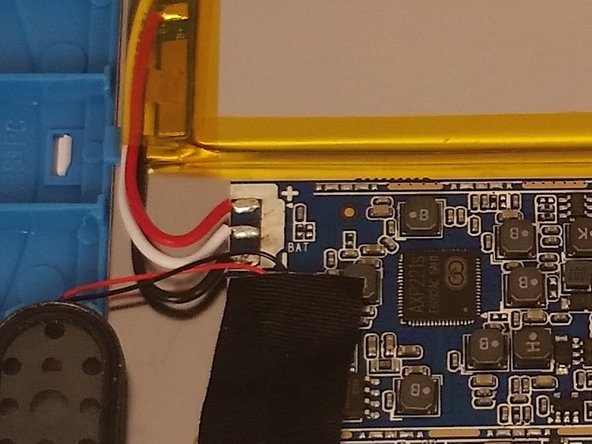
The battery is fairly easy to replace the only issue with taking it out is the adhesive holding it in. the best way to do this is to heat it up, recommended tool is the iopener and the mettle spudger.
Neye ihtiyacın var
-
-
Use an opening tool to push in and release sixteen small plastic clips around the edge of the case. As the clips are released, gradually pry the case apart.
-
-
-
Remove the black electrical tape over the ribbon connector.
-
Remove the ribbon connector over the battery.
-
-
To reassemble your device, follow these instructions in reverse order.
To reassemble your device, follow these instructions in reverse order.
İptal et: Bu kılavuzu tamamlamadım.
3 farklı kişi bu kılavuzu tamamladı.
7 Yorum
I had the same problem, only played while plugged in and would not charge.. I found that the battery wires while appearing tight one wire had broken inside the wire insulation at the solder pad on the main board. When I redid the connection it charges, and works well. 8/11/16
My grand daughters won't come on, should I take it to an electronic store?. I don't want to try and pry it open, for fear I may make it worse, she loves her tablet, and it is very helpful for her with school, she's had it 2 years and I put it away for about 8 month, for going on line, without permission, I gave it back in Sept. Now its not charging or coming on. Thank you.Deborah


I'm not sure what's wrong with ours. The color started fading and the picture looked strange. If I pressed the cubby firmly together it would work for a little while. Now I can't get that to work either. Could it just be a loose connection?
thisnotbiznas - Yanıt
Check the connection for the LCD at the motherboard. Lift up the latch to release the cable, remove and reinstall the cable, and then close the latch again.
Stephen Martinez -
Where do I find the LCD connector? My screen is very dim but works.
tnsimons - Yanıt