Ana içeriğe geç
Onarım Topluluğuna Katılın - Hesap Oluşturun

Swagtron T3 Gyroscope Replacement

Neye ihtiyacın var

  1. Swagtron T3 Gyroscope Replacement, Cover: adım 1, 2 resimden 1. Swagtron T3 Gyroscope Replacement, Cover: adım 1, 2 resimden 2.
    • Make sure the hoverboard is completely powered off and unplugged from any outlets.

    • Flip the Swagtron so that the footpads are facing the ground.

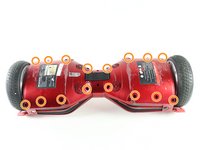
    • Unscrew the sixteen 9.4 mm Phillips #1 machine screws on the side of the Swagtron that is now facing upwards.

    FixBot'a Sor

    Yorum Ekle

  2. Swagtron T3 Gyroscope Replacement: adım 2, 3 resimden 1. Swagtron T3 Gyroscope Replacement: adım 2, 3 resimden 2. Swagtron T3 Gyroscope Replacement: adım 2, 3 resimden 3.
    • Be careful with the small blue capacitors indicated by the orange box. There are many of these capacitors in the device.

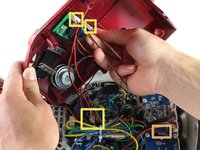
    • Slowly lift the backside cover.

    • Both sides lift up the same way, but the motherboard is under one side and the battery is under the other.

    • Detach the four cables connected to the cover by pinching the connector clips and pulling the cables out:

    • Three cables on the motherboard side.

    • Two red cables with white connectors and one white cable with a white connector.

    • One yellow cable with a black connector on the battery side.

    • After detachment, you should be able to completely remove the backside cover.

    FixBot'a Sor

    Yorum Ekle

  3. Swagtron T3 Gyroscope Replacement, Gyroscope: adım 3, 1 resimden 1.
    • The gyroscope is a blue rectangular circuit board on top of a white base and is closest to the wheel.

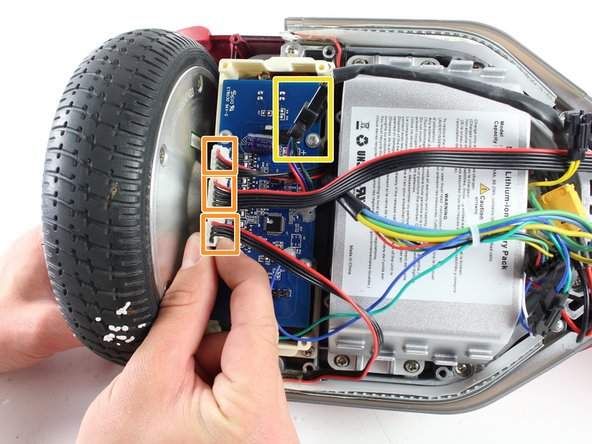
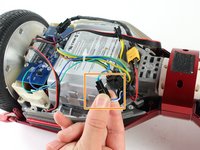
    • Detach the four cables connecting the gyroscope to the hoverboard by pinching the connector clips and pulling the cables out:

    • Three red and black cables with white connectors.

    • One multicolored cable with a black connector.

    FixBot'a Sor

    Yorum Ekle

  4. Swagtron T3 Gyroscope Replacement: adım 4, 1 resimden 1.
    • Uncrew the four 7.2 mm Phillips #1 self-drilling screws connecting the blue gyroscope to the white plastic holding piece.

    FixBot'a Sor

    Yorum Ekle

  5. Swagtron T3 Gyroscope Replacement: adım 5, 2 resimden 1. Swagtron T3 Gyroscope Replacement: adım 5, 2 resimden 2.
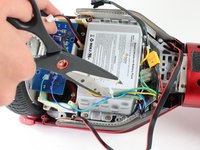
    • Cut the plastic cable tie holding the cables together with utility scissors.

    • Disconnect the blue/green cable from the blue/white cable by pinching the connector clips and pulling the cables apart.

    FixBot'a Sor

    Yorum Ekle

  6. Swagtron T3 Gyroscope Replacement: adım 6, 1 resimden 1.
    • Gently lift the blue gyroscope off of the white plastic holder piece.

    • After reassembling the Swagtron with the new gyroscope, check to make sure your Swagtron is balancing properly.

    • If it is still unbalanced, repeat all steps in this guide with the gyroscope by the other wheel.

    FixBot'a Sor

    Yorum Ekle

Sonuç

To reassemble your device, follow these instructions in reverse order.

İptal et: Bu kılavuzu tamamlamadım.

3 farklı kişi bu kılavuzu tamamladı.

Emily Richter

Üyelik tarihi: 04/10/17

351 İtibar

1 Kılavuz yazıldı

Ekip

Cal Poly, Team S13-G3, Forte Spring 2017 Cal Poly, Team S13-G3, Forte Spring 2017 üyesi

CPSU-FORTE-S17S13G3

4 Üyeler

4 adet Kılavuz yazıldı

3Kılavuz Yorumları

Where can one buy the new gyroscope?

Mike - Yanıt Paylaş

Where is the best place to buy the gyroscope for the T3?

I see Ebay sells complete kits with motherboards and all.

Are they compatible?

Mike - Yanıt Paylaş

where can I buy new gyroscope

roccovalletta - Yanıt Paylaş

Yorum Ekle

İstatistikleri Görüntüle:

Son 24 Saat: 0

Son 7 gün: 17

Son 30 gün: 69

Her zaman: 5,462