Giriş
If you device is not holding it's charge after a few years of use, it may be worthwhile replacing the battery.
Neye ihtiyacın var
-
-
Remove the three T6 Torex screens in the positions highlighted. Two inside the shaver head, one on the outside back.
-
-
-
Gently pry open the case to pop the front blue cover off. There are three catch points on each side. (Suggest to start working down the side from the top, be careful not to snap any of the holding points as you lift them open)
-
Once the front cover is released, the back will easily fall away
-
-
-
-
Gently pop off the white cover which is protecting the electronics.
-
-
-
De-seolder the points highlighted (the charging / power supply pegs) and gently lift/pull out the electronics.
-
The unit is held in by the charging pegs and also with double sided tape on the back of the battery, so may need some gentle force/working at to lift (once the charging pegs have been de-soldered to free them).
-
N. B. the wires to the motors remain attached so do not fully tear away.
-
-
-
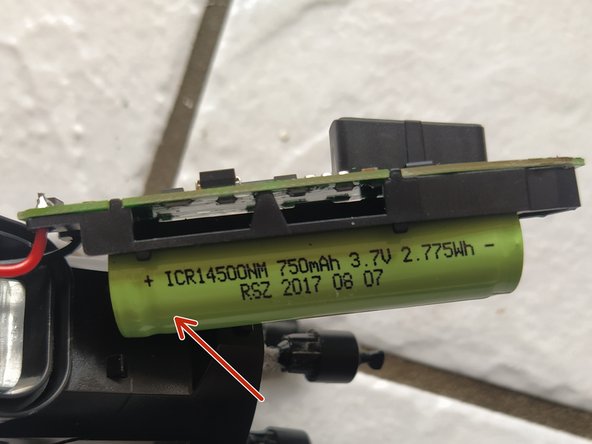
De-solder at the points highlighted to release the battery from the circuit board.
-
-
-
Solder the replacement battery back in place. Note which end has the positive (closest to the shaving head), usually this can be identified by a small ridge/dip on the battery case (if not clearly marked)
-
Replacement battery must be of the same voltage, although the capacity my be larger if needed.
-
You may need to trim (using scissors) the solder tags on the battery to make them narrow enough to fit through the holes in the PCB / circuit board
-
-
-
Follow the steps in reverse & the battery function should be restored better than before!
-


To reassemble your device, follow these instructions in reverse order.
To reassemble your device, follow these instructions in reverse order.
İptal et: Bu kılavuzu tamamlamadım.
2 farklı kişi bu kılavuzu tamamladı.