Ana içeriğe geç

Syntus ST150 Ultrasonic Plate Replacement

Neye ihtiyacın var

  1. Syntus ST150 Ultrasonic Plate Replacement, Ultrasonic Plate: adım 1, 1 resimden 1.
    • First, make sure the water tank inside the diffuser is completely dry to avoid any water from contacting the internal components.

    • Make sure the diffuser is disconnected from the power source to avoid electrical hazards.

  2. Syntus ST150 Ultrasonic Plate Replacement: adım 2, 2 resimden 1. Syntus ST150 Ultrasonic Plate Replacement: adım 2, 2 resimden 2.
    • With a Phillips #1 screwdriver, remove the three 10 mm screws on the bottom of the diffuser.

  3. Syntus ST150 Ultrasonic Plate Replacement: adım 3, 3 resimden 1. Syntus ST150 Ultrasonic Plate Replacement: adım 3, 3 resimden 2. Syntus ST150 Ultrasonic Plate Replacement: adım 3, 3 resimden 3.
    • Lift the water tank while holding the base of the diffuser.

    • Disconnect the three cables form the board.

    • Make sure when reassembling the diffuser to plug in each cable to its assigned port.

  4. Syntus ST150 Ultrasonic Plate Replacement: adım 4, 3 resimden 1. Syntus ST150 Ultrasonic Plate Replacement: adım 4, 3 resimden 2. Syntus ST150 Ultrasonic Plate Replacement: adım 4, 3 resimden 3.
    • To separate the board from the water tank, unscrew the three Phillips #1 10 mm screws securing the board.

  5. Syntus ST150 Ultrasonic Plate Replacement: adım 5, 3 resimden 1. Syntus ST150 Ultrasonic Plate Replacement: adım 5, 3 resimden 2. Syntus ST150 Ultrasonic Plate Replacement: adım 5, 3 resimden 3.
    • With a Phillips #0 screwdriver, remove the three 7 mm screws from the ultrasonic sensor cover.

    • Remove the cover to expose the ultrasonic sensor.

  6. Syntus ST150 Ultrasonic Plate Replacement: adım 6, 3 resimden 1. Syntus ST150 Ultrasonic Plate Replacement: adım 6, 3 resimden 2. Syntus ST150 Ultrasonic Plate Replacement: adım 6, 3 resimden 3.
    • Detach the ultrasonic sensor from the water tank.

    • Detach the ultrasonic sensor connector from the board.

  7. Syntus ST150 Ultrasonic Plate Replacement: adım 7, 1 resimden 1.
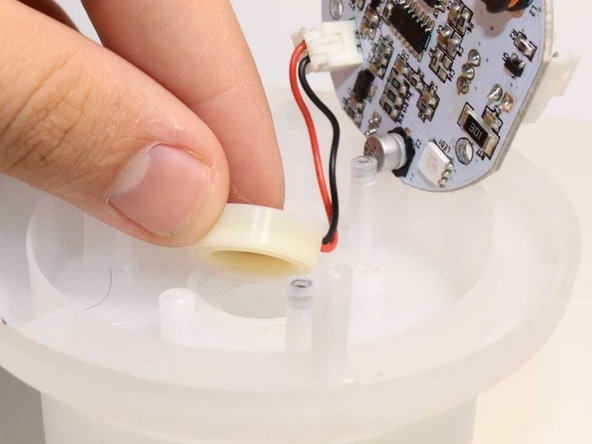
    • Remove the rubber cover from the ultrasonic plate.

  8. Syntus ST150 Ultrasonic Plate Replacement: adım 8, 1 resimden 1.
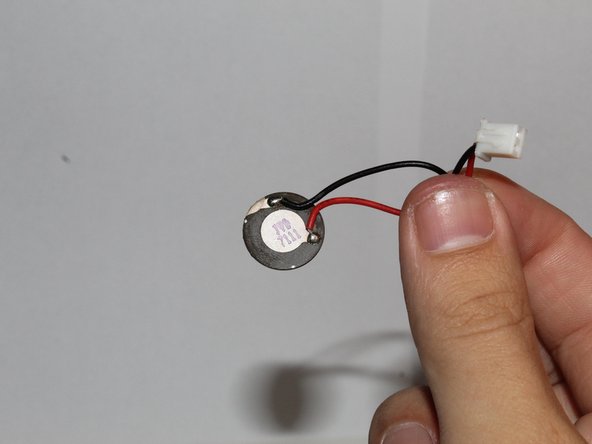
    • Now you can replace the ultrasonic plate of your diffuser.

Sonuç

To reassemble your device, follow these instructions in reverse order.

0 Yorum

Yorum Ekle

İstatistikleri Görüntüle:

Son 24 Saat: 1

Son 7 gün: 9

Son 30 gün: 23

Her zaman: 526