Bu sürüm, hatalı düzenlemeler içerebilir. En son doğrulanmış bellek kopyası dönün.
Neye ihtiyacın var
-
Bu adım çevrilmemiş. Çevrilmesine yardım edin
-
Remove the 11mm Phillips screw from below the power component panel.
-
-
Bu adım çevrilmemiş. Çevrilmesine yardım edin
-
Pull the panel away from the rice cooker.
-
Remove the 9mm Phillips screw from behind the power component dashboard that is connected to the light plate.
-
-
-
Bu adım çevrilmemiş. Çevrilmesine yardım edin
-
Remove the one 7mm Phillips screw from the side of the brass panel
-
Lift the brass plate off of the device and set it aside.
-
-
Bu adım çevrilmemiş. Çevrilmesine yardım edin
-
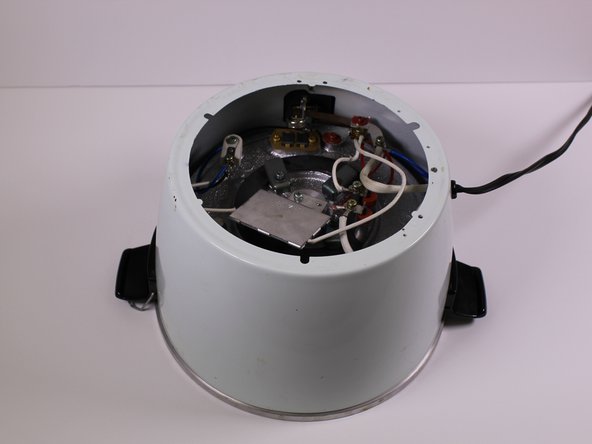
Remove the 7mm Phillips screw holding the white and maroon colored wires that are connected to the heating element.
-
-
Bu adım çevrilmemiş. Çevrilmesine yardım edin
-
Remove the 10mm Phillips screw that connects the white, blue and black wires to the white plastic piece in the corner of the device.
-
-
Bu adım çevrilmemiş. Çevrilmesine yardım edin
-
Remove the 7mm Phillips screw that connects two white wires and one red wire to the heating "warm" switch.
-
-
Bu adım çevrilmemiş. Çevrilmesine yardım edin
-
Using your hand, pull out the light plate with the maroon red and black wires.
-


Ekip

University of Alabama, Team 1-6, Sydow campbell Spring 2016 University of Alabama, Team 1-6, Sydow campbell Spring 2016 üyesi
UA-SYDOW CAMPBELL-S16S1G6
4 Üyeler
3 adet Kılavuz yazıldı