Ana içeriğe geç

Titan Airless Sprayer IMPACT 410 Pressure Adjustment Assembly Replacement

Neye ihtiyacın var

  1. Titan Airless Sprayer IMPACT 410 Pressure Adjustment Assembly Replacement, Safety precautions: adım 1, 2 resimden 1. Titan Airless Sprayer IMPACT 410 Pressure Adjustment Assembly Replacement, Safety precautions: adım 1, 2 resimden 2.
    • Before you begin, make sure to follow the pressure relief procedure documented in the user manual before powering down the paint sprayer and disconnecting the pump.

    • Turn off and unplug the sprayer.

  2. Titan Airless Sprayer IMPACT 410 Pressure Adjustment Assembly Replacement, Unfasten the motor controller assembly: adım 2, 2 resimden 1. Titan Airless Sprayer IMPACT 410 Pressure Adjustment Assembly Replacement, Unfasten the motor controller assembly: adım 2, 2 resimden 2.
    • Use a Phillips driver to remove the four 12 mm-long screws securing the motor controller assembly.

  3. Titan Airless Sprayer IMPACT 410 Pressure Adjustment Assembly Replacement, Reposition the motor controller assembly: adım 3, 3 resimden 1. Titan Airless Sprayer IMPACT 410 Pressure Adjustment Assembly Replacement, Reposition the motor controller assembly: adım 3, 3 resimden 2. Titan Airless Sprayer IMPACT 410 Pressure Adjustment Assembly Replacement, Reposition the motor controller assembly: adım 3, 3 resimden 3.
    • Don't try to remove the motor controller assembly completely, as it's connected to the body with cables.

    • Pull the motor controller assembly out and hold it to the side, exposing the cables.

  4. Titan Airless Sprayer IMPACT 410 Pressure Adjustment Assembly Replacement, Disconnect the spade connectors: adım 4, 2 resimden 1. Titan Airless Sprayer IMPACT 410 Pressure Adjustment Assembly Replacement, Disconnect the spade connectors: adım 4, 2 resimden 2.
    • Use a pair of needle nose pliers, or your fingers, to disconnect the two spade connectors from to the on/off switch.

    • Disconnect the one spade connector on the circuit breaker.

    • Note the order of the cables and their connectors to help with reassembly.

  5. Titan Airless Sprayer IMPACT 410 Pressure Adjustment Assembly Replacement: adım 5, 2 resimden 1. Titan Airless Sprayer IMPACT 410 Pressure Adjustment Assembly Replacement: adım 5, 2 resimden 2.
    • Disconnect the remaining spade connector from the on/off switch

    • Disconnect the jumper spade connector from the on/off switch and the circuit breaker.

    • The black jumper cable with the dark blue connectors isn't attached to the rest of the assembly.

    • Note the order of the cables and their connectors to help with reassembly.

  6. Titan Airless Sprayer IMPACT 410 Pressure Adjustment Assembly Replacement, Remove the circuit breaker: adım 6, 2 resimden 1. Titan Airless Sprayer IMPACT 410 Pressure Adjustment Assembly Replacement, Remove the circuit breaker: adım 6, 2 resimden 2.
    • Use your fingers to unscrew and remove the circuit breaker nut.

    • Remove the circuit breaker.

  7. Titan Airless Sprayer IMPACT 410 Pressure Adjustment Assembly Replacement, Remove the on/off switch: adım 7, 3 resimden 1. Titan Airless Sprayer IMPACT 410 Pressure Adjustment Assembly Replacement, Remove the on/off switch: adım 7, 3 resimden 2. Titan Airless Sprayer IMPACT 410 Pressure Adjustment Assembly Replacement, Remove the on/off switch: adım 7, 3 resimden 3.
    • Use a flathead screwdriver to depress the locking tabs located on both the top and bottom of the on/off switch.

    • While depressing the tabs, push the on/off switch out through the cutout.

    • Remove the on/off switch.

  8. Titan Airless Sprayer IMPACT 410 Pressure Adjustment Assembly Replacement, Unfasten the contact switch: adım 8, 2 resimden 1. Titan Airless Sprayer IMPACT 410 Pressure Adjustment Assembly Replacement, Unfasten the contact switch: adım 8, 2 resimden 2.
    • Use a Phillips driver to remove the two 17 mm-long screws securing the contact switch.

  9. Titan Airless Sprayer IMPACT 410 Pressure Adjustment Assembly Replacement, Reposition the contact switch: adım 9, 1 resimden 1.
    • Pull the contact switch away from the plunger and place it on the floor of the housing.

  10. Titan Airless Sprayer IMPACT 410 Pressure Adjustment Assembly Replacement, Remove the retaining ring: adım 10, 2 resimden 1. Titan Airless Sprayer IMPACT 410 Pressure Adjustment Assembly Replacement, Remove the retaining ring: adım 10, 2 resimden 2.
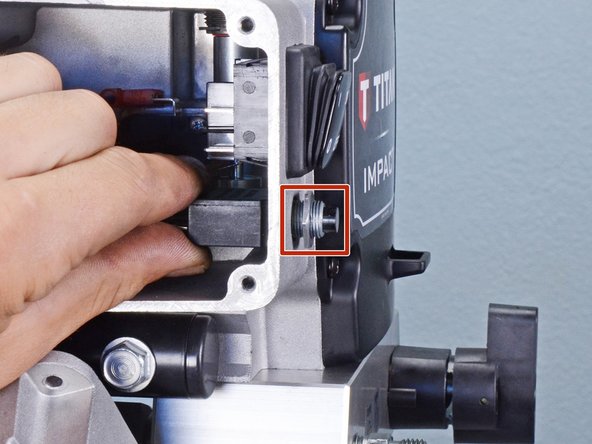
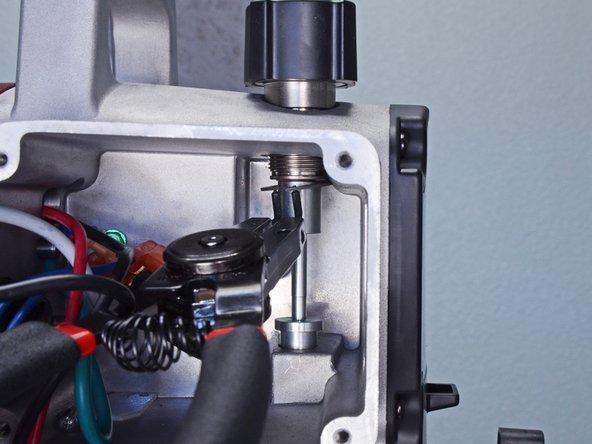
    • Use snap ring pliers to remove the retaining ring from the top of the plunger.

    • During reassembly, install a new ring with the flat side facing down.

  11. Titan Airless Sprayer IMPACT 410 Pressure Adjustment Assembly Replacement, Remove the control knob: adım 11, 3 resimden 1. Titan Airless Sprayer IMPACT 410 Pressure Adjustment Assembly Replacement, Remove the control knob: adım 11, 3 resimden 2. Titan Airless Sprayer IMPACT 410 Pressure Adjustment Assembly Replacement, Remove the control knob: adım 11, 3 resimden 3.
    • Loosen the pressure control knob.

    • Remove the pressure control knob.

  12. Titan Airless Sprayer IMPACT 410 Pressure Adjustment Assembly Replacement, Remove the pressure adjustment spring: adım 12, 2 resimden 1. Titan Airless Sprayer IMPACT 410 Pressure Adjustment Assembly Replacement, Remove the pressure adjustment spring: adım 12, 2 resimden 2.
    • Remove the pressure adjustment spring.

  13. Titan Airless Sprayer IMPACT 410 Pressure Adjustment Assembly Replacement, Remove the plunger: adım 13, 2 resimden 1. Titan Airless Sprayer IMPACT 410 Pressure Adjustment Assembly Replacement, Remove the plunger: adım 13, 2 resimden 2.
    • Remove the plunger.

Sonuç

To reassemble your device, follow these instructions in reverse order.

Bir başkası bu kılavuzu tamamladı.

Alex Diaz-Kokaisl

Üyelik tarihi: 01/16/22

163.918 İtibar

769 adet Kılavuz yazıldı

Ekip

iFixit iFixit üyesi

Staff

119 Üyeler

19.658 adet Kılavuz yazıldı

0Kılavuz Yorumları

Yorum Ekle

İstatistikleri Görüntüle:

Son 24 Saat: 0

Son 7 gün: 18

Son 30 gün: 55

Her zaman: 1,000