Bu sürüm, hatalı düzenlemeler içerebilir. En son doğrulanmış bellek kopyası dönün.
Neye ihtiyacın var
-
Bu adım çevrilmemiş. Çevrilmesine yardım edin
-
Use a T-9 Torx screwdriver to unscrew the four screws on the back cover.
-
-
Bu adım çevrilmemiş. Çevrilmesine yardım edin
-
Using the spudger, gently pry apart the back case from the front case. It is easier to start on a side and work your way around the device.
-
-
-
Bu adım çevrilmemiş. Çevrilmesine yardım edin
-
Once the two covers are separated, use the tweezers, or even your fingers, to gently disconnect the two sets of wires that are connected to the motherboard from the back cover. You may have to wiggle the wires a little bit to get them to disconnect.
-
-
Bu adım çevrilmemiş. Çevrilmesine yardım edin
-
Next, you must remove the motherboard from the front screen.
-
Use a Torx T-7 screwdriver to unscrew the two screws.
-
-
Bu adım çevrilmemiş. Çevrilmesine yardım edin
-
Before you can seperate the motherboard from the front cover, you must disconnect the wire connecting the two.
-
To do so, you must use the back end of the spudger to push out the two white tabs connected to the wire, that holds the motherboard and front cover together.
-
-
Bu adım çevrilmemiş. Çevrilmesine yardım edin
-
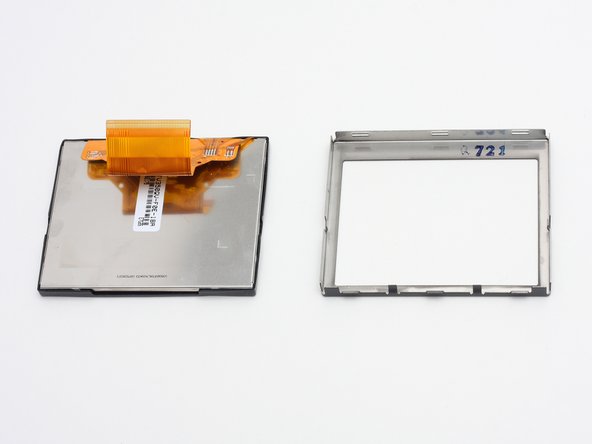
Once separated, use the spudger to pry around the edges of the outer casing.
-
-
Bu adım çevrilmemiş. Çevrilmesine yardım edin
-
Apply pressure with thumbs to remove screen from inner casing.
-
The screen and front cover are now disconnected.
-


İptal et: Bu kılavuzu tamamlamadım.
2 farklı kişi bu kılavuzu tamamladı.
Ekip

Cal Poly, Team 7-7, Maness Spring 2010 Cal Poly, Team 7-7, Maness Spring 2010 üyesi
CPSU-MANESS-S10S7G7
4 Üyeler
6 adet Kılavuz yazıldı