Bu sürüm, hatalı düzenlemeler içerebilir. En son doğrulanmış bellek kopyası dönün.
Neye ihtiyacın var
-
Bu adım çevrilmemiş. Çevrilmesine yardım edin
-
Locate the battery locking mechanism on the back side of the laptop. It is labeled with a lock and unlock symbol to indicate its function. The mechanism also has a serrated texture to increase grip.
-
-
Bu adım çevrilmemiş. Çevrilmesine yardım edin
-
Place your left hand on the locking mechanism and slide it all the way to the left. This will move it into the unlocked position. While holding the mechanism in the unlocked position place another finger in the cavity to the right of the locking mechanism.
-
-
Bu adım çevrilmemiş. Çevrilmesine yardım edin
-
Pulling up with your right hand while the locking mechanism in in the unlocked position will release the battery from its socket.
-
-
-
Bu adım çevrilmemiş. Çevrilmesine yardım edin
-
Flip your device on its backside.
-
Slide the latch on the bottom left of the backside all the way to the left
-
Keep holding the latch in that position and move to the next step.
-
-
Bu adım çevrilmemiş. Çevrilmesine yardım edin
-
While holding the latch in place, pull out the Optical Disc Drive towards your body, away from the latch with another hand.
-
-
Bu adım çevrilmemiş. Çevrilmesine yardım edin
-
Locate and unscrew the 4 6mm Phillips Head Screws using a PH 0 Screwdriver bit.
-
-
Bu adım çevrilmemiş. Çevrilmesine yardım edin
-
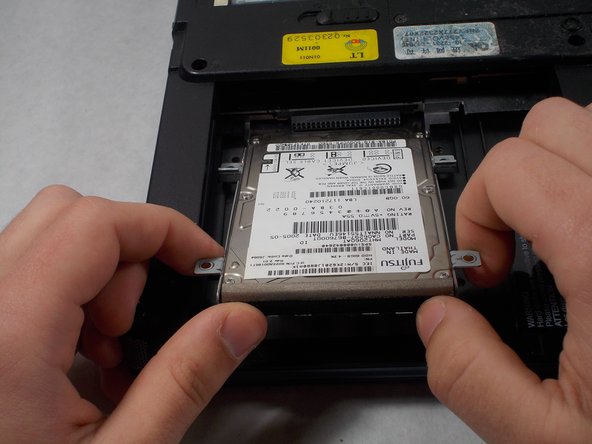
Place both thumbs on the bottom end of the hard drive and push it up.
-
Then use both index fingers to grasp the two metal side prongs that were held in place by the screws.
-
Pull out the drive towards your body using your index fingers.
-
-
Bu adım çevrilmemiş. Çevrilmesine yardım edin
-
After removing the hard drive from the laptop, locate and unscrew the 4 5mm screws (2 on each side) from the rails using a PH 0 screwdriver bit.
-
-
Bu adım çevrilmemiş. Çevrilmesine yardım edin
-
Holding the hard drive in place with the connection facing towards your body, put a finger on the cover and slide it away from your body to reveal the hard drive.
-


İptal et: Bu kılavuzu tamamlamadım.
Bir başkası bu kılavuzu tamamladı.
Ekip

UMass Dartmouth, Team S6-G5, Bernier Spring 2018 UMass Dartmouth, Team S6-G5, Bernier Spring 2018 üyesi
UMASSD-BERNIER-S18S6G5
3 Üyeler
12 adet Kılavuz yazıldı