Ana içeriğe geç
Onarım Topluluğuna Katılın - Hesap Oluşturun

Toshiba Satellite A215 S4697 Optical Drive Replacement

Neye ihtiyacın var

    1. Toshiba Satellite A215 S4697 Optical Drive Replacement, Battery: adım 1, 3 resimden 1. Toshiba Satellite A215 S4697 Optical Drive Replacement, Battery: adım 1, 3 resimden 2. Toshiba Satellite A215 S4697 Optical Drive Replacement, Battery: adım 1, 3 resimden 3.
      • Close the laptop and turn it over so that the base is facing upwards and the spine is facing away from you.

      • Find the battery compartment.

      • Slide the left slider which is just beneath the battery compartment into its leftmost position.

      FixBot'a Sor

      Yorum Ekle

    2. Toshiba Satellite A215 S4697 Optical Drive Replacement: adım 2, 3 resimden 1. Toshiba Satellite A215 S4697 Optical Drive Replacement: adım 2, 3 resimden 2. Toshiba Satellite A215 S4697 Optical Drive Replacement: adım 2, 3 resimden 3.
      • Slide and hold the right slider into its rightmost position. Lift the battery out of the compartment.

      • Do not touch the gold nodes inside the compartment.

      FixBot'a Sor

      Yorum Ekle

    1. Toshiba Satellite A215 S4697 Optical Drive Replacement, Optical Drive: adım 3, 3 resimden 1. Toshiba Satellite A215 S4697 Optical Drive Replacement, Optical Drive: adım 3, 3 resimden 2. Toshiba Satellite A215 S4697 Optical Drive Replacement, Optical Drive: adım 3, 3 resimden 3.
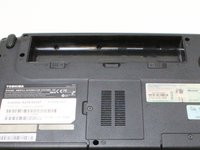
      • Turn computer over so that the battery compartment is facing up and is at the top.

      • Locate and unscrew one captive Phillips #1 screw located at the center.

      • A captive screw cannot be completely removed from the device's component.

      FixBot'a Sor

      Yorum Ekle

    2. Toshiba Satellite A215 S4697 Optical Drive Replacement: adım 4, 3 resimden 1. Toshiba Satellite A215 S4697 Optical Drive Replacement: adım 4, 3 resimden 2. Toshiba Satellite A215 S4697 Optical Drive Replacement: adım 4, 3 resimden 3.
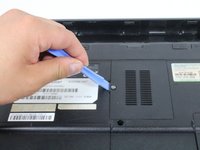
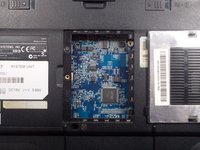
      • Use a plastic opening tool to open the motherboard access cover.

      • Do not touch the motherboard.

      FixBot'a Sor

      Yorum Ekle

    3. Toshiba Satellite A215 S4697 Optical Drive Replacement: adım 5, 3 resimden 1. Toshiba Satellite A215 S4697 Optical Drive Replacement: adım 5, 3 resimden 2. Toshiba Satellite A215 S4697 Optical Drive Replacement: adım 5, 3 resimden 3.
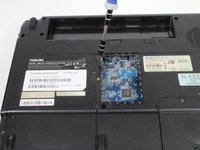
      • Remove one 1.5mm Phillips #1 screw located near the top left edge of the opening.

      FixBot'a Sor

      Yorum Ekle

    4. Toshiba Satellite A215 S4697 Optical Drive Replacement: adım 6, 2 resimden 1. Toshiba Satellite A215 S4697 Optical Drive Replacement: adım 6, 2 resimden 2.
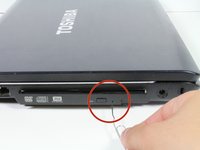
      • Flip your device right side up, and rotate it so that the optical drive is facing you.

      • Insert a paper clip into a manual release switch located to the right of the automatic release button.

      • Optical Drive will not release if you insert the clip diagonally. Make sure to insert the clip straight into the switch.

      FixBot'a Sor

      Yorum Ekle

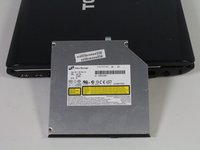
    5. Toshiba Satellite A215 S4697 Optical Drive Replacement: adım 7, 2 resimden 1. Toshiba Satellite A215 S4697 Optical Drive Replacement: adım 7, 2 resimden 2.
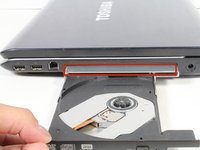
      • Gently pull out the disk drive until you can see the metallic case of the optical drive.

      • Hold the metal case and continue to pull the drive out toward you.

      FixBot'a Sor

      Yorum Ekle

    6. Toshiba Satellite A215 S4697 Optical Drive Replacement: adım 8, 3 resimden 1. Toshiba Satellite A215 S4697 Optical Drive Replacement: adım 8, 3 resimden 2. Toshiba Satellite A215 S4697 Optical Drive Replacement: adım 8, 3 resimden 3.
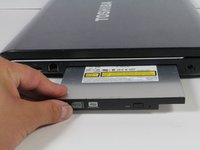
      • Once you see the yellow labels on the disk drive, fully retract the disk mount until you hear a click.

      FixBot'a Sor

      Yorum Ekle

    7. Toshiba Satellite A215 S4697 Optical Drive Replacement: adım 9, 3 resimden 1. Toshiba Satellite A215 S4697 Optical Drive Replacement: adım 9, 3 resimden 2. Toshiba Satellite A215 S4697 Optical Drive Replacement: adım 9, 3 resimden 3.
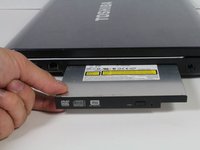
      • Continue to pull the disk drive toward you until it is completely removed from the laptop's housing.

      FixBot'a Sor

      Yorum Ekle

Sonuç

To reassemble your device, follow these instructions in reverse order.

İptal et: Bu kılavuzu tamamlamadım.

9 farklı kişi bu kılavuzu tamamladı.

Mike Dongyub Ryu

Üyelik tarihi: 04/16/13

566 İtibar

2 adet Kılavuz yazıldı

Ekip

Cal Poly, Team 4-12, Maness Spring 2013 Cal Poly, Team 4-12, Maness Spring 2013 üyesi

CPSU-MANESS-S13S4G12

4 Üyeler

72 adet Kılavuz yazıldı

0Kılavuz Yorumları

Yorum Ekle

İstatistikleri Görüntüle:

Son 24 Saat: 2

Son 7 gün: 29

Son 30 gün: 94

Her zaman: 5,113