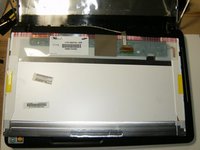
Ana içeriğe geç

Toshiba Satellite C655D-S5200 LCD Replacement

Neye ihtiyacın var

  1. Toshiba Satellite C655D-S5200 LCD Replacement, LCD: adım 1, 3 resimden 1. Toshiba Satellite C655D-S5200 LCD Replacement, LCD: adım 1, 3 resimden 2. Toshiba Satellite C655D-S5200 LCD Replacement, LCD: adım 1, 3 resimden 3.
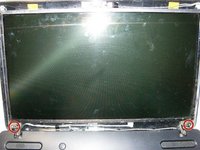
    • Here is the Toshiba Satellite C655D-S5200

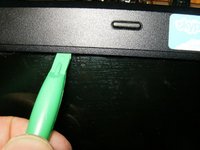
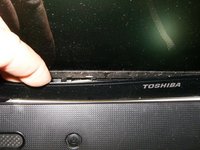
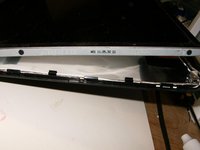
    • Open the laptop with the LCD facing forward. There are four rubber caps, one in each corner

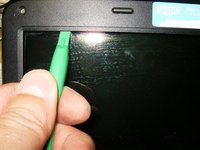
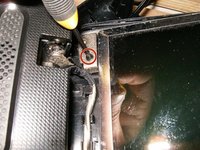
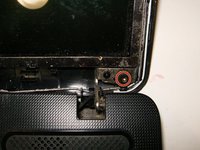
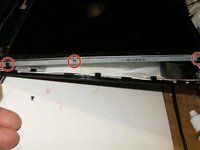
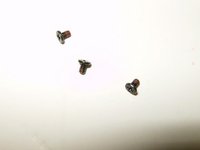
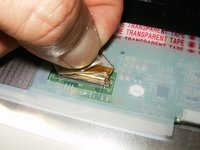
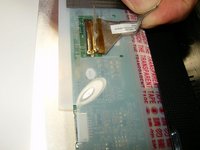
    • Removing the plugs reveal the Phillips screws

  2. Toshiba Satellite C655D-S5200 LCD Replacement: adım 2, 3 resimden 1. Toshiba Satellite C655D-S5200 LCD Replacement: adım 2, 3 resimden 2. Toshiba Satellite C655D-S5200 LCD Replacement: adım 2, 3 resimden 3.
    • Remove all four screws, tow on top left and right corner

    • One on the bottom left corner

    • and the bottom right corner.

    • Here are the four M3x5mm screws

  3. Toshiba Satellite C655D-S5200 LCD Replacement: adım 3, 3 resimden 1. Toshiba Satellite C655D-S5200 LCD Replacement: adım 3, 3 resimden 2. Toshiba Satellite C655D-S5200 LCD Replacement: adım 3, 3 resimden 3.
    • Use a plastic opening tool, or similar to pop the bezel of the LCD assembly

    • Continue to slide the tool all the way across the top

    • Once the bezel has been released from the tabs, it can be further released be applying some gently manual pulling

  4. Toshiba Satellite C655D-S5200 LCD Replacement: adım 4, 3 resimden 1. Toshiba Satellite C655D-S5200 LCD Replacement: adım 4, 3 resimden 2. Toshiba Satellite C655D-S5200 LCD Replacement: adım 4, 3 resimden 3.
    • Continue to pull gently on the sides

    • and finally on the bottom.

    • With all the tabs released the bezel can now be removed.

  5. Toshiba Satellite C655D-S5200 LCD Replacement: adım 5, 3 resimden 1. Toshiba Satellite C655D-S5200 LCD Replacement: adım 5, 3 resimden 2. Toshiba Satellite C655D-S5200 LCD Replacement: adım 5, 3 resimden 3.
    • Here is the LCD assembly without the bezel

    • Remove the Phillips screw that connects the LCD frame to the back cover. This is the left one

    • Remove the right one as well

  6. Toshiba Satellite C655D-S5200 LCD Replacement: adım 6, 3 resimden 1. Toshiba Satellite C655D-S5200 LCD Replacement: adım 6, 3 resimden 2. Toshiba Satellite C655D-S5200 LCD Replacement: adım 6, 3 resimden 3.
    • The LCD can now be moved forward and away from the rear cover

    • There are three screws on either side that hold the panel to the frame. Remove those

    • Here are the three M2x4 screws

  7. Toshiba Satellite C655D-S5200 LCD Replacement: adım 7, 3 resimden 1. Toshiba Satellite C655D-S5200 LCD Replacement: adım 7, 3 resimden 2. Toshiba Satellite C655D-S5200 LCD Replacement: adım 7, 3 resimden 3.
    • Remove the three Phillips screws on the right side as well.

    • with the screws removed the panel can now be moved out of the LCD frame. The LCD is still connected by the display cable.

    • The display cable is secured to the connector with some clear adhesive. Remove this frist

  8. Toshiba Satellite C655D-S5200 LCD Replacement: adım 8, 2 resimden 1. Toshiba Satellite C655D-S5200 LCD Replacement: adım 8, 2 resimden 2.
    • Remove the display cable carefully.

    • With the display cable disconnected, the LCD can now be removed and replaced.

Sonuç

To reassemble your device, follow these instructions in reverse order.

Bir başkası bu kılavuzu tamamladı.

oldturkey03

Üyelik tarihi: 09/29/10

778.255 İtibar

118 adet Kılavuz yazıldı

Ekip

Global Fixers Global Fixers üyesi

Community

31 Üyeler

520 adet Kılavuz yazıldı

0 Yorum

Yorum Ekle

İstatistikleri Görüntüle:

Son 24 Saat: 0

Son 7 gün: 1

Son 30 gün: 6

Her zaman: 1,504