Ana içeriğe geç
Toshiba Satellite C855D-S5109 Hard Drive Replacement

Toshiba Satellite C855D-S5109 Hard Drive Replacement

Rebeca Carrillo

Rebeca Carrillo ve başka bir katkıda bulunan

En son December 29, 2022 tarihinde güncellendi

10 dakika
Kolay
Daha İyi Resimler Gerekli
Eksik Ayrıntılar

This is a step-by-step guide on how to replace the hard drive in a Toshiba Satellite C855D-S5109. The hard drive is responsible for long term storage on a device, housing all the user’s data and the computer’s operating system. A hard drive can become partially corrupted, leading to “File not Found” errors, or cease function completely, leading to errors during startup—if the OS cannot be loaded from the hard drive, the computer will usually get tripped up in the BIOS during startup. If you are experiencing either of these problems, or if you simply need more storage space for your machine, use this guide to replace or upgrade the hard drive in your Toshiba Satellite C855D-S5109.

Neye ihtiyacın var

Aletler

  1. Toshiba Satellite C855D-S5109 Hard Drive Replacement, Battery: adım 1, 2 resimden 1. Toshiba Satellite C855D-S5109 Hard Drive Replacement, Battery: adım 1, 2 resimden 2.
    • Flip the laptop over so the bottom is facing up.

  2. Toshiba Satellite C855D-S5109 Hard Drive Replacement: adım 2, 2 resimden 1. Toshiba Satellite C855D-S5109 Hard Drive Replacement: adım 2, 2 resimden 2.
    • Slide the two lock tabs on the battery to the open position.

  3. Toshiba Satellite C855D-S5109 Hard Drive Replacement: adım 3, 3 resimden 1. Toshiba Satellite C855D-S5109 Hard Drive Replacement: adım 3, 3 resimden 2. Toshiba Satellite C855D-S5109 Hard Drive Replacement: adım 3, 3 resimden 3.
    • While still holding the lock tabs outward, use your hand to grab the top of battery and pull up.

    • Remove the battery.

  4. Toshiba Satellite C855D-S5109 Hard Drive Replacement, Hard Drive: adım 4, 2 resimden 1. Toshiba Satellite C855D-S5109 Hard Drive Replacement, Hard Drive: adım 4, 2 resimden 2.
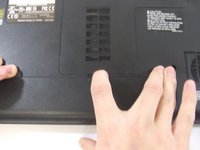
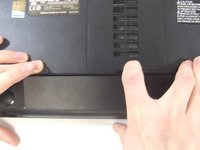
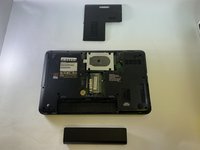
    • Use the Phillips #00 screwdriver to unscrew the captive screw on the L-Shaped panel.

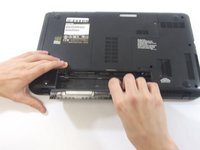
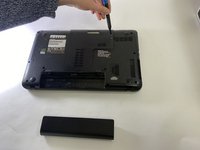
    • Remove the L-Shaped panel.

  5. Toshiba Satellite C855D-S5109 Hard Drive Replacement: adım 5, 2 resimden 1. Toshiba Satellite C855D-S5109 Hard Drive Replacement: adım 5, 2 resimden 2.
    • Using a Phillips #00 screwdriver, remove the screw(s) securing the hard drive to the laptop case.

    • Carefully pull the tab on the hard drive to detach the connecting wire to the right of the hard drive.

    • Remove the hard drive.

Sonuç

To reassemble your device, follow these instructions in reverse order.

Rebeca Carrillo

Üyelik tarihi: 09/30/21

87 İtibar

1 Kılavuz yazıldı

Ekip

Casper College, Team 1-3, Lareau Fall 2021 Casper College, Team 1-3, Lareau Fall 2021 üyesi

CASC-LAREAU-F21S1G3

3 Üyeler

8 adet Kılavuz yazıldı

0 Yorum

Yorum Ekle

İstatistikleri Görüntüle:

Son 24 Saat: 0

Son 7 gün: 0

Son 30 gün: 7

Her zaman: 235