Ana içeriğe geç
Onarım Topluluğuna Katılın - Hesap Oluşturun

UTStarcom XV6700 Motherboard Replacement

Neye ihtiyacın var

  1. UTStarcom XV6700 Motherboard Replacement, Battery: adım 1, 1 resimden 1.
    • Press the on/off button on the top to power the phone off.

    FixBot'a Sor

    Yorum Ekle

  2. UTStarcom XV6700 Motherboard Replacement: adım 2, 1 resimden 1.
    • Remove the battery cover by pressing and sliding the cover down and off of the phone.

    FixBot'a Sor
    Yorum Ekle

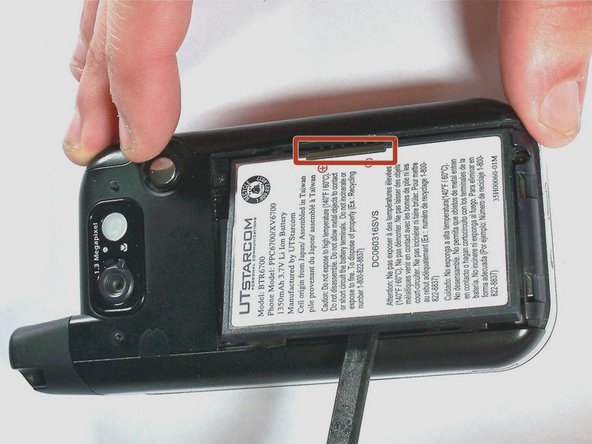
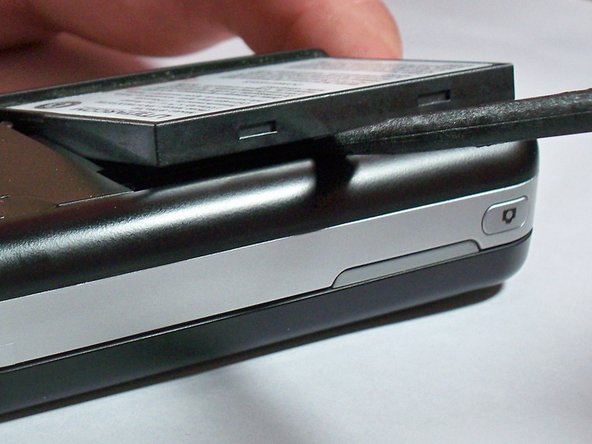
  3. UTStarcom XV6700 Motherboard Replacement: adım 3, 3 resimden 1. UTStarcom XV6700 Motherboard Replacement: adım 3, 3 resimden 2. UTStarcom XV6700 Motherboard Replacement: adım 3, 3 resimden 3.
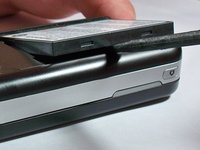
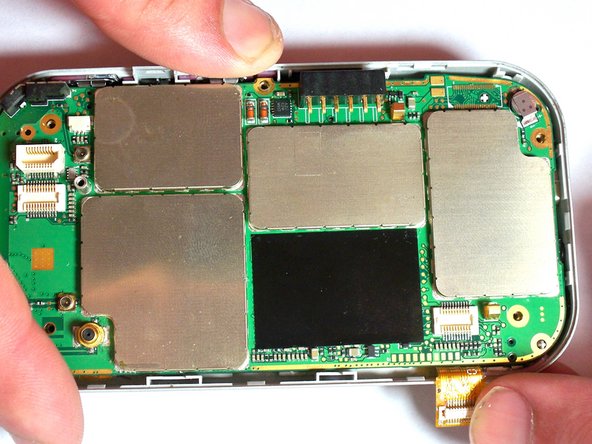
    • Pull the battery removal tab and lift the battery out of the phone.

    • If the battery removal tab is missing, place a spudger on the opposite side of the highlighted connector and pry the battery up.

    FixBot'a Sor
    Yorum Ekle

  4. UTStarcom XV6700 Motherboard Replacement, Camera: adım 4, 1 resimden 1.
    Bu adımda kullanılan alet:
    Tweezers
    $4.99
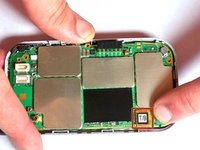
    • Remove the two 4.0-mm #000 Phillips screws at the top of the battery compartment. Tweezers may be useful to remove the screws.

    FixBot'a Sor
    Yorum Ekle

  5. UTStarcom XV6700 Motherboard Replacement: adım 5, 2 resimden 1. UTStarcom XV6700 Motherboard Replacement: adım 5, 2 resimden 2.
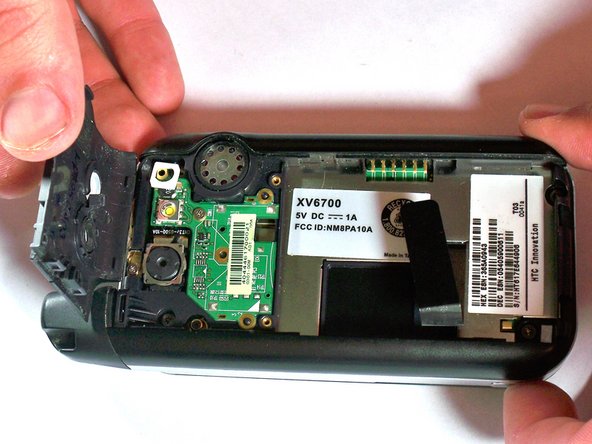
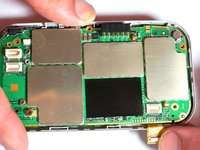
    • Use firm pressure to carefully pry off the cover with your fingers.

    FixBot'a Sor

    Yorum Ekle

  6. UTStarcom XV6700 Motherboard Replacement: adım 6, 1 resimden 1.
    • Remove the 4.0-mm #00 Phillips screw securing the camera flash circuit board. The board is still connected by a connector on the bottom of the board.

    FixBot'a Sor
    Yorum Ekle

  7. UTStarcom XV6700 Motherboard Replacement: adım 7, 1 resimden 1.
    • Gently pry off the camera flash circuit board with the spudger.

    FixBot'a Sor
    Yorum Ekle

  8. UTStarcom XV6700 Motherboard Replacement: adım 8, 1 resimden 1.
    • Gently pry off the camera with the spudger.

    FixBot'a Sor
    Yorum Ekle

  9. UTStarcom XV6700 Motherboard Replacement, Motherboard: adım 9, 1 resimden 1.
    • Remove the four 5.0-mm Torx T6 screws from the corners of the black cover.

    FixBot'a Sor

    Yorum Ekle

  10. UTStarcom XV6700 Motherboard Replacement: adım 10, 1 resimden 1.
    • Remove the 4.0-mm #00 Phillips screw that holds the antenna in place. The antenna does not need to be removed.

    FixBot'a Sor

    Yorum Ekle

  11. UTStarcom XV6700 Motherboard Replacement: adım 11, 3 resimden 1. UTStarcom XV6700 Motherboard Replacement: adım 11, 3 resimden 2. UTStarcom XV6700 Motherboard Replacement: adım 11, 3 resimden 3.
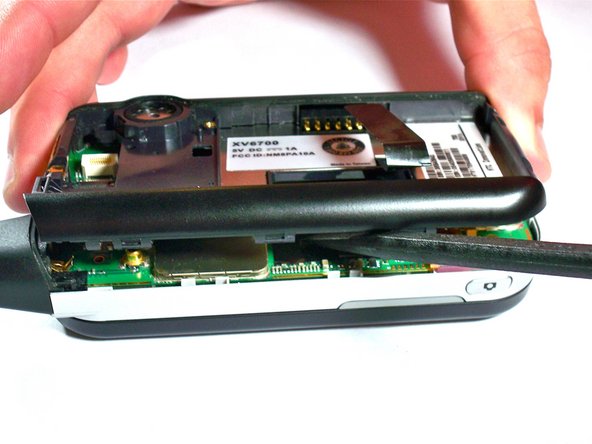
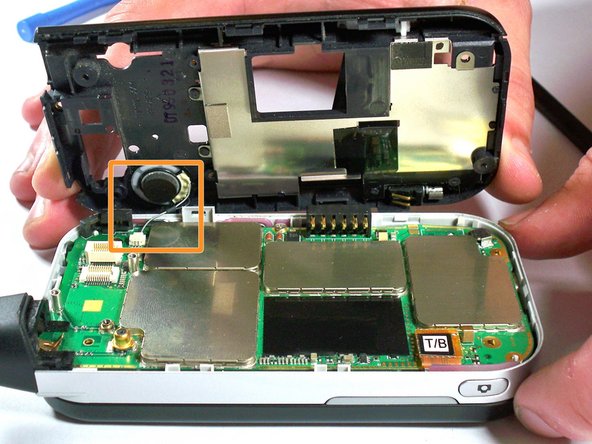
    • Use the spudger or plastic opening tools to apply firm but gentle pressure equally around the outside of the case.

    • Carefully pry the black portion of the case away from the silver portion.

    • Do not try to remove the case completely. The speaker wire is still connected to the motherboard.

    FixBot'a Sor

    Yorum Ekle

  12. UTStarcom XV6700 Motherboard Replacement: adım 12, 1 resimden 1.
    Bu adımda kullanılan alet:
    Tweezers
    $4.99
    • Using tweezers, pull with gentle pressure in the direction of the wire to unplug from the motherboard connector.

    FixBot'a Sor

    Yorum Ekle

  13. UTStarcom XV6700 Motherboard Replacement: adım 13, 1 resimden 1.
    • Remove the 4.0-mm #00 Phillips screw holding the motherboard in place. The screw is in the middle of the motherboard, near the outside edge.

    FixBot'a Sor

    Yorum Ekle

  14. UTStarcom XV6700 Motherboard Replacement: adım 14, 2 resimden 1. UTStarcom XV6700 Motherboard Replacement: adım 14, 2 resimden 2.
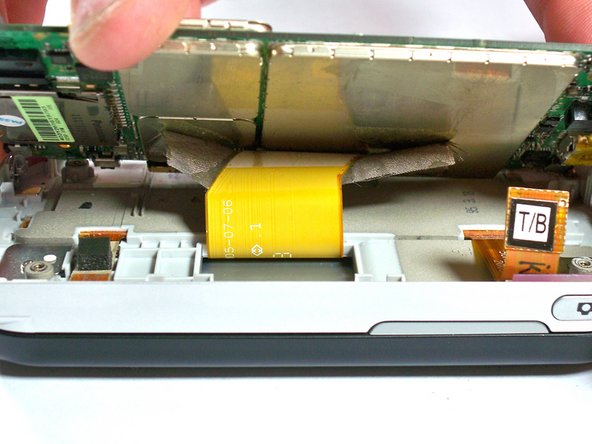
    • With your fingers, disconnect the keyboard cable from the motherboard. The cable is orange with the letters T/B printed on the connector.

    FixBot'a Sor

    Yorum Ekle

  15. UTStarcom XV6700 Motherboard Replacement: adım 15, 2 resimden 1. UTStarcom XV6700 Motherboard Replacement: adım 15, 2 resimden 2.
    • Carefully lift up on the motherboard with the spudger until you can see the display cable connected to the underside of the motherboard. The display cable connector will be taped over.

    FixBot'a Sor

    Yorum Ekle

  16. UTStarcom XV6700 Motherboard Replacement: adım 16, 1 resimden 1.
    • Use the spudger to peel away the tape from the connector.

    FixBot'a Sor

    Yorum Ekle

  17. UTStarcom XV6700 Motherboard Replacement: adım 17, 1 resimden 1.
    • Using the spudger, pry away the display cable connector from the motherboard. The motherboard is now completely disconnected.

    FixBot'a Sor

    Yorum Ekle

Sonuç

To reassemble your device, follow these instructions in reverse order.

İptal et: Bu kılavuzu tamamlamadım.

0Kılavuz Yorumları

Yorum Ekle

İstatistikleri Görüntüle:

Son 24 Saat: 1

Son 7 gün: 6

Son 30 gün: 33

Her zaman: 715