Giriş
There is no visible way to open this device. Knowing this, assembly and disassembly must be done carefully in order to maintain the integrity of the device.
Neye ihtiyacın var
-
-
-
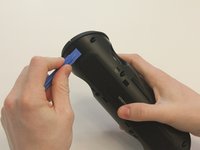
Starting with the Taco on its side, use the plastic opening tool to pop off the outer casing near the base.
 FixBot'a Sor
-
-
-
Repeat the previous step on the opposite side to remove the other outer casing.
-
-
-
Bu adımda kullanılan alet:Phillips #0 Screwdriver$5.49
-
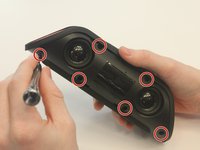
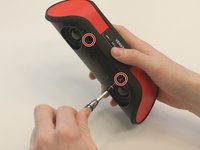
Using a Phillips PH0 3 mm-bit screwdriver, remove the six screws on the inner layer of the Taco.
-
-
-
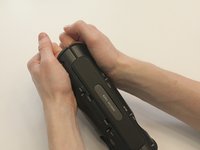
From the same side you just unscrewed, use a plastic opening tool to unwedge the inner cover on both sides of the base.
-
-
-
Slide off the inner cover. It pulls apart and is held on by a small amount of glue.
-
-




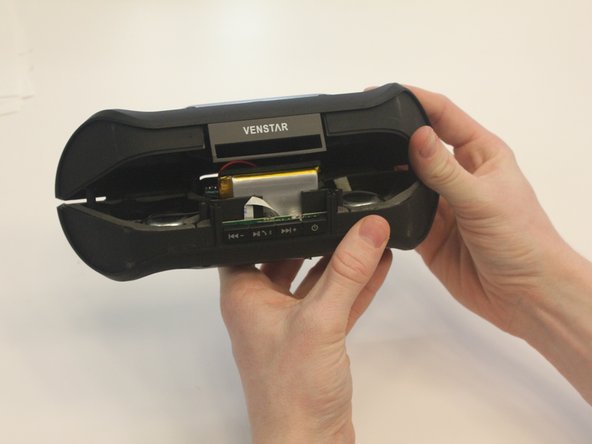

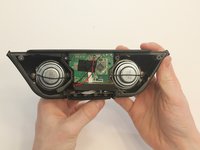
To reassemble your device, follow these instructions in reverse order.

Ekip

University of Kentucky Louisville, Team 1-3, Matravers Spring 2016 University of Kentucky Louisville, Team 1-3, Matravers Spring 2016 üyesi
LOUISVILLE-MATRAVERS-S16S1G3
4 Üyeler
15 adet Kılavuz yazıldı
