Ana içeriğe geç
Onarım Topluluğuna Katılın - Hesap Oluşturun

VTech InnoTab Max Camera Replacement

Neye ihtiyacın var

  1. VTech InnoTab Max Camera Replacement, Cover: adım 1, 3 resimden 1. VTech InnoTab Max Camera Replacement, Cover: adım 1, 3 resimden 2. VTech InnoTab Max Camera Replacement, Cover: adım 1, 3 resimden 3.
    • Remove all screw caps from the back panel using a metal spudger.

    FixBot'a Sor

    Yorum Ekle

  2. VTech InnoTab Max Camera Replacement: adım 2, 3 resimden 1. VTech InnoTab Max Camera Replacement: adım 2, 3 resimden 2. VTech InnoTab Max Camera Replacement: adım 2, 3 resimden 3.
    • Next remove all of the now uncovered screws.

    • If there is a cartridge in the device make sure to remove it.

    FixBot'a Sor

    Yorum Ekle

  3. VTech InnoTab Max Camera Replacement: adım 3, 2 resimden 1. VTech InnoTab Max Camera Replacement: adım 3, 2 resimden 2.
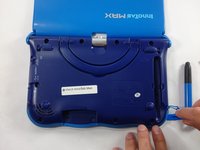
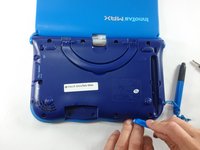
    • Now that all of the screws have been removed, pry the back cover off using a plastic opening tool.

    FixBot'a Sor

    Yorum Ekle

  4. VTech InnoTab Max Camera Replacement: adım 4, 2 resimden 1. VTech InnoTab Max Camera Replacement: adım 4, 2 resimden 2.
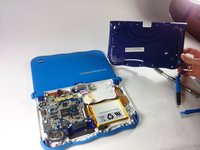
    • Here you can see the back cover has been fully removed and you can now access the front cover.

    • To remove the front cover, remove the springs holding the pictured brackets in place, then pull it away.

    FixBot'a Sor

    Yorum Ekle

  5. VTech InnoTab Max Camera Replacement, Camera: adım 5, 1 resimden 1.
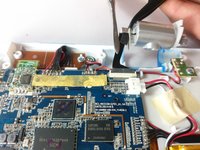
    • The camera is not held down by anything, so simply remove it from it's spot to prepare for unplugging it.

    FixBot'a Sor

    Yorum Ekle

  6. VTech InnoTab Max Camera Replacement: adım 6, 2 resimden 1. VTech InnoTab Max Camera Replacement: adım 6, 2 resimden 2.
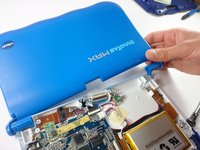
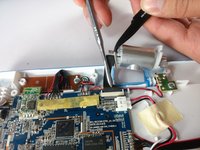
    • Carefully remove the wire connecting the camera to the motherboard, using a tool to grip it if needed.

    • Be careful to only pull from the end of the connector (closest to the motherboard), as the strip is easy to tear.

    FixBot'a Sor

    Yorum Ekle

  7. VTech InnoTab Max Camera Replacement: adım 7, 1 resimden 1.
    • The camera is now removed completely removed from the device.

    FixBot'a Sor

    Yorum Ekle

Sonuç

To reassemble your device, follow these instructions in reverse order.

İptal et: Bu kılavuzu tamamlamadım.

Bir başkası bu kılavuzu tamamladı.

Jacob Schioppo

Üyelik tarihi: 02/15/17

594 İtibar

4 adet Kılavuz yazıldı

Ekip

USF Tampa, Team S5-G5, Lacy Spring 2017 USF Tampa, Team S5-G5, Lacy Spring 2017 üyesi

USFT-LACY-S17S5G5

3 Üyeler

10 adet Kılavuz yazıldı

0Kılavuz Yorumları

Yorum Ekle

İstatistikleri Görüntüle:

Son 24 Saat: 2

Son 7 gün: 6

Son 30 gün: 43

Her zaman: 776