Ana içeriğe geç

Weed Whacker Line Replacement

  1. Weed Whacker Line Replacement, Line: adım 1, 3 resimden 1. Weed Whacker Line Replacement, Line: adım 1, 3 resimden 2. Weed Whacker Line Replacement, Line: adım 1, 3 resimden 3.
    • Remove cutting line guard from weed whacker. This is usually attached by a wing-nut or a bolt and nut, so it can be removed either by hand or with the correct sized wrench.

  2. Weed Whacker Line Replacement: adım 2, 1 resimden 1.
    • Flip weed whacker upside down so that bottom of cutting piece is facing up.

  3. Weed Whacker Line Replacement: adım 3, 1 resimden 1.
    • There will be a bottom cap of the rotor setup that needs to be removed. In some models this will be held on with a nut and bolt fixture, but in many models there will be a circular cap that can be rotated counter clockwise for removal. Remove this piece in the manner necessary.

  4. Weed Whacker Line Replacement: adım 4, 2 resimden 1. Weed Whacker Line Replacement: adım 4, 2 resimden 2.
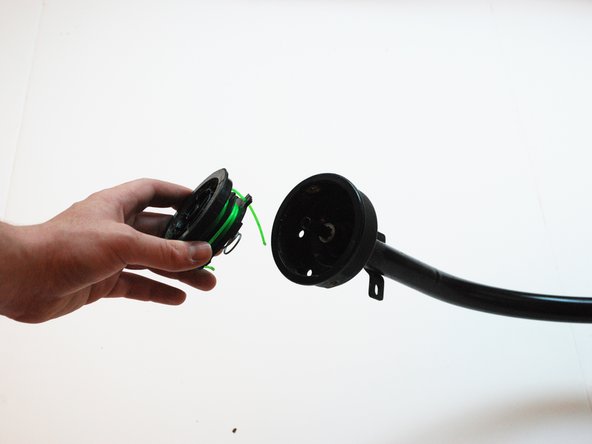
    • Once the bottom piece is removed, there will be another circular piece that may or may not have cutting line coiled around it. Remove this piece from the weed whacker.

  5. Weed Whacker Line Replacement: adım 5, 2 resimden 1. Weed Whacker Line Replacement: adım 5, 2 resimden 2.
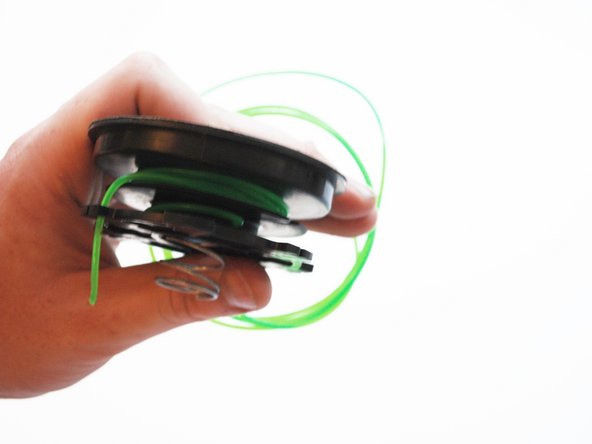
    • There should be slots to coil cutting line around, with a hole in each for line to be anchored. If no line is coiled around the part, insert the end of about three feet of cutting line into each of the holes, and coil the cutting line snugly around the part, making sure that there are no tangles in the line.

  6. Weed Whacker Line Replacement: adım 6, 1 resimden 1.
    • If there are plastic tabs on the plastic part to hold the cutting line, insert each line into one these tabs. Leave approximately a foot of each line hanging out from the coils.

  7. Weed Whacker Line Replacement: adım 7, 2 resimden 1. Weed Whacker Line Replacement: adım 7, 2 resimden 2.
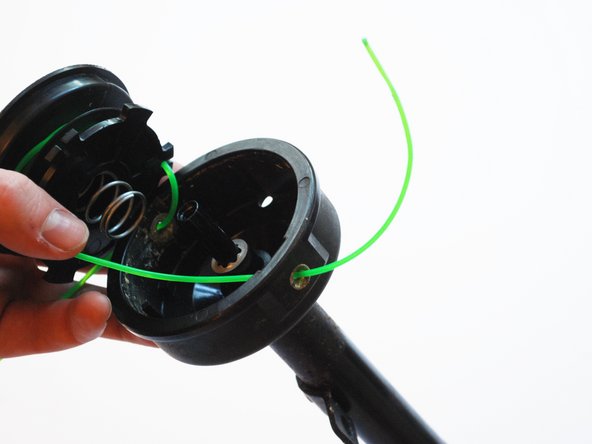
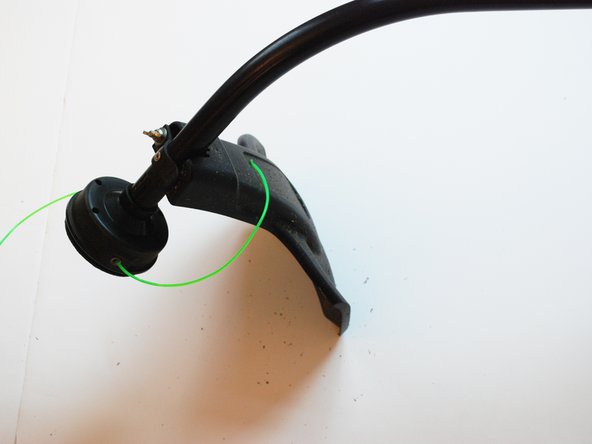
    • On the weed whacker rotor, there will be eyelets for the cutting line to be fed through. Feed each line through each of these eyelets, being careful not to let the line come uncoiled.

  8. Weed Whacker Line Replacement: adım 8, 1 resimden 1.
    • Replace the plastic piece with the cutting lines back onto the rotor, being sure that the coils remain in place, and the lines remain in place through the eyelets.

  9. Weed Whacker Line Replacement: adım 9, 1 resimden 1.
    • Replace the cap that was removed at the beginning of the assembly.

  10. Weed Whacker Line Replacement: adım 10, 2 resimden 1. Weed Whacker Line Replacement: adım 10, 2 resimden 2.
    • Replace the cutting line guard.

Bitiş Çizgisi

2 farklı kişi bu kılavuzu tamamladı.

Hannah Akey

Üyelik tarihi: 10/02/17

191 İtibar

1 Kılavuz yazıldı

Ekip

Bir Yorum

It spins besept not with enough power to cut the grass why is

Mercedes Bush - Yanıt

Yorum Ekle

İstatistikleri Görüntüle:

Son 24 Saat: 0

Son 7 gün: 1

Son 30 gün: 1

Her zaman: 638