Ana içeriğe geç

Wiko pulp 4g Touch screen Replacement

  1. Wiko pulp 4g Touch screen Replacement, Touch screen: adım 1, 2 resimden 1. Wiko pulp 4g Touch screen Replacement, Touch screen: adım 1, 2 resimden 2.
    • rimuovere cover posteriore

    • Rimuovere batteria

  2. Wiko pulp 4g Touch screen Replacement: adım 2, 1 resimden 1.
    • rimuovere le viti segnate, attenzione una è coperta da un adesivo bianco

  3. Wiko pulp 4g Touch screen Replacement: adım 3, 2 resimden 1. Wiko pulp 4g Touch screen Replacement: adım 3, 2 resimden 2.
    • aiutandosi con uno strumento sottile separare il frame centrale dal corpo display

  4. Wiko pulp 4g Touch screen Replacement: adım 4, 2 resimden 1. Wiko pulp 4g Touch screen Replacement: adım 4, 2 resimden 2.
    • sganciare connettore touchscreen

  5. Wiko pulp 4g Touch screen Replacement: adım 5, 3 resimden 1. Wiko pulp 4g Touch screen Replacement: adım 5, 3 resimden 2. Wiko pulp 4g Touch screen Replacement: adım 5, 3 resimden 3.
    • rimuovere 2 viti fissaggio scheda madre

    • Sganciare connettori

    • rimuovere fotocamera anteriore e posteriore

  6. Wiko pulp 4g Touch screen Replacement: adım 6, 3 resimden 1. Wiko pulp 4g Touch screen Replacement: adım 6, 3 resimden 2. Wiko pulp 4g Touch screen Replacement: adım 6, 3 resimden 3.
    • Sganciare cavo collegamento tra scheda superiore ed inferiore

    • rimuovere scheda madre superiore

  7. Wiko pulp 4g Touch screen Replacement: adım 7, 3 resimden 1. Wiko pulp 4g Touch screen Replacement: adım 7, 3 resimden 2. Wiko pulp 4g Touch screen Replacement: adım 7, 3 resimden 3.
    • Riscaldare il telefono con una piastra ad 80 gradi oppure con un phon adeguato

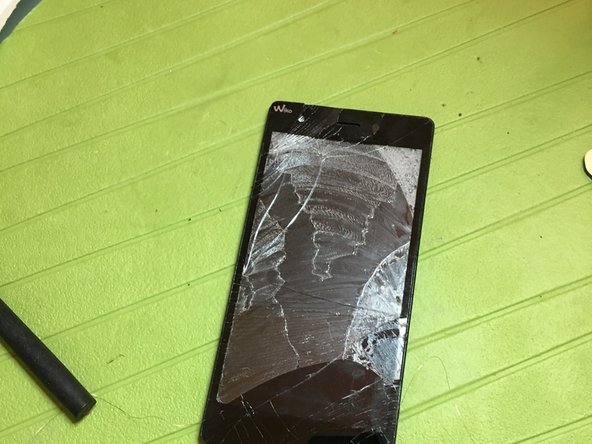
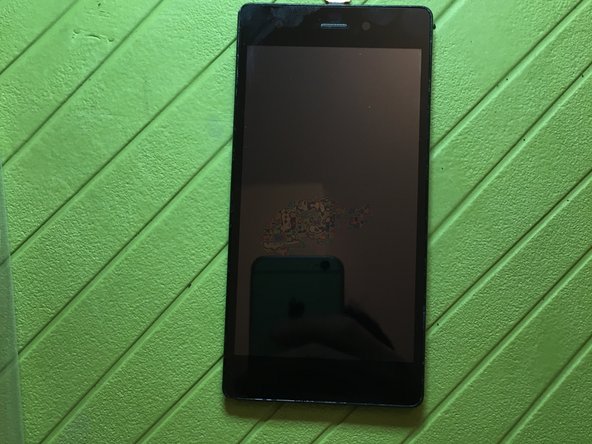
    • Con l'aiuto di strumenti sottili o filo apposito cominciare a separare il vetro touch dal display

    • Massima attenzione a non rompere il display, accertarsi di inserire gli strumenti tra touch screen e display e non tra vetro e touchscreen..

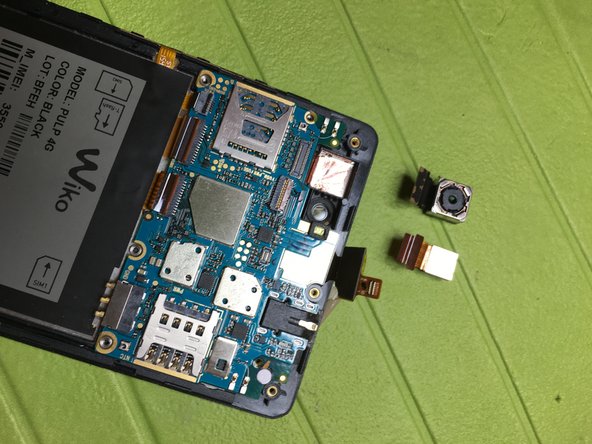
    • Non sono presenti flat di tasti quindi l'unica attenzione è per il display

  8. Wiko pulp 4g Touch screen Replacement: adım 8, 2 resimden 1. Wiko pulp 4g Touch screen Replacement: adım 8, 2 resimden 2.
    • Pulire il display dai residui di colla

    • applicare biadesivo sui bordi ed il nuovo vetro touchscreen

Sonuç

Per rimontare il dispositivo, segui queste istruzioni in ordine inverso.

8 farklı kişi bu kılavuzu tamamladı.

Smilzo

Üyelik tarihi: 11/09/13

11.267 İtibar

39 adet Kılavuz yazıldı

4 Yorum

I replaced a screen on a Acer Wiko Lenny 2 - was very simular to this one. I followed all these steps and it is working BUT the display does not respond as it should. Almost all touches on the outside border of the screen (for example, digit 1 on the left, digit 0 on the right) don't respond quickly, or don't respond at all. What could be wrong? If wonder if I didn't clean the digitizer properly enough...

Jan Oelbrandt - Yanıt

sorry for the delay.

I had some problem with the touch screen too much more intrusive than yours.

I have secured the edges well with scotch because it does not contact me.

But these Chinese touchscreens do not have good quality so I prefer to buy a screen mounted with touchscreen, so I save a lot of time and work is better and working

Smilzo - Yanıt

Ciao, come fai a rimuovere i residui di colla dal display, una volta tolto il vetro?

Roberto Oboe - Yanıt

Scaldando e con una spatolina ed anche con il puliscicontatti spray

Smilzo - Yanıt

Yorum Ekle

İstatistikleri Görüntüle:

Son 24 Saat: 1

Son 7 gün: 5

Son 30 gün: 10

Her zaman: 7,439